Tag: Teeny Tiny Wishes

Stampin’ Up! Sunday Swap Day for the Babies!

Stampin’ Up! Sunday Swap Day for the Babies!

Hey there! It's Sunday again, which means it's the day I share more of my swaps! yay!

Today I have three adorable baby cards for you! Let's get started!

Stampin_up_label_love_1

First up is a card that has no name on it, but it sure is cute! The creator cut her "bib" with the Ovals Collection Framelits from Whisper White cardstock and Blushing Bride Patterns Designer Paper.

Stampin_up_label_love_2

A close up shows the detail of the punched greeting from Label Love using the Artisan Label Punch, 7/8" Scallop Circle Punch, and the banner cut with one of the Butty Banner Framelits.

A side view shows this is a completely bib-shaped card:

Stampin_up_label_love_3

Our next creation is by Kathy Johnson. Kathy used the Circle Framelits to create her "teddy bear"!

Stampin_up_teeny_tiny_wishes_1

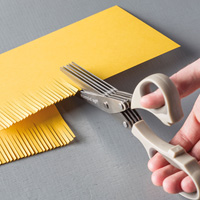
Up close you can see that she used the Fringe Scissors to cut this girly teddy's eyelashes:

Stampin_up_teeny_tiny_wishes_2

Another fully-shaped card using lots of scallop circle and circle punches, small heart punch, Crumb Cake 1/2" Seam Binding, Word Window Punch, Boho Blossoms Punch, Itty Bitty Shapes Punch Pack, Silver Baker's Twine, and a Pearl Basic Jewel.

Stampin_up_teeny_tiny_wishes_3

Finally, Tamie Ackerson created an adorable "onesie" card from a template you can find online. She embossed the Whisper White with the Perfect Polka Dots Textured Impressions Folder, and edged it with Strawberry Slush 3/8" Ruffled Stretch Trim. She chose to stamp the lion from Zoo Babies with Strawberry Slush for her circle-punched medallion.

Stampin_up_zoo_babies_1

Inside she simply stamped a phrase from Cuddles & Kisses!

Stampin_up_zoo_babies_2

Babies DO make your heart happy, don't they?

That's all for now. Until tomorrow, have a Stampingrox! day!

Here's the supply list for today's projects. You can choose the products you wish to order from the list and then go HERE to make your purchase:


All images ©Stampin' Up! ™1990-2014

Stampin’ Up! Stamper’s Dozen Blog Hop:Hoppity Hop Hop!

Stampin’ Up! Stamper’s Dozen Blog Hop:Hoppity Hop Hop!

1800397_10152216696440070_2004070056_n

NOTE: Be sure to scroll all the way to the bottom of this post to download the tutorial for today's projects!!!!1

Hey there! Welcome to the Stamper's Dozen Blog Hop March Edition: Hoppity Hop Hop! If you are already on the hop you just arrived from Stella MacKay's blog, StellarStamps where you saw Stella's gorgeous Easter Bunny Basket Card! Love it!

My creation for you today is a little "suite" of two coordinating 3-D items that I absolutely love:

Stampin_up_stampers_dozen_blog_hop_5 - Copy

My suite consists of a Coastal Cabana Easter Basket and a sponge-daubered Mini Muslin treat bag with a double-gift tag!

Stampin_up_stampers_dozen_blog_hop_1 - Copy

The basket is super-easy to make with just a 4" x 5" piece of Coastal Cabana Cardstock and one more 1/2" x 4" itty-bitty strip for the handle. I inked just the "hello" from the "hello baby" stamp in Teeny Tiny Wishes, then punched it out with one of the Little Labels Punch Pack labels. I tied a bit of Linen Thread in a bow, then glue-dotted it to the basket.

Stampin_up_stampers _dozen_blog_hop_3 - Copy

I used acrylic paint and Sponge Daubers to stamp the polka-dots on the Mini Muslin Bag for a spring-y, easter-y look! I had just a few colors of acrylic paint in my stash, and no pink, so I added a drop of Primrose Petals to white and stirred it with a toothpick before stamping on the bag. The yellow paint was also a little bit too dark, so I added a bit of white paint to it to tone it down.

Stampin_up_stampers_dozen_blog_hop_2 - Copy

I used the bunny from the "Baby, We've Grown" stamp set, stamped on a scrap of Watercolor Paper, watercolored with an Aquapainter and inkpad lid ink, and cut out with the smallest Oval Collection Framelit Die. I mounted it on a Scalloped Tag Topper Punched piece of Afternoon Tea Designer Paper.

Stampin_up_stampers_dozen_blog_hop_4 - Copy

I stamped a Very Vanilla Scalloped Tag Topper Tag with the string of hearts from the Make Note This and That Rotary Stamp and Coastal Cabana ink. The greeting is from Delightful Dozen. I added a strip of Coastal Cabana cut with the Fringe Scissors. The "eggs" hiding in the grass are actually punched with another of the Little Labels Punch Pack punches and then cut in half.

You can download a tutorial to make these two projects by clicking on this link:

Download Hoppity Hop Hop Projects March 2014

Then click on THIS LINK to purchase the supplies you need from my Online Store!

That's all for now! To continue on to the next blog in the hop, click on the link below to see what Judy Garza has created for you. You're gonna love it!

1551612_10152213036645070_18131182_n - Copy


If you want to go back to Stella, click on this link:

1013763_10152213037420070_1159313436_n


Stamping Alert!!!!! The April "Happiest Day" class will be held on Thursday, April 3rd and Friday, April 4th, both from 1-9 p.m. All three projects for this class will be chosen from my favorites from this month's blog hop (hard to decide, I know, as they are all fantabulous!!!!) just in time for Easter!!!!

Fee for this class is always a low $15 for all three projects or free with a $30 order placed at class.

BRING A BUDDY BONUS!!!! Bring a buddy to this class, (adults only please) and you and the buddy will receive your choice of one of my projects from today's post, completed and FREE!!!!

Send me a $30 order, or place one in my Online Store by Friday, April 4th to receive all three class projects completed by mail!

Please RSVP for this class as soon as you can!

 Until tomorrow, have a Stampingrox! day!

All products used are ©Stampin'Up!™1990-2014

Stampin’ Up! Stamper’s Dozen Blog Hop:Hoppity Hop Hop!

Stampin’ Up! Stamper’s Dozen Blog Hop:Hoppity Hop Hop!

1800397_10152216696440070_2004070056_n

NOTE: Be sure to scroll all the way to the bottom of this post to download the tutorial for today's projects!!!!1

Hey there! Welcome to the Stamper's Dozen Blog Hop March Edition: Hoppity Hop Hop! If you are already on the hop you just arrived from Stella MacKay's blog, StellarStamps where you saw Stella's gorgeous Easter Bunny Basket Card! Love it!

My creation for you today is a little "suite" of two coordinating 3-D items that I absolutely love:

Stampin_up_stampers_dozen_blog_hop_5 - Copy

My suite consists of a Coastal Cabana Easter Basket and a sponge-daubered Mini Muslin treat bag with a double-gift tag!

Stampin_up_stampers_dozen_blog_hop_1 - Copy

The basket is super-easy to make with just a 4" x 5" piece of Coastal Cabana Cardstock and one more 1/2" x 4" itty-bitty strip for the handle. I inked just the "hello" from the "hello baby" stamp in Teeny Tiny Wishes, then punched it out with one of the Little Labels Punch Pack labels. I tied a bit of Linen Thread in a bow, then glue-dotted it to the basket.

Stampin_up_stampers _dozen_blog_hop_3 - Copy

I used acrylic paint and Sponge Daubers to stamp the polka-dots on the Mini Muslin Bag for a spring-y, easter-y look! I had just a few colors of acrylic paint in my stash, and no pink, so I added a drop of Primrose Petals to white and stirred it with a toothpick before stamping on the bag. The yellow paint was also a little bit too dark, so I added a bit of white paint to it to tone it down.

Stampin_up_stampers_dozen_blog_hop_2 - Copy

I used the bunny from the "Baby, We've Grown" stamp set, stamped on a scrap of Watercolor Paper, watercolored with an Aquapainter and inkpad lid ink, and cut out with the smallest Oval Collection Framelit Die. I mounted it on a Scalloped Tag Topper Punched piece of Afternoon Tea Designer Paper.

Stampin_up_stampers_dozen_blog_hop_4 - Copy

I stamped a Very Vanilla Scalloped Tag Topper Tag with the string of hearts from the Make Note This and That Rotary Stamp and Coastal Cabana ink. The greeting is from Delightful Dozen. I added a strip of Coastal Cabana cut with the Fringe Scissors. The "eggs" hiding in the grass are actually punched with another of the Little Labels Punch Pack punches and then cut in half.

You can download a tutorial to make these two projects by clicking on this link:

Download Hoppity Hop Hop Projects March 2014

Then click on THIS LINK to purchase the supplies you need from my Online Store!

That's all for now! To continue on to the next blog in the hop, click on the link below to see what Judy Garza has created for you. You're gonna love it!

1551612_10152213036645070_18131182_n - Copy


If you want to go back to Stella, click on this link:

1013763_10152213037420070_1159313436_n


Stamping Alert!!!!! The April "Happiest Day" class will be held on Thursday, April 3rd and Friday, April 4th, both from 1-9 p.m. All three projects for this class will be chosen from my favorites from this month's blog hop (hard to decide, I know, as they are all fantabulous!!!!) just in time for Easter!!!!

Fee for this class is always a low $15 for all three projects or free with a $30 order placed at class.

BRING A BUDDY BONUS!!!! Bring a buddy to this class, (adults only please) and you and the buddy will receive your choice of one of my projects from today's post, completed and FREE!!!!

Send me a $30 order, or place one in my Online Store by Friday, April 4th to receive all three class projects completed by mail!

Please RSVP for this class as soon as you can!

 Until tomorrow, have a Stampingrox! day!

All products used are ©Stampin'Up!™1990-2014

Stampin’Up! Monster Hug & Word Bubble Valentines for My Grandkids!

Stampin’Up! Monster Hug & Word Bubble Valentines for My Grandkids!

Hey there! A couple of days ago I went to Jessica's to make valentines with my grandkids. I started this tradition when Maddie Kate was in kindergarten. She's in 7th grade now, so that's makes 8 years of valentines! I wish I had taken pictures of our first ones, but oh, well, here's this years' installment:

Stampin_up_monster_hugs_1

In past years we've spent a lot of hours making quite elaborate valentines, but since this year I knew I might be more pressed for time with all the commitments I have, I decided to go easy. Ava said, "Wow, Grammie, these are alot easier than last year!" I asked if she still liked them and she said "OH YES!" (guess easy can sometimes be just as good or better?)

For both Ava (in 3rd grade) and Cohen (in kindergarten) I opted for the "Monster Hugs" valentines we still have available on the "Whole Lot of Love" flyer:

Stampin_up_monster_hugs_4

Ava was able to assemble these adorable little "monsters" all by herself, signing the "to: from:" area on the monsters' little bum, removing the protective cover on the adhesive area on the front and adhering the candy, adding the single googlie eye, and then attaching the arms together with the slits just above the monster hands!

Stampin_up_monster_hugs_5

Cohen needed a little bit more help, but he managed signing his name to the backside, adhering the candy, and adding the googlie eye. The googlie eye was his favorite part!

Stampin_up_monster_hugs_2

Stampin_up_monster_hugs_3

I brought Nerds, Bottlecaps, and Laffy Taffy for the monsters to "hug"!

Stampin_up_word_bubble_valentines

Maddie Kate's were pretty simple too. A strip of Fresh Prints Designer Paper punched on both ends with the Scalloped Tag Topper Punch (my FAVORITE new tool in the Occasions Catalog!), then scored in the middle to create the flat area to attach the candy (chocolate, of course!). We tied to ends together with Real Red 1/8" Taffeta Ribbon, then added the valentine greeting from Teeny Tiny Wishes, cut with a Word Bubble Framelit and mounted on a 1 3/4" Pool Party Scallop Circle. We added just a bit of bling with a Silver Glimmer circle!

Just so you know, I had Jessica take these pictures with her fabulous camera! (I'm still learning how to use mine, but I will get better!)

My hubby came along on this trip, so Jessica fixed us a yummy supper before we headed home. Good times!

That's all for today. You can still order the Monster Hugs (for your little munchkins or grandbabies next year!). Just go to my Online Store by clicking HERE.

Download the Whole Lot of Love flyer of products (available through Friday, February 14th while supplies last) here:

Download Flyer_wholelotoflove_demo_12.1-1.27.2014_US

Until tomorrow, have a Stampingrox! day!

All products used are ©Stampin'Up!™1990-2014

Clicking on any of these products will take you directly to my Online Store!

Stampin_up_monster_hugs_girl          Stampin_up_monster_hugs_boy         Stampin_up_fresh_prints_stack

Monster Hugs Girl (18 /pkg)    Monster Hugs Boy (18/pkg)    Fresh Prints Designer Series Paper Stack

# 132163       $5.95                      #132162      $5.95            #132996 $6.95 (48 – 4 1/2" x 6 1/2" sheets)

Stampin_up_scalloped_tag_topper_punch Stampin_up_word_bubbles_framelits_dies


Stampin’Up! Monster Hug & Word Bubble Valentines for My Grandkids!

Stampin’Up! Monster Hug & Word Bubble Valentines for My Grandkids!

Hey there! A couple of days ago I went to Jessica's to make valentines with my grandkids. I started this tradition when Maddie Kate was in kindergarten. She's in 7th grade now, so that's makes 8 years of valentines! I wish I had taken pictures of our first ones, but oh, well, here's this years' installment:

Stampin_up_monster_hugs_1

In past years we've spent a lot of hours making quite elaborate valentines, but since this year I knew I might be more pressed for time with all the commitments I have, I decided to go easy. Ava said, "Wow, Grammie, these are alot easier than last year!" I asked if she still liked them and she said "OH YES!" (guess easy can sometimes be just as good or better?)

For both Ava (in 3rd grade) and Cohen (in kindergarten) I opted for the "Monster Hugs" valentines we still have available on the "Whole Lot of Love" flyer:

Stampin_up_monster_hugs_4

Ava was able to assemble these adorable little "monsters" all by herself, signing the "to: from:" area on the monsters' little bum, removing the protective cover on the adhesive area on the front and adhering the candy, adding the single googlie eye, and then attaching the arms together with the slits just above the monster hands!

Stampin_up_monster_hugs_5

Cohen needed a little bit more help, but he managed signing his name to the backside, adhering the candy, and adding the googlie eye. The googlie eye was his favorite part!

Stampin_up_monster_hugs_2

Stampin_up_monster_hugs_3

I brought Nerds, Bottlecaps, and Laffy Taffy for the monsters to "hug"!

Stampin_up_word_bubble_valentines

Maddie Kate's were pretty simple too. A strip of Fresh Prints Designer Paper punched on both ends with the Scalloped Tag Topper Punch (my FAVORITE new tool in the Occasions Catalog!), then scored in the middle to create the flat area to attach the candy (chocolate, of course!). We tied to ends together with Real Red 1/8" Taffeta Ribbon, then added the valentine greeting from Teeny Tiny Wishes, cut with a Word Bubble Framelit and mounted on a 1 3/4" Pool Party Scallop Circle. We added just a bit of bling with a Silver Glimmer circle!

Just so you know, I had Jessica take these pictures with her fabulous camera! (I'm still learning how to use mine, but I will get better!)

My hubby came along on this trip, so Jessica fixed us a yummy supper before we headed home. Good times!

That's all for today. You can still order the Monster Hugs (for your little munchkins or grandbabies next year!). Just go to my Online Store by clicking HERE.

Download the Whole Lot of Love flyer of products (available through Friday, February 14th while supplies last) here:

Download Flyer_wholelotoflove_demo_12.1-1.27.2014_US

Until tomorrow, have a Stampingrox! day!

All products used are ©Stampin'Up!™1990-2014

Clicking on any of these products will take you directly to my Online Store!

Stampin_up_monster_hugs_girl          Stampin_up_monster_hugs_boy         Stampin_up_fresh_prints_stack

Monster Hugs Girl (18 /pkg)    Monster Hugs Boy (18/pkg)    Fresh Prints Designer Series Paper Stack

# 132163       $5.95                      #132162      $5.95            #132996 $6.95 (48 – 4 1/2" x 6 1/2" sheets)

Stampin_up_scalloped_tag_topper_punch Stampin_up_word_bubbles_framelits_dies


Stampin’ Up! Sunday Swap Day, Valentines, One More Time!

Stampin’ Up! Sunday Swap Day, Valentines, One More Time!

Hey there! Earlier this week I received my monthly packet of swaps. It took me about a day and a half to find the time to open it, but when I did I was not disappointed! Today I'm going to share the valentines that were in the packet. Next Sunday I will share some of the other fantastic swaps that were in there, but for today here goes:

Stampin_up_take_care_language_of_love

First, a really sweet and simple one from Barb Dykhouse. Barb tore a piece of paper, then laid it on the Whisper White layer and sponged ever-so-gently with Smoky Slate ink. She stamped the tree branch from Take Care next, then stamped and punched out the little hearts from the Language of Love set with the Small Heart punch. She then added the "heartstrings" with a Basic Black Stampin' Write Marker. LOVE it!

Stampin_up_love_you_to_the_moon

This was another swap I received at Leadership by Michelle Suit. Michelle used the Love You to the Moon stamp set, pairing it with Fresh Prints Designer Paper and the On Film Framelits. The tiny hearts were punched with the Owl Builder Punch! Cute!

DSC_0289

Karen Kurz created this one with the Perfect Pennants stamp set, Decorative Dots Textured Impressions Folder, and Envelope Punch Board. She punched the seemingly dozens of hearts with the Small Heart punch from Silver Glimmer, Champagne Glimmer, and Red Glimmer Paper. The Soft Sky heart in the background was punched with the Full Heart Punch.

Stampin_up_petite_petals

I swapped with Linda Wright at Leadership for this one! Real Red cardstock, Fresh Prints DSP, Coastal Cabana 3/8" Ruffle Stretch Trim, Petite Petals stamps and punch and Labels Collection Framelits combine to create a quick and perky valentine!

Stampin_up_flowerful_heart

Katy Simecka used the Flowerful Heart wood-only stamp (still available unti February 14th!) with Retro Fresh Designer Paper, Coastal Cabana Ruffle Stretch Trim, and a banner from the Perfect Pennants set for her valentine offering.

Stampin_up_banner_blast

Tamie Ackerson used the free SAB set, Banner Blast with the Perfect Polka Dots Textured Impressions Folder and a Delightful Dozen greeting. She added a Red Glimmer Small Heart for her finishing touch!

Stampin_up_best_of_love

Last but definitely not least, Ruth Bingle used Whisper White Cardstock Vellum over the "love" stamp from Best of Love (still available until March 31st) to give a frosted, elegant look! I also love the crisp textured look of the wavy Fresh Prints paper under the Whisper White Small Heart-punched layer. Ruth added a litle bit of Real Red 1/8" Taffeta Ribbon tied in a bow. Simply perfect!!!!!

That's all for now. It's not too late to order Valentine stamps! To shop and place your order (and choose a free Sale-a-bration item when your merchandise total reaches $50!) click HERE to go to my Online Store.

Until tomorrow, have a Stampingrox! day!


All products used are ©Stampin'Up!™1990-2014

Stampin’ Up! Sunday Swap Day, Valentines, One More Time!

Stampin’ Up! Sunday Swap Day, Valentines, One More Time!

Hey there! Earlier this week I received my monthly packet of swaps. It took me about a day and a half to find the time to open it, but when I did I was not disappointed! Today I'm going to share the valentines that were in the packet. Next Sunday I will share some of the other fantastic swaps that were in there, but for today here goes:

Stampin_up_take_care_language_of_love

First, a really sweet and simple one from Barb Dykhouse. Barb tore a piece of paper, then laid it on the Whisper White layer and sponged ever-so-gently with Smoky Slate ink. She stamped the tree branch from Take Care next, then stamped and punched out the little hearts from the Language of Love set with the Small Heart punch. She then added the "heartstrings" with a Basic Black Stampin' Write Marker. LOVE it!

Stampin_up_love_you_to_the_moon

This was another swap I received at Leadership by Michelle Suit. Michelle used the Love You to the Moon stamp set, pairing it with Fresh Prints Designer Paper and the On Film Framelits. The tiny hearts were punched with the Owl Builder Punch! Cute!

DSC_0289

Karen Kurz created this one with the Perfect Pennants stamp set, Decorative Dots Textured Impressions Folder, and Envelope Punch Board. She punched the seemingly dozens of hearts with the Small Heart punch from Silver Glimmer, Champagne Glimmer, and Red Glimmer Paper. The Soft Sky heart in the background was punched with the Full Heart Punch.

Stampin_up_petite_petals

I swapped with Linda Wright at Leadership for this one! Real Red cardstock, Fresh Prints DSP, Coastal Cabana 3/8" Ruffle Stretch Trim, Petite Petals stamps and punch and Labels Collection Framelits combine to create a quick and perky valentine!

Stampin_up_flowerful_heart

Katy Simecka used the Flowerful Heart wood-only stamp (still available unti February 14th!) with Retro Fresh Designer Paper, Coastal Cabana Ruffle Stretch Trim, and a banner from the Perfect Pennants set for her valentine offering.

Stampin_up_banner_blast

Tamie Ackerson used the free SAB set, Banner Blast with the Perfect Polka Dots Textured Impressions Folder and a Delightful Dozen greeting. She added a Red Glimmer Small Heart for her finishing touch!

Stampin_up_best_of_love

Last but definitely not least, Ruth Bingle used Whisper White Cardstock Vellum over the "love" stamp from Best of Love (still available until March 31st) to give a frosted, elegant look! I also love the crisp textured look of the wavy Fresh Prints paper under the Whisper White Small Heart-punched layer. Ruth added a litle bit of Real Red 1/8" Taffeta Ribbon tied in a bow. Simply perfect!!!!!

That's all for now. It's not too late to order Valentine stamps! To shop and place your order (and choose a free Sale-a-bration item when your merchandise total reaches $50!) click HERE to go to my Online Store.

Until tomorrow, have a Stampingrox! day!


All products used are ©Stampin'Up!™1990-2014

Stampin’ Up! Sunday Swap Day! More Giftcardholder Ideas!

Stampin’ Up! Sunday Swap Day! More Giftcardholder Ideas!

Hey there! Last night my husband surprised me with tickets to see "The Best Christmas Pageant Ever" at the Marion Civic Center! yay! I've been reading the book every Christmas to my family since my kids were little, and even though they are big kids now, they still love it! I do to! It was a sweet production. I always tear up when Gladys says "hey! Unto YOU a child is born!" Gives me goosebumps just writing it! It was nice to get out after being snowbound since Thursday. Roads, sidewalks, and parking lots are still treacherous, and we are supposed to get "snow showers" again today, so church was cancelled for today. Oh well, one more day to stay in my jammies and stamp!

Since I have that new bunch of swaps, I think I will share a few more of them with you today:

Stampin_up_a_dozen_thoughts_1

Rene Watson used the Envelope Liner Framelit Dies to put together her holder (it could also be a card with the greeting page pulling out of the top!). She used Old Olive cardstock, Season of Style Designer Paper, Festive Flurry stamps and Framelit Dies, Cherry Cobbler 1" Stitched Edged Ribbon, and "just because" from the A Dozen Thoughts stamp set.

Stampin_up_festive_flurry_1

This design is the first giftcardholder style I learned to make! Katy Simecka used the Festive Flurry stamps & framelits bundle with Pool Party, Whisper White, the Northern Flurry folder and Silver 1/8" Taffeta Ribbon!

Stampin_up_festive_flurry_2

The unique feature of this one is the Whisper White Medium Envelope that is the working part of the holder. Just fold the envelope in half, cut the flap in half at the fold, stick down the left side of the flap, then leave the right side open to slip the gift card in!

Stampin_up_a_gift_for_you_1

Barb Dykhouse used the Pop n' Cuts Card Base Die, A Gift For You Single Stamp, Crumb Cake cardstock, Season of Style Designer Paper, Oval punches, adn the Label Bracket Punch for her gift card holder.

Stampin_up_a_gift_for_you_2

Simple and easy with the Pop 'n Cuts Card Base Die, just cut out, score a couple of times, and decorate!

Stampin_up_warmth_wonder_1

Ruth Anne Lilley used  Warmth & Wishes Hostess and More Merry Messages stamps, Cherry Cobbler, Whisper White, and Old Olive cardstock, Season of Style Designer Paper, Petals-a-Plenty Textured Impressions Folder, and the 2 3/8" Scallop Circle and 1 3/4" Circle punches for this cute little pop-up gift card holder!

Stampin_up_warmth_wonder_2

Inside she used the Word Window Punch, punching a couple of time side-by-side to create the slot of the gift card!

Stampin_up_teeny_tiny_wishes_1

And last-but-definitely-not-least, Tamie Ackerson used the Pop 'n Cuts Card Base Die again for her adorable Snowman holder! Punches, markers, and sponging were used to create his perky little face, and the Bird Builder Punch does a great job looking like "holly"! Doesn't the Silver Glimmer Paper cut with the smallest Festive Flurry Framelit look a little bit like a sheriff's badge?

Stampin_up_teeny_tiny_wishes_2

The inside features a pull-up greeting, in addtion to the gift card pocket!

Stampin_up_teeny_tiny_wishes_3

Tamie used Teeny Tiny Wishes for the outside greeting, and Wishing You for the pull-up greeting!

Well, that's all for today! Even though we aren't going to church today, I still want to make a Sunday-dinner-worthy meal! Most of my kids are staying snug in their homes today, but Troy is coming over for lunch! yay!

To shop for the stamps, dies, papers, punches, and accessories to make these projects, click HERE to shop in my Online Store!

Until tomorrow, have a Stampingrox! day!

All products used are ©Stampin'Up!™1990-2013

Stampin’ Up! Sunday Swap Day! More Giftcardholder Ideas!

Stampin’ Up! Sunday Swap Day! More Giftcardholder Ideas!

Hey there! Last night my husband surprised me with tickets to see "The Best Christmas Pageant Ever" at the Marion Civic Center! yay! I've been reading the book every Christmas to my family since my kids were little, and even though they are big kids now, they still love it! I do to! It was a sweet production. I always tear up when Gladys says "hey! Unto YOU a child is born!" Gives me goosebumps just writing it! It was nice to get out after being snowbound since Thursday. Roads, sidewalks, and parking lots are still treacherous, and we are supposed to get "snow showers" again today, so church was cancelled for today. Oh well, one more day to stay in my jammies and stamp!

Since I have that new bunch of swaps, I think I will share a few more of them with you today:

Stampin_up_a_dozen_thoughts_1

Rene Watson used the Envelope Liner Framelit Dies to put together her holder (it could also be a card with the greeting page pulling out of the top!). She used Old Olive cardstock, Season of Style Designer Paper, Festive Flurry stamps and Framelit Dies, Cherry Cobbler 1" Stitched Edged Ribbon, and "just because" from the A Dozen Thoughts stamp set.

Stampin_up_festive_flurry_1

This design is the first giftcardholder style I learned to make! Katy Simecka used the Festive Flurry stamps & framelits bundle with Pool Party, Whisper White, the Northern Flurry folder and Silver 1/8" Taffeta Ribbon!

Stampin_up_festive_flurry_2

The unique feature of this one is the Whisper White Medium Envelope that is the working part of the holder. Just fold the envelope in half, cut the flap in half at the fold, stick down the left side of the flap, then leave the right side open to slip the gift card in!

Stampin_up_a_gift_for_you_1

Barb Dykhouse used the Pop n' Cuts Card Base Die, A Gift For You Single Stamp, Crumb Cake cardstock, Season of Style Designer Paper, Oval punches, adn the Label Bracket Punch for her gift card holder.

Stampin_up_a_gift_for_you_2

Simple and easy with the Pop 'n Cuts Card Base Die, just cut out, score a couple of times, and decorate!

Stampin_up_warmth_wonder_1

Ruth Anne Lilley used  Warmth & Wishes Hostess and More Merry Messages stamps, Cherry Cobbler, Whisper White, and Old Olive cardstock, Season of Style Designer Paper, Petals-a-Plenty Textured Impressions Folder, and the 2 3/8" Scallop Circle and 1 3/4" Circle punches for this cute little pop-up gift card holder!

Stampin_up_warmth_wonder_2

Inside she used the Word Window Punch, punching a couple of time side-by-side to create the slot of the gift card!

Stampin_up_teeny_tiny_wishes_1

And last-but-definitely-not-least, Tamie Ackerson used the Pop 'n Cuts Card Base Die again for her adorable Snowman holder! Punches, markers, and sponging were used to create his perky little face, and the Bird Builder Punch does a great job looking like "holly"! Doesn't the Silver Glimmer Paper cut with the smallest Festive Flurry Framelit look a little bit like a sheriff's badge?

Stampin_up_teeny_tiny_wishes_2

The inside features a pull-up greeting, in addtion to the gift card pocket!

Stampin_up_teeny_tiny_wishes_3

Tamie used Teeny Tiny Wishes for the outside greeting, and Wishing You for the pull-up greeting!

Well, that's all for today! Even though we aren't going to church today, I still want to make a Sunday-dinner-worthy meal! Most of my kids are staying snug in their homes today, but Troy is coming over for lunch! yay!

To shop for the stamps, dies, papers, punches, and accessories to make these projects, click HERE to shop in my Online Store!

Until tomorrow, have a Stampingrox! day!

All products used are ©Stampin'Up!™1990-2013

Stampin’Up! Wonderful Blessing!

Stampin’Up! Wonderful Blessing!

Good morning! We interrupt "What to Washi Week" to bring you this brand spankin' new creation:

Wonderful blessing 1

I created this with the new Wonderful Blessing single stamp (#134779 $8.95). I gold heat-embossed the image, along with Flowering Flourishes images on Midnight Muse cardstock.

I decided to use the "Double Door" or "Gatefold" layout. Here's the basic design:

Cut two card bases
8 1/2” x 4 ¼”. Score each at 2 1/8” and 4 ¼” on the 8 ½” side with Simply
Scoring Tool. Use the smaller end of the scoring tool to score your lines. This
lets the folds come together more closely when you put the card together. Fold
both bases into a “z” shape as shown in picture #2. Attach 4 ¼” x 4 ¼” sections
to each other to form card back with SNAIL.

I then cut the circles for the "doors" with the Circles Collection Framelits. It's not easy to describe this step. Maybe I will do a video for this card soon, we'll see! Leave me a comment if you would like to see this card in a video!

Wonderful blessing 2

I'm lovin' how this card turned out!

Wonderful blessing 3

The "merry christmas" is from Teeny Tiny Wishes, embossed on Midnight Muse and punched with the Word Window punch. I punched some of the new Gold Foil sheets with the Modern Label punch to layer behind it.

Wonderful blessing 4

That's all for now! I'm going to read to my grandson, Cohen, in his kindergarten class today for Grandparent's Day, so we shall see what I accomplish after I get home!

Until tomorrow, have a Stampingrox! day!

All products used are ©Stampin'Up!™1990-2013

Theme: Overlay by Kaira
Bonnie, Illinois, USA