Tag: cards

Stampin’ Up! Pansy Punch Bunny!

Stampin’ Up! Pansy Punch Bunny!

Hey there! Just a quick post tonight. I spent the last 12 hours at Jessica's, plowing through all the paperwork, getting all her numbers ready for her tax lady, and I am pooped! We got it all done, so we can breathe a sigh of relief!

I do have a cute little treat holder to show you, using the Scalloped Tag Topper Punch for the holder and the Pansy Punch for the bunny ears:

Stampin_up_scalloped_tag_topper_bunny_watermarked

Isn't this the cutest little itty-bitty bunny? She was really quick and easy to make, too!

Stampin_up_scalloped_tag_topper_bunny_2watermarked

I hope to be able to share the directions for both the treat holder and the bunny soon, but now I must send my self to bed. My cold has been much better today. I think I may NOT have a sinus infection, but I've got to get some rest so that trend continues! Hopefully tomorrow I can share directions and pictures  to make this fun little treat!

ETA 3/26/14: Here's a punch page showing all the punches I used to make the bunny:

Bunny punch page - Copy

And here's a quick tutorial to make the Scalloped Tag Topper treat holder:

Punch both ends of a  8 1/2" x 2" strip of Coastal Cabana cardstock with the Scallop Tag Topper Punch. Score the center of the strip at 4 1/8" after you have punched. Score 3/4" on either side of the center scored line. Fold along the two outer score lines to create the base of the treat holder.

Stampin_up_scalloped_tag_topper_egg_holder_1

Cut about 1 or 1 1/2" from scalloped end with Paper Trimmer, cutting only half-way across to create a slit. Flip paper over and cut other end. You will be cutting a slit on the opposite side of the end.

Topper 1

This is what your slits will look like:

Topper 3

Bring the ends of the treat holder together, sliding the slits over each other to close the top:

Topper 4

When you are done the top of your holder will look like this:

Topper 5

That's all for now! Please visit my Online Store to shop and purchase your supplies to create this fun little cutie!

Until tomorrow, have a Stampingrox! day!

Click on any image below to go to my Online Store:
Stampin’ Up! Pansy Punch Bunny!

Stampin’ Up! Pansy Punch Bunny!

Hey there! Just a quick post tonight. I spent the last 12 hours at Jessica's, plowing through all the paperwork, getting all her numbers ready for her tax lady, and I am pooped! We got it all done, so we can breathe a sigh of relief!

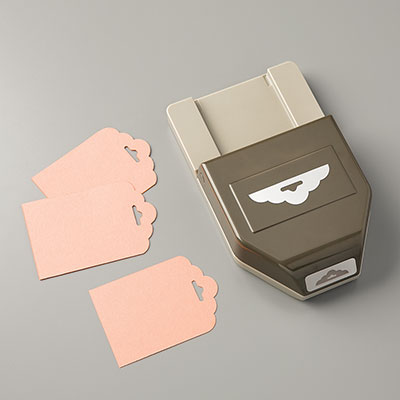
I do have a cute little treat holder to show you, using the Scalloped Tag Topper Punch for the holder and the Pansy Punch for the bunny ears:

Stampin_up_scalloped_tag_topper_bunny_watermarked

Isn't this the cutest little itty-bitty bunny? She was really quick and easy to make, too!

Stampin_up_scalloped_tag_topper_bunny_2watermarked

I hope to be able to share the directions for both the treat holder and the bunny soon, but now I must send my self to bed. My cold has been much better today. I think I may NOT have a sinus infection, but I've got to get some rest so that trend continues! Hopefully tomorrow I can share directions and pictures  to make this fun little treat!

ETA 3/26/14: Here's a punch page showing all the punches I used to make the bunny:

Bunny punch page - Copy

And here's a quick tutorial to make the Scalloped Tag Topper treat holder:

Punch both ends of a  8 1/2" x 2" strip of Coastal Cabana cardstock with the Scallop Tag Topper Punch. Score the center of the strip at 4 1/8" after you have punched. Score 3/4" on either side of the center scored line. Fold along the two outer score lines to create the base of the treat holder.

Stampin_up_scalloped_tag_topper_egg_holder_1

Cut about 1 or 1 1/2" from scalloped end with Paper Trimmer, cutting only half-way across to create a slit. Flip paper over and cut other end. You will be cutting a slit on the opposite side of the end.

Topper 1

This is what your slits will look like:

Topper 3

Bring the ends of the treat holder together, sliding the slits over each other to close the top:

Topper 4

When you are done the top of your holder will look like this:

Topper 5

That's all for now! Please visit my Online Store to shop and purchase your supplies to create this fun little cutie!

Until tomorrow, have a Stampingrox! day!

Click on any image below to go to my Online Store:

Stampin’Up! Scalloped Tag Topper Birthday Basics Balloon Card!

Stampin’Up! Scalloped Tag Topper Birthday Basics Balloon Card!

Good morning! My laptop had been grumbling at me for the past couple of days about updates, which I had been ignoring, but last night it refused to upload my camera photos, so I accepted the inevitable, updated, restarted, and went to bed!

This morning the cold/sinus thing is still with me. I feel better, but am debating visiting a clinic to get some meds. The left side of my face is still full of junk!

I know I am feeling better because I sat down and stamped this last night. It just made me happy!

Stampin_up_birthday_basics_label_love_1 - Copy - Copy

Next to Christmas cards, birthday cards are my favorite to make, and this one was pretty quick and easy! Cards with closures made with the Scalloped Tag Topper Punch are very trendy right now. I made this one is a bit easier with a "faux closure". Here's how I did it:

I started with Gumball Green cardstock 4" x just a hair less than 2":

Stampin_up_scalloped_tag_topper_tab_1 - Copy

I punched both ends with the Scalloped Tag Topper Punch:

Stampin_up_scalloped_tag_topper_tab_2 - Copy

I cut the punched strip apart, making one piece 1 1/2" long and the other 2 1/4" long. I added Stampin' Dimensionals to the back of each piece as shown:

Stampin_up_scalloped_tag_topper_tab_3 - Copy

After adhering the pieces to my card front I tied a 12" piece of Raspberry Ripple 3/8" Stitched Satin Ribbon through the slots of the punched ends.

Stampin_up_scalloped_tag_topper_tab_4 - Copy

Inside I used more of the Birthday Basics Designer Paper and a Very Vanilla strip punched with the Scalloped Tag Topper Punch. I stamped a sentiment from the Photopolymer stamp set, Bombs Away Birthday with Raspberry Ripple ink.

Stampin_up_birthday_basics_bombs_away_birthday - Copy

We are nearing the end of Sale-a-bration (ends March 31st!) AND we are also nearing the end of the current Annual Catalog. I'm awful about hoarding Designer Paper, but this year I'm trying to use more of it up before it retires. You will be seeing LOTS more Designer Paper used on my creations and inside the envelopes from now on!

If you haven't subscribed to my newsletter, please do so today. Each newsletter I send out contains an exclusive tutorial just for my newsletter subscribers. My next newsletter will contain a tutorial to make the balloons I have featured on today's card!

I'm including a supply list below that you can use to shop in my Online Store. Click on any of the product pics and you will be taken directly to my store.

Until tomorrow, have a Stampingrox! day!


Stampin’Up! Scalloped Tag Topper Birthday Basics Balloon Card!

Stampin’Up! Scalloped Tag Topper Birthday Basics Balloon Card!

Good morning! My laptop had been grumbling at me for the past couple of days about updates, which I had been ignoring, but last night it refused to upload my camera photos, so I accepted the inevitable, updated, restarted, and went to bed!

This morning the cold/sinus thing is still with me. I feel better, but am debating visiting a clinic to get some meds. The left side of my face is still full of junk!

I know I am feeling better because I sat down and stamped this last night. It just made me happy!

Stampin_up_birthday_basics_label_love_1 - Copy - Copy

Next to Christmas cards, birthday cards are my favorite to make, and this one was pretty quick and easy! Cards with closures made with the Scalloped Tag Topper Punch are very trendy right now. I made this one is a bit easier with a "faux closure". Here's how I did it:

I started with Gumball Green cardstock 4" x just a hair less than 2":

Stampin_up_scalloped_tag_topper_tab_1 - Copy

I punched both ends with the Scalloped Tag Topper Punch:

Stampin_up_scalloped_tag_topper_tab_2 - Copy

I cut the punched strip apart, making one piece 1 1/2" long and the other 2 1/4" long. I added Stampin' Dimensionals to the back of each piece as shown:

Stampin_up_scalloped_tag_topper_tab_3 - Copy

After adhering the pieces to my card front I tied a 12" piece of Raspberry Ripple 3/8" Stitched Satin Ribbon through the slots of the punched ends.

Stampin_up_scalloped_tag_topper_tab_4 - Copy

Inside I used more of the Birthday Basics Designer Paper and a Very Vanilla strip punched with the Scalloped Tag Topper Punch. I stamped a sentiment from the Photopolymer stamp set, Bombs Away Birthday with Raspberry Ripple ink.

Stampin_up_birthday_basics_bombs_away_birthday - Copy

We are nearing the end of Sale-a-bration (ends March 31st!) AND we are also nearing the end of the current Annual Catalog. I'm awful about hoarding Designer Paper, but this year I'm trying to use more of it up before it retires. You will be seeing LOTS more Designer Paper used on my creations and inside the envelopes from now on!

If you haven't subscribed to my newsletter, please do so today. Each newsletter I send out contains an exclusive tutorial just for my newsletter subscribers. My next newsletter will contain a tutorial to make the balloons I have featured on today's card!

I'm including a supply list below that you can use to shop in my Online Store. Click on any of the product pics and you will be taken directly to my store.

Until tomorrow, have a Stampingrox! day!


Stampin’ Up! Sunday Swap Day!

Stampin’ Up! Sunday Swap Day!

Hey there! I'm doing better, not great, but better. Lots of rest, fluids, and Nyquil are doing their job! After my fever broke during the night last night, I've been feeling quite a bit better. My head's still very stuffy and my nose is still runny (TMI, sorry!), but at least I don't feel like I'm carrying a baby elephant on my back like I did yesterday!

I'm so glad it's Sunday Swap Day, because at least today I have some pretty things to show you!

Raedean Shibata's creation with Hardwood, Peaceful Petals, Lacy & Lovely, Chalk Talk & Ovals Framelits. A layer of Vellum cardstock is held down to the cardfront with Watercolor Wonder Washi Tape. Raedean stamped directly on the vellum with StazOn Black ink, then colored the blossoms, stems, and leaves with Stmapin' Write Markers.

Stampin_up_peaceful_petals_raedean_shibata

Ruthann Liley's creation with Petite Petals Bundle, Hearts Framelits, Teeny Tiny Wishes, Bird Builder Punch, Perfect Polka Dots Textured Impressions Folder, Itty Bitty Banners Framelits, & Rhinestones. She used Primrose Petals 3/8" Stitched Satin Ribbon and ink, and cardstock colors of Whisper White and Pistachio Pudding.

This would make a pretty wedding, valentine, or baby card too!

Stampin_up_petite_petals_ruthanneliley

Kathy Johnson's creation with Secret Garden and "Thinking of You" from Thoughts and Prayers. Her colors are Elegant Eggplant, Whisper White, Pistachio Pudding, and stamped-off Daffodil Delight for the centers. She cut out the main flower with the coordinating Secret Garden Framelit. After stamping all the flowers and leaves on Whisper White she embossed the layer with the Square Lattice Textured Impressions Folder and the Big Shot.

Bluesox Stamping Tip: "Stamping Off" is a stamping term used when you ink your stamp on the stamp pad, then stamp on a piece of scrap paper at least one time before stamping on your project. This gives you a lighter version of the original color. It also gives you TWO shades for the price of one inkpad!

Stampin_up_secret_garden_kathy_johnson

Nancy Hall heat-embossed Vivid Vases with Tangerine Tango Stampin' Emboss Powder on Soft Suede cardstock for her creation. She mounted it on a layer of Coastal Cabana which had been dry-embossed  with the Decorative Dots Textured Impressions Folder. She accented a flower with a Pearl Basic Jewel, and punched a little banner flag with the Banner Punch and Retro Fresh Designer Series Paper. There are 12 different designs in each package of Stampin' Up! Designer Series Paper, which all coordinate with each other, making it the perfect additon to just about any project!

Stampin_up_vivid_vases_nancy_hall

That's all for now. I'm bushed and it's time for bed. I'm going to go easy on myself tonight and just remind you that you can always order your Stampin' Up! supplies in my Online Store.

There's only 1 short week left of Sale-a-bration, so don't hesitate to place your order and choose your freebies, one with each $50 you order (before tax & shipping).

Until tomorrow, have a Stampingrox! day!

©Stampin'Up!™1990-2014

Stampin’ Up! Sunday Swap Day!

Stampin’ Up! Sunday Swap Day!

Hey there! I'm doing better, not great, but better. Lots of rest, fluids, and Nyquil are doing their job! After my fever broke during the night last night, I've been feeling quite a bit better. My head's still very stuffy and my nose is still runny (TMI, sorry!), but at least I don't feel like I'm carrying a baby elephant on my back like I did yesterday!

I'm so glad it's Sunday Swap Day, because at least today I have some pretty things to show you!

Raedean Shibata's creation with Hardwood, Peaceful Petals, Lacy & Lovely, Chalk Talk & Ovals Framelits. A layer of Vellum cardstock is held down to the cardfront with Watercolor Wonder Washi Tape. Raedean stamped directly on the vellum with StazOn Black ink, then colored the blossoms, stems, and leaves with Stmapin' Write Markers.

Stampin_up_peaceful_petals_raedean_shibata

Ruthann Liley's creation with Petite Petals Bundle, Hearts Framelits, Teeny Tiny Wishes, Bird Builder Punch, Perfect Polka Dots Textured Impressions Folder, Itty Bitty Banners Framelits, & Rhinestones. She used Primrose Petals 3/8" Stitched Satin Ribbon and ink, and cardstock colors of Whisper White and Pistachio Pudding.

This would make a pretty wedding, valentine, or baby card too!

Stampin_up_petite_petals_ruthanneliley

Kathy Johnson's creation with Secret Garden and "Thinking of You" from Thoughts and Prayers. Her colors are Elegant Eggplant, Whisper White, Pistachio Pudding, and stamped-off Daffodil Delight for the centers. She cut out the main flower with the coordinating Secret Garden Framelit. After stamping all the flowers and leaves on Whisper White she embossed the layer with the Square Lattice Textured Impressions Folder and the Big Shot.

Bluesox Stamping Tip: "Stamping Off" is a stamping term used when you ink your stamp on the stamp pad, then stamp on a piece of scrap paper at least one time before stamping on your project. This gives you a lighter version of the original color. It also gives you TWO shades for the price of one inkpad!

Stampin_up_secret_garden_kathy_johnson

Nancy Hall heat-embossed Vivid Vases with Tangerine Tango Stampin' Emboss Powder on Soft Suede cardstock for her creation. She mounted it on a layer of Coastal Cabana which had been dry-embossed  with the Decorative Dots Textured Impressions Folder. She accented a flower with a Pearl Basic Jewel, and punched a little banner flag with the Banner Punch and Retro Fresh Designer Series Paper. There are 12 different designs in each package of Stampin' Up! Designer Series Paper, which all coordinate with each other, making it the perfect additon to just about any project!

Stampin_up_vivid_vases_nancy_hall

That's all for now. I'm bushed and it's time for bed. I'm going to go easy on myself tonight and just remind you that you can always order your Stampin' Up! supplies in my Online Store.

There's only 1 short week left of Sale-a-bration, so don't hesitate to place your order and choose your freebies, one with each $50 you order (before tax & shipping).

Until tomorrow, have a Stampingrox! day!

©Stampin'Up!™1990-2014

Stampin’ Up! Hello Lovely Reverse Easel Tutorial!

Stampin’ Up! Hello Lovely Reverse Easel Tutorial!

Hey there! As promised, here is another Reverse Easel card, this time with the "Hello, Lovely" stamp set and Epic Day This and That Designer Series Paper.

Tip: Designer Series Paper (aka DSP) is the lovely 2-sided paper Stampin' Up! sells. There's a different design on each side of each sheet. Lots of choices! yay!

Stampin_up_hello_lovely_1

My card base is Gumball Green, layered with Pool Party, then the Epic Day paper, and tied with a Gumball Green 3/8" Stitched Satin Ribbon.

Stampin_up_hello_lovely_2 - Copy

I brayered a Tea Lace Doily with Pool Party ink, then layered on a Whisper White strip that I embossed with one of the Delicate Designs Textured Impressions Folders and my Big Shot.

I inked my stamp with Gumball Green and Pool Party markers, then punched the image with the Decorative Label Punch. I layered a couple of Pool Party Decorative Labels behind the greeting before adhering to the card over the ribbon with Stampin' Dimensionals.

Tip: Stampin' Dimensionals give the perfect "lift" for both interest and to let the ribbon do it's job without popping the label off.

Lastly, I added a Summer Starfruit In Color Dahlia to make it all pop!

Pssst. . . Gumball Green and Summer Starfruit are 2012-2014 In Colors, which will be retiring at the end of May, so if you want these colors in cardstock, ink, markers, ribbon or Dahlia's, you need to order them now!

Stampin_up_hello_lovely_4 - Copy

Inside I stamped a sentiment from "Take Care", cut it out with a Deco Label Framelit, and then layered a Pool Party Deco Label behind it.

Here's my tutorial for the "Reverse Easel" technique:

Card base dimensions: 12" x 4", scored at 2", 5 1/2", and 9".

Lay 3" long end of the card base up against the ruler of the Envelope Punch Board, putting the left edge at 1 1/2". Punch but do not score.

IMG_5538 - Copy

Flip the card over and repeat with the left edge again at 1 1/2". You will have one "peak" along the edge.

IMG_5539 - Copy

You will cut off the ends of the cardstock from the peak out to the corners of the card base with the Paper Trimmer.

IMG_5540 - Copy

One end of your card base will now have a tab that looks like this:

IMG_5541 - Copy

On the opposite end, line up the Word Window Punch  as shown to punch a slot to insert the tab when the card is standing up. I lined up the "patent numbers" on the back of the punch with the fold of the card base, then "eye-balled" the sides for eveness. ("eye-balled" is my word for guessing as accurately as I can just by looking but not measuring. I was an awful "eye-baller" when I started stamping 11 years ago, but I'm much better now!)

IMG_5543 - Copy

After folding on all the scored lines, here's what my card base looks like:

IMG_5545 - Copy

Insert the tab on one end into the slot on the other end:

IMG_5546 - Copy

You now have a little easel. I adhered the card front to one side with Sticky Strip.

IMG_5547 - Copy

The folds will lay flat to insert into an envelope!

Stampin_up_hello_lovely_fb_1 - Copy

That's all for now! See the supply list to create this card below. All items can be ordered from My Online Store. Until tomorrow, have a Stampingrox! day!


Stampin’ Up! Hello Lovely Reverse Easel Tutorial!

Stampin’ Up! Hello Lovely Reverse Easel Tutorial!

Hey there! As promised, here is another Reverse Easel card, this time with the "Hello, Lovely" stamp set and Epic Day This and That Designer Series Paper.

Tip: Designer Series Paper (aka DSP) is the lovely 2-sided paper Stampin' Up! sells. There's a different design on each side of each sheet. Lots of choices! yay!

Stampin_up_hello_lovely_1

My card base is Gumball Green, layered with Pool Party, then the Epic Day paper, and tied with a Gumball Green 3/8" Stitched Satin Ribbon.

Stampin_up_hello_lovely_2 - Copy

I brayered a Tea Lace Doily with Pool Party ink, then layered on a Whisper White strip that I embossed with one of the Delicate Designs Textured Impressions Folders and my Big Shot.

I inked my stamp with Gumball Green and Pool Party markers, then punched the image with the Decorative Label Punch. I layered a couple of Pool Party Decorative Labels behind the greeting before adhering to the card over the ribbon with Stampin' Dimensionals.

Tip: Stampin' Dimensionals give the perfect "lift" for both interest and to let the ribbon do it's job without popping the label off.

Lastly, I added a Summer Starfruit In Color Dahlia to make it all pop!

Pssst. . . Gumball Green and Summer Starfruit are 2012-2014 In Colors, which will be retiring at the end of May, so if you want these colors in cardstock, ink, markers, ribbon or Dahlia's, you need to order them now!

Stampin_up_hello_lovely_4 - Copy

Inside I stamped a sentiment from "Take Care", cut it out with a Deco Label Framelit, and then layered a Pool Party Deco Label behind it.

Here's my tutorial for the "Reverse Easel" technique:

Card base dimensions: 12" x 4", scored at 2", 5 1/2", and 9".

Lay 3" long end of the card base up against the ruler of the Envelope Punch Board, putting the left edge at 1 1/2". Punch but do not score.

IMG_5538 - Copy

Flip the card over and repeat with the left edge again at 1 1/2". You will have one "peak" along the edge.

IMG_5539 - Copy

You will cut off the ends of the cardstock from the peak out to the corners of the card base with the Paper Trimmer.

IMG_5540 - Copy

One end of your card base will now have a tab that looks like this:

IMG_5541 - Copy

On the opposite end, line up the Word Window Punch  as shown to punch a slot to insert the tab when the card is standing up. I lined up the "patent numbers" on the back of the punch with the fold of the card base, then "eye-balled" the sides for eveness. ("eye-balled" is my word for guessing as accurately as I can just by looking but not measuring. I was an awful "eye-baller" when I started stamping 11 years ago, but I'm much better now!)

IMG_5543 - Copy

After folding on all the scored lines, here's what my card base looks like:

IMG_5545 - Copy

Insert the tab on one end into the slot on the other end:

IMG_5546 - Copy

You now have a little easel. I adhered the card front to one side with Sticky Strip.

IMG_5547 - Copy

The folds will lay flat to insert into an envelope!

Stampin_up_hello_lovely_fb_1 - Copy

That's all for now! See the supply list to create this card below. All items can be ordered from My Online Store. Until tomorrow, have a Stampingrox! day!


Stampin’Up! Simple Stems Reverse Easel!

Stampin’Up! Simple Stems Reverse Easel!

Hey there! I have a fun new card fold for you today! I saw a card on Splitcoast that inspired me to use my Envelope Punch Board to create my own version. I call mine a "Reverse Easel":

Stampin_up_simple_stems_1 - Copy

I used the stamp sets Simple Stems and Petite Pairs with Basic Black, Coastal Cabana, Pool Party, Very Vanilla, and Modern Medley Designer Paper.

Stampin_up_simple_stems_2 - Copy

In this picture you can see one of the things that helps make my "reverse easel" card work, the tab I created with the Envelope Punch Board!

Stampin_up_simple_stems_4 - Copy

 Up close you can see I stamped my favorite bloom from the Simple Stems set first directly on the Very Vanilla oval, then stamped it again on a Very Vanilla scrap and cut it out with my Paper Snips. I sponged the edges with Coastal Cabana ink before mounting it over the first stamped image with Stampin' Dimensionals.

I love the tiny pearls I added to the center of the flower, and the paper-piercing I did with my Paper-Piercing Tool, Occasions Paper-Piercing Pack, and Stampin' Pierce Mat gives it the perfect finishing touch!

I have another reverse-easel card to show you, so be sure to come back tomorrow. I will also have a mini-tutorial of how to create a reverese-easel ready for you. Right now the pictures are still in the camera and it's getting too late to download and edit them tonight!

Here's your shopping list of supplies to make this card. Clicking on any of the products will take you to that product in my online store.

Please leave a comment or shoot me an email if you have any questions!

Until tomorrow, have a Stampingrox! day!

Product List


All products used are ©Stampin'Up!™1990-2014

Stampin’Up! Simple Stems Reverse Easel!

Stampin’Up! Simple Stems Reverse Easel!

Hey there! I have a fun new card fold for you today! I saw a card on Splitcoast that inspired me to use my Envelope Punch Board to create my own version. I call mine a "Reverse Easel":

Stampin_up_simple_stems_1 - Copy

I used the stamp sets Simple Stems and Petite Pairs with Basic Black, Coastal Cabana, Pool Party, Very Vanilla, and Modern Medley Designer Paper.

Stampin_up_simple_stems_2 - Copy

In this picture you can see one of the things that helps make my "reverse easel" card work, the tab I created with the Envelope Punch Board!

Stampin_up_simple_stems_4 - Copy

 Up close you can see I stamped my favorite bloom from the Simple Stems set first directly on the Very Vanilla oval, then stamped it again on a Very Vanilla scrap and cut it out with my Paper Snips. I sponged the edges with Coastal Cabana ink before mounting it over the first stamped image with Stampin' Dimensionals.

I love the tiny pearls I added to the center of the flower, and the paper-piercing I did with my Paper-Piercing Tool, Occasions Paper-Piercing Pack, and Stampin' Pierce Mat gives it the perfect finishing touch!

I have another reverse-easel card to show you, so be sure to come back tomorrow. I will also have a mini-tutorial of how to create a reverese-easel ready for you. Right now the pictures are still in the camera and it's getting too late to download and edit them tonight!

Here's your shopping list of supplies to make this card. Clicking on any of the products will take you to that product in my online store.

Please leave a comment or shoot me an email if you have any questions!

Until tomorrow, have a Stampingrox! day!

Product List


All products used are ©Stampin'Up!™1990-2014

Theme: Overlay by Kaira
Bonnie, Illinois, USA