Tag: easel card

Stampin’ Up! Petal Passion for the Petal Palette Class!

Stampin’ Up! Petal Passion for the Petal Palette Class!

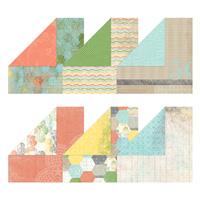
Hey there! For today's easel card I used Petal Passion Designer Series Paper, part of the Petal Passion Suite.  We'll be making this one at my Petal Palette Class on Saturday, February 17th!

Stampin_up_petal_passion_carolpaynestamps4

I colored the Petal Passion DSP bloom with Cherry Cobbler Light & Dark and Dark Daffodil Delight Stampin' Blends.

Stampin_up_petal_passion_carolpaynestamps2

I cut a greeting with a Celebrate You Thinlet (SAB) from Silver Foil. The Basic Black background is embossed with the Simple Stripes folder.

Stampin_up_petal_passion_carolpaynestamps3

I stamped inside with Perennial Birthday. I used the Pretty Label Punch to create the easel stop from Basic Black,  then added "YOU" with a Celebrate You Thinlet.

Stampin_up_petal_passion_carolpaynestamps5

To achieve a Lemon Lime Twist leaf, I colored first with Dark Daffodil Delight Stampin' Blends, then a thin layer of Light Old Olive. I colored the bloom with both Light & Dark Cherry Cobbler Stampin' Blends.

Stampin_up_perennial_birthday_carolpaynestamps

Here's today’s supply list. Place your order in my online store: http://bit.ly/shopwithCarolPayneStamps using February Host Code: 3ZZEF367


Big Shot

$110.00

Check out my Rewards Program and download your point sheet from the box on the right side of this blog! Earn points with online orders to get free stamps!

F

Order at least $50, choose a free product from the Sale-a-bration brochure.
Order at least $100, choose TWO free Sale-a-bration products or one of the Level 2 SAB items!
If your order is over $150, don’t use the code, because YOU’RE THE HOST and get to choose free Stampin’ Rewards! You’ll still accrue your points toward free stamps!
If you prefer to not use my online store you can give me a call or a text: 618-237-6281
Email me: carol@carolpaynestamps.com

Until tomorrow, have a Stampingrox! day!

All images ©Stampin'Up!™1990-2018

Stampin’ Up! Playful Palette Pop of Paradise Easel Card!

Stampin’ Up! Playful Palette Pop of Paradise Easel Card!

Hey there! Do you ever get on a roll making the same style of card but mixing up the colors and stuff just to see how they look? I did while playing with Pop of Paradise. I can't begin to tell you how surprised I am at how much I love that flamingo!

Today I used a print from the Playful Palette Designer Series Paper Stack to start my design:

Stampin_up_playful_palette_pop_of_paradise_carolpaynestamps1 - Copy

Easel cards are so EASY! Starting with a 4 1/4" x 11" card base, score at 5 1/2" and 8 1/4". After folding to create a "mountain fold" on the 8 1/4" scored line, you add the "easel" and off you go!

Stampin_up_playful_palette_pop_of_paradise_carolpaynestamps2 - Copy

Although most flamingos are stamped with Melon Mambo or Flirty Flamingo ink, I stamped this one with Sweet Sugarplum, one of the colors in the Playful Palette designer paper. I stamped the leaf with Emerald Envy. All of the black images are stamped with Archival Basic Black.

Stampin_up_playful_palette_pop_of_paradise_carolpaynestamps3 - Copy

I used Painter's Palette to stamp  brushstrokes on the inside.

Stampin_up_playful_palette_pop_of_paradise_carolpaynestamps4 - Copy

I also a sentiment from Love & Affection, and added one more flamingo just because I love her so much!

Stampin_up_playful_palette_pop_of_paradise_carolpaynestamps5 - Copy

You can order all of today's supplies from my online store and have them delivered right to your door! www.carolpayne.stampinup.net

Product List

Remember while shopping:

All orders of any amount (except Online Class Orders) will receive a Thank You Project Packet in the mail.

 Check the Clearance Rack for savings of up to 60%!

When your order is at least $35 (before tax & shipping) and you use the June Hostess Code:   MPESNHAJ you will receive the June Online Class; six COMPLETED cards, two each of three designs, with envelopes and instructions, FREE!

Stampin_up_pop_of_paradise_June_online_class_carolpaynestamps - Copy

When your order (before tax & shipping) reaches $150, DON’T USE THE HOSTESS CODE, because you can choose free Stampin' Rewards starting at 10% of the total. You will still receive the monthly online class cards.  

That’s all for now, until tomorrow, have a Stampingrox! Day!

All images ©Stampin' Up! ™1990-2016

Stampin’ Up! Playful Palette Pop of Paradise Easel Card!

Stampin’ Up! Playful Palette Pop of Paradise Easel Card!

Hey there! Do you ever get on a roll making the same style of card but mixing up the colors and stuff just to see how they look? I did while playing with Pop of Paradise. I can't begin to tell you how surprised I am at how much I love that flamingo!

Today I used a print from the Playful Palette Designer Series Paper Stack to start my design:

Stampin_up_playful_palette_pop_of_paradise_carolpaynestamps1 - Copy

Easel cards are so EASY! Starting with a 4 1/4" x 11" card base, score at 5 1/2" and 8 1/4". After folding to create a "mountain fold" on the 8 1/4" scored line, you add the "easel" and off you go!

Stampin_up_playful_palette_pop_of_paradise_carolpaynestamps2 - Copy

Although most flamingos are stamped with Melon Mambo or Flirty Flamingo ink, I stamped this one with Sweet Sugarplum, one of the colors in the Playful Palette designer paper. I stamped the leaf with Emerald Envy. All of the black images are stamped with Archival Basic Black.

Stampin_up_playful_palette_pop_of_paradise_carolpaynestamps3 - Copy

I used Painter's Palette to stamp  brushstrokes on the inside.

Stampin_up_playful_palette_pop_of_paradise_carolpaynestamps4 - Copy

I also a sentiment from Love & Affection, and added one more flamingo just because I love her so much!

Stampin_up_playful_palette_pop_of_paradise_carolpaynestamps5 - Copy

You can order all of today's supplies from my online store and have them delivered right to your door! www.carolpayne.stampinup.net

Product List

Remember while shopping:

All orders of any amount (except Online Class Orders) will receive a Thank You Project Packet in the mail.

 Check the Clearance Rack for savings of up to 60%!

When your order is at least $35 (before tax & shipping) and you use the June Hostess Code:   MPESNHAJ you will receive the June Online Class; six COMPLETED cards, two each of three designs, with envelopes and instructions, FREE!

Stampin_up_pop_of_paradise_June_online_class_carolpaynestamps - Copy

When your order (before tax & shipping) reaches $150, DON’T USE THE HOSTESS CODE, because you can choose free Stampin' Rewards starting at 10% of the total. You will still receive the monthly online class cards.  

That’s all for now, until tomorrow, have a Stampingrox! Day!

All images ©Stampin' Up! ™1990-2016

Stampin’ Up! Hello Lovely Reverse Easel Tutorial!

Stampin’ Up! Hello Lovely Reverse Easel Tutorial!

Hey there! As promised, here is another Reverse Easel card, this time with the "Hello, Lovely" stamp set and Epic Day This and That Designer Series Paper.

Tip: Designer Series Paper (aka DSP) is the lovely 2-sided paper Stampin' Up! sells. There's a different design on each side of each sheet. Lots of choices! yay!

Stampin_up_hello_lovely_1

My card base is Gumball Green, layered with Pool Party, then the Epic Day paper, and tied with a Gumball Green 3/8" Stitched Satin Ribbon.

Stampin_up_hello_lovely_2 - Copy

I brayered a Tea Lace Doily with Pool Party ink, then layered on a Whisper White strip that I embossed with one of the Delicate Designs Textured Impressions Folders and my Big Shot.

I inked my stamp with Gumball Green and Pool Party markers, then punched the image with the Decorative Label Punch. I layered a couple of Pool Party Decorative Labels behind the greeting before adhering to the card over the ribbon with Stampin' Dimensionals.

Tip: Stampin' Dimensionals give the perfect "lift" for both interest and to let the ribbon do it's job without popping the label off.

Lastly, I added a Summer Starfruit In Color Dahlia to make it all pop!

Pssst. . . Gumball Green and Summer Starfruit are 2012-2014 In Colors, which will be retiring at the end of May, so if you want these colors in cardstock, ink, markers, ribbon or Dahlia's, you need to order them now!

Stampin_up_hello_lovely_4 - Copy

Inside I stamped a sentiment from "Take Care", cut it out with a Deco Label Framelit, and then layered a Pool Party Deco Label behind it.

Here's my tutorial for the "Reverse Easel" technique:

Card base dimensions: 12" x 4", scored at 2", 5 1/2", and 9".

Lay 3" long end of the card base up against the ruler of the Envelope Punch Board, putting the left edge at 1 1/2". Punch but do not score.

IMG_5538 - Copy

Flip the card over and repeat with the left edge again at 1 1/2". You will have one "peak" along the edge.

IMG_5539 - Copy

You will cut off the ends of the cardstock from the peak out to the corners of the card base with the Paper Trimmer.

IMG_5540 - Copy

One end of your card base will now have a tab that looks like this:

IMG_5541 - Copy

On the opposite end, line up the Word Window Punch  as shown to punch a slot to insert the tab when the card is standing up. I lined up the "patent numbers" on the back of the punch with the fold of the card base, then "eye-balled" the sides for eveness. ("eye-balled" is my word for guessing as accurately as I can just by looking but not measuring. I was an awful "eye-baller" when I started stamping 11 years ago, but I'm much better now!)

IMG_5543 - Copy

After folding on all the scored lines, here's what my card base looks like:

IMG_5545 - Copy

Insert the tab on one end into the slot on the other end:

IMG_5546 - Copy

You now have a little easel. I adhered the card front to one side with Sticky Strip.

IMG_5547 - Copy

The folds will lay flat to insert into an envelope!

Stampin_up_hello_lovely_fb_1 - Copy

That's all for now! See the supply list to create this card below. All items can be ordered from My Online Store. Until tomorrow, have a Stampingrox! day!


Stampin’ Up! Hello Lovely Reverse Easel Tutorial!

Stampin’ Up! Hello Lovely Reverse Easel Tutorial!

Hey there! As promised, here is another Reverse Easel card, this time with the "Hello, Lovely" stamp set and Epic Day This and That Designer Series Paper.

Tip: Designer Series Paper (aka DSP) is the lovely 2-sided paper Stampin' Up! sells. There's a different design on each side of each sheet. Lots of choices! yay!

Stampin_up_hello_lovely_1

My card base is Gumball Green, layered with Pool Party, then the Epic Day paper, and tied with a Gumball Green 3/8" Stitched Satin Ribbon.

Stampin_up_hello_lovely_2 - Copy

I brayered a Tea Lace Doily with Pool Party ink, then layered on a Whisper White strip that I embossed with one of the Delicate Designs Textured Impressions Folders and my Big Shot.

I inked my stamp with Gumball Green and Pool Party markers, then punched the image with the Decorative Label Punch. I layered a couple of Pool Party Decorative Labels behind the greeting before adhering to the card over the ribbon with Stampin' Dimensionals.

Tip: Stampin' Dimensionals give the perfect "lift" for both interest and to let the ribbon do it's job without popping the label off.

Lastly, I added a Summer Starfruit In Color Dahlia to make it all pop!

Pssst. . . Gumball Green and Summer Starfruit are 2012-2014 In Colors, which will be retiring at the end of May, so if you want these colors in cardstock, ink, markers, ribbon or Dahlia's, you need to order them now!

Stampin_up_hello_lovely_4 - Copy

Inside I stamped a sentiment from "Take Care", cut it out with a Deco Label Framelit, and then layered a Pool Party Deco Label behind it.

Here's my tutorial for the "Reverse Easel" technique:

Card base dimensions: 12" x 4", scored at 2", 5 1/2", and 9".

Lay 3" long end of the card base up against the ruler of the Envelope Punch Board, putting the left edge at 1 1/2". Punch but do not score.

IMG_5538 - Copy

Flip the card over and repeat with the left edge again at 1 1/2". You will have one "peak" along the edge.

IMG_5539 - Copy

You will cut off the ends of the cardstock from the peak out to the corners of the card base with the Paper Trimmer.

IMG_5540 - Copy

One end of your card base will now have a tab that looks like this:

IMG_5541 - Copy

On the opposite end, line up the Word Window Punch  as shown to punch a slot to insert the tab when the card is standing up. I lined up the "patent numbers" on the back of the punch with the fold of the card base, then "eye-balled" the sides for eveness. ("eye-balled" is my word for guessing as accurately as I can just by looking but not measuring. I was an awful "eye-baller" when I started stamping 11 years ago, but I'm much better now!)

IMG_5543 - Copy

After folding on all the scored lines, here's what my card base looks like:

IMG_5545 - Copy

Insert the tab on one end into the slot on the other end:

IMG_5546 - Copy

You now have a little easel. I adhered the card front to one side with Sticky Strip.

IMG_5547 - Copy

The folds will lay flat to insert into an envelope!

Stampin_up_hello_lovely_fb_1 - Copy

That's all for now! See the supply list to create this card below. All items can be ordered from My Online Store. Until tomorrow, have a Stampingrox! day!


Stampin’ Up! Sweet Sorbet 2014 Calendar!

Stampin’ Up! Sweet Sorbet 2014 Calendar!

Hey there! I worked quite a bit today on some new projects for my New Year's Day Stamp-a-Stack, and this is one of them:

Stampin_up_sweet_sorbet_calendar_1

I ordered the calendars from vippies.com a few weeks ago with the plan to create a calendar for my stampers to make at the Stampin' in the New Year Birthday Stamp-a-Stack on January 1st, 3rd, and 4th. In case you didn't know, I'm notoriously know for putting things away "safely", then not remembering where "safe" is, but I actually found the package of calendars with not much fuss!

Stampin_up_sweet_sorbet_calendar_2

I created an easel-style calendar using the Sweet Sorbet Designer Series Paper and Petals Parade Stamp Set from the Sale-a-bration brochure, and the Petite Petals stamp set from the new Occasions Catalog. Sale-a-bration means you get to choose a free item from the SAB brochure for every $50 you order! This much-loved annual promotion starts January 28th! It's a GREAT time to host a stampin' party because SAB makes it even easier to get more free hostess benefits (which means MORE free stamps and accessories for YOU, the hostess!)

The colors of the paper are Pistachio Pudding, Crisp Cantaloupe, Basic Black, Pool Party, Sahara Sand, and Whisper White. After stamping the flowers, I punched them out with the 1 3/4" Scallop Circle Punch, 1 1/4" Scallop Punch, and the Petite Pansy Punch. I added 2013/2015 In-Color Boutique Details and a Vintage Faceted Designer Button to the center of the flowers with Glue Dots. The leafy branches are punched with the Bird Builder Punch from Pistachio Pudding cardstock.

I JUST LOVE how the Basic Black mats make everything really POP!

I also added a mini-gel pen behind the Post-It Note pad by adhering a piece of Crisp Cantaloupe 3/8" Ruffle Stretch Trim with Sticky Strip.

This project folds flat to fit inside a custom box I made for it with the Envelope Punch Board! Come back tomorrow to see it!

This project joins the Pinky Sparkly Birthday Cake card I showed you HERE.

PLEASE RSVP for this class ASAP so I know how many packets to prepare!

That's all for now! You can order Stampin' Up! products from my Online Store:www.carolpayne.stampinup.net

Until tomorrow, have a Stampingrox! Day!


All products used are ©Stampin'Up!™1990-2013

Stampin’ Up! Sweet Sorbet 2014 Calendar!

Stampin’ Up! Sweet Sorbet 2014 Calendar!

Hey there! I worked quite a bit today on some new projects for my New Year's Day Stamp-a-Stack, and this is one of them:

Stampin_up_sweet_sorbet_calendar_1

I ordered the calendars from vippies.com a few weeks ago with the plan to create a calendar for my stampers to make at the Stampin' in the New Year Birthday Stamp-a-Stack on January 1st, 3rd, and 4th. In case you didn't know, I'm notoriously know for putting things away "safely", then not remembering where "safe" is, but I actually found the package of calendars with not much fuss!

Stampin_up_sweet_sorbet_calendar_2

I created an easel-style calendar using the Sweet Sorbet Designer Series Paper and Petals Parade Stamp Set from the Sale-a-bration brochure, and the Petite Petals stamp set from the new Occasions Catalog. Sale-a-bration means you get to choose a free item from the SAB brochure for every $50 you order! This much-loved annual promotion starts January 28th! It's a GREAT time to host a stampin' party because SAB makes it even easier to get more free hostess benefits (which means MORE free stamps and accessories for YOU, the hostess!)

The colors of the paper are Pistachio Pudding, Crisp Cantaloupe, Basic Black, Pool Party, Sahara Sand, and Whisper White. After stamping the flowers, I punched them out with the 1 3/4" Scallop Circle Punch, 1 1/4" Scallop Punch, and the Petite Pansy Punch. I added 2013/2015 In-Color Boutique Details and a Vintage Faceted Designer Button to the center of the flowers with Glue Dots. The leafy branches are punched with the Bird Builder Punch from Pistachio Pudding cardstock.

I JUST LOVE how the Basic Black mats make everything really POP!

I also added a mini-gel pen behind the Post-It Note pad by adhering a piece of Crisp Cantaloupe 3/8" Ruffle Stretch Trim with Sticky Strip.

This project folds flat to fit inside a custom box I made for it with the Envelope Punch Board! Come back tomorrow to see it!

This project joins the Pinky Sparkly Birthday Cake card I showed you HERE.

PLEASE RSVP for this class ASAP so I know how many packets to prepare!

That's all for now! You can order Stampin' Up! products from my Online Store:www.carolpayne.stampinup.net

Until tomorrow, have a Stampingrox! Day!


All products used are ©Stampin'Up!™1990-2013

Stampin’ Up! Halloween Hello, Halloween Bash, & Undefined Stamp Carving Kit!

Stampin’ Up! Halloween Hello, Halloween Bash, & Undefined Stamp Carving Kit!

Good morning! Are you ready to get ready for Halloween yet? After yesterday's post, I'm in the mood!

Today I have the rest of the Halloween-themed swaps from my monthly group, and they are pretty neat!

First up, Raedean Shibata used Halloween Hello (#131718 Wood $18.95, #131721 Clear $14.95) with the 1" Square Punch (#124094 $15.95) and the Postage Stamp Punch (#122344 $15.95) for her creation:

Raedean shibata 1 posted

Pumpkin Pie, Basic Black, Pear Pizzazz, & Whisper White were her color palette, then she added some Witches' Brew Designer Paper (#132185 $10.95) and some Witches' Brew Designer Washi Tape (#132156 $4.95).

Raedean used the new Undefined Stamp Carving Kit (#133402 $19.95) to create her own personalized name stamp for the back of her card! Cool!

Raedean shibata 2 posted

Next, Ruth Anne Lilley used Halloween Bash (#130577 Wood $20.95, Clear #130580 $15.95), Witches' Brew Designer Paper, and the Label Card Thinlets Die (#133479 $32.95) for her fun creation:

Ruth anne lilley 1 posted

When the label "flips", it shows the "happy halloween" from Teeny Tiny Wishes (#128748 Wood $36.95, #127802 Clear $26.95)

Ruth anne lilley 2 posted

Lastly for today, Susie Wood created this fun easel card with Halloween Hello, Witches' Brew Desinger Paper, and a faux iris-folding technqiue!

Susie wood 1 posted

Side view of the easel:

Susie wood 2 posted

So fun! That's all for today! I have a BUNCH of stamping and paper-cutting to do today! I have two workshops in a row starting tomorrow!

Until tomorrow, have a Stampingrox! day!


All products used are ©Stampin'Up!™1990-2013

Theme: Overlay by Kaira
Bonnie, Illinois, USA