Tag: birthday basics

Stampin’Up! Scalloped Tag Topper Birthday Basics Balloon Card!

Stampin’Up! Scalloped Tag Topper Birthday Basics Balloon Card!

Good morning! My laptop had been grumbling at me for the past couple of days about updates, which I had been ignoring, but last night it refused to upload my camera photos, so I accepted the inevitable, updated, restarted, and went to bed!

This morning the cold/sinus thing is still with me. I feel better, but am debating visiting a clinic to get some meds. The left side of my face is still full of junk!

I know I am feeling better because I sat down and stamped this last night. It just made me happy!

Stampin_up_birthday_basics_label_love_1 - Copy - Copy

Next to Christmas cards, birthday cards are my favorite to make, and this one was pretty quick and easy! Cards with closures made with the Scalloped Tag Topper Punch are very trendy right now. I made this one is a bit easier with a "faux closure". Here's how I did it:

I started with Gumball Green cardstock 4" x just a hair less than 2":

Stampin_up_scalloped_tag_topper_tab_1 - Copy

I punched both ends with the Scalloped Tag Topper Punch:

Stampin_up_scalloped_tag_topper_tab_2 - Copy

I cut the punched strip apart, making one piece 1 1/2" long and the other 2 1/4" long. I added Stampin' Dimensionals to the back of each piece as shown:

Stampin_up_scalloped_tag_topper_tab_3 - Copy

After adhering the pieces to my card front I tied a 12" piece of Raspberry Ripple 3/8" Stitched Satin Ribbon through the slots of the punched ends.

Stampin_up_scalloped_tag_topper_tab_4 - Copy

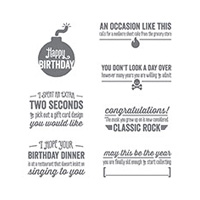
Inside I used more of the Birthday Basics Designer Paper and a Very Vanilla strip punched with the Scalloped Tag Topper Punch. I stamped a sentiment from the Photopolymer stamp set, Bombs Away Birthday with Raspberry Ripple ink.

Stampin_up_birthday_basics_bombs_away_birthday - Copy

We are nearing the end of Sale-a-bration (ends March 31st!) AND we are also nearing the end of the current Annual Catalog. I'm awful about hoarding Designer Paper, but this year I'm trying to use more of it up before it retires. You will be seeing LOTS more Designer Paper used on my creations and inside the envelopes from now on!

If you haven't subscribed to my newsletter, please do so today. Each newsletter I send out contains an exclusive tutorial just for my newsletter subscribers. My next newsletter will contain a tutorial to make the balloons I have featured on today's card!

I'm including a supply list below that you can use to shop in my Online Store. Click on any of the product pics and you will be taken directly to my store.

Until tomorrow, have a Stampingrox! day!


Stampin’ Up! Starburst Sayings Happy Day!

Stampin’ Up! Starburst Sayings Happy Day!

Hey there! Today I have the final project from February's Happiest Day class using Starburst Sayings stamps and Birthday Basics Designer Paper!

Stampin_up_starburst_sayings_1

Happiest Day class attendees made this fun-fold card with the birthday candle attached with the Raspberry Ripple 3/8" Stitched Satin Ribbon and glue dots. The "Oh Happy Day"  and "celebrate" from Starburst Sayings was cut out with Starburst Framelit Dies, then mounted onto a circle cut with a Circles Collection Framelit and a 1 1/4" Circle punch. We also made a custom envelope for the card with the Envelope Punch Board.

Stampin_up_starburst_sayings_2
The card fully opened.

Stampin_up_make_a_wish_1

On the back side of the card we stamped images with the Make a Wish stamp set using Raspberry Ripple and Bermuda Bay Stampin' Write Markers.

Here's the class handout to create this card, including the directions to make the envelope:

Download Starburst Sayings Birthday Basics

That's all for now. To order Stampin' Up! products to make this card, click HERE

to go to my Online Store!

Until tomorrow, have a Stampingrox! day!

All products used are ©Stampin'Up!™1990-2014

Products used today:

Stampin_up_starburst_sayings_bundle  Stampin_up_birthday_basics            Stampin_up_make_a_wish


Starburst Sayings Bundle       Birthday Basics Designer Paper       Make a Wish

(stamp set & framelits)         #130145 $10.95                            #131928   wood $23.95

#134817 wood $44.95                                                               #129222  clear $17.95                                   

#134818 clear $38.95

Stampin’ Up! Starburst Sayings Happy Day!

Stampin’ Up! Starburst Sayings Happy Day!

Hey there! Today I have the final project from February's Happiest Day class using Starburst Sayings stamps and Birthday Basics Designer Paper!

Stampin_up_starburst_sayings_1

Happiest Day class attendees made this fun-fold card with the birthday candle attached with the Raspberry Ripple 3/8" Stitched Satin Ribbon and glue dots. The "Oh Happy Day"  and "celebrate" from Starburst Sayings was cut out with Starburst Framelit Dies, then mounted onto a circle cut with a Circles Collection Framelit and a 1 1/4" Circle punch. We also made a custom envelope for the card with the Envelope Punch Board.

Stampin_up_starburst_sayings_2
The card fully opened.

Stampin_up_make_a_wish_1

On the back side of the card we stamped images with the Make a Wish stamp set using Raspberry Ripple and Bermuda Bay Stampin' Write Markers.

Here's the class handout to create this card, including the directions to make the envelope:

Download Starburst Sayings Birthday Basics

That's all for now. To order Stampin' Up! products to make this card, click HERE

to go to my Online Store!

Until tomorrow, have a Stampingrox! day!

All products used are ©Stampin'Up!™1990-2014

Products used today:

Stampin_up_starburst_sayings_bundle  Stampin_up_birthday_basics            Stampin_up_make_a_wish


Starburst Sayings Bundle       Birthday Basics Designer Paper       Make a Wish

(stamp set & framelits)         #130145 $10.95                            #131928   wood $23.95

#134817 wood $44.95                                                               #129222  clear $17.95                                   

#134818 clear $38.95

Stampin’ Up! Happiest Day and More!

Stampin’ Up! Happiest Day and More!

Hey there! We had a fun time yesterday at my Sale-a-bration Kick-off! Lots of ladies in and out all afternoon and evening, with lots of cards made, grab-bags chosen, parties booked, and order forms filled out! I even signed up a new recruit during the event, and she has her first party already booked! yay!

I have been head-down getting ready for this event for a few days, so realized this morning that I have been remiss is announcing my newest class offerings here at my house. (Just to give you a heads-up, I'm planning to announce an Online Virtual Class for my long-distance friends soon!)

"Happiest Day" Classes!

Stampin_up_happiest_day_class

Fri. February 7th 1-9 p.m.

Fri. March 7th 1-9 p.m.

Fri. April 4th 1-9 p.m

Fri. May 16th 1-9 p.m.

Fri. June 13th 1-9 p.m

Fee: $15  for 3 projects or class is free with a $30 order. Projects will vary from month to month, but the theme will always be "happiest day"!

Club option (local): Contact me direct for info if you would like to be part of the "Happiest Day" Club and receieve Hostess Benefits for participating! Join anytime!

"Vivid Vases" Class!

Stampin_up_vivid_vases

Saturday, February 22nd, 1-5 pm.

Fee: $25 to make 5 projects using the Vivid Vases stamp set and Sweet Sorbet Designer Paper, including the "card in a box"  and traditional card shown above! Take $10 off the class fee when you order $25 or more.

"Glitz & Glam" Class!

Stampin_up_glitz_and_glam

Saturday, March 15th, 1-5 p.m.

Fee: $25 to make 5 projects featuring our GOLD products in the Occasions Catalog! Take $10 off the class fee when you order $25 or more.

"Burlap & Blooms" Wreath Class!

Stampin_up_burlap_and_blooms_1

Fee: $25 to make this fun, springy wreath from the kit offered in the Occasions Catalog! All materials will be supplied, including hot glue guns and instruction.

I will be ordering the "Burlap & Blooms" Simply Created Kits for this class, therefore there is a FIRM DEADLINE RSVP date of Friday, March 14th!

"Girly Girls" Class!

Stampin_up_spiral_flower_die

Saturday, April 26th, 1-5 p.m.

Fee: $25 to make 5 "girly" projects, perfect for birthdays or Mother's Day! We will be making this kraft gift box embellished with Spiral Flower Die roses! Take $10 off the class fee when you order $25 or more.

Also coming:

Friday, May 30th and Saturday, May 31st, New Catalog Kick-off! Details TBA, but you won't want to miss this once-a-year event! All attendees will receive their own spiral-bound NEW 2014-2015 Stampin' Up! Annual Catalog from me! Catalogs are always free, but this is the only event you can get your catalog free AND spiral bound!

Saturday, June 7th, 1-5 p.m. "For the Boys" Class. Projects TBA.

Fee: $25 to make 5 projects "for the boys", perfect for birthdays or Father's Day! Take $10 off the class fee when you order $25 or more.

That's all for now. Until tomorrow, have a Stampingrox! day!

To order Stampin' Up! supplies from your wish list, click HERE.

All products used are ©Stampin'Up!™1990-2014

Stampin’ Up! Happiest Day and More!

Stampin’ Up! Happiest Day and More!

Hey there! We had a fun time yesterday at my Sale-a-bration Kick-off! Lots of ladies in and out all afternoon and evening, with lots of cards made, grab-bags chosen, parties booked, and order forms filled out! I even signed up a new recruit during the event, and she has her first party already booked! yay!

I have been head-down getting ready for this event for a few days, so realized this morning that I have been remiss is announcing my newest class offerings here at my house. (Just to give you a heads-up, I'm planning to announce an Online Virtual Class for my long-distance friends soon!)

"Happiest Day" Classes!

Stampin_up_happiest_day_class

Fri. February 7th 1-9 p.m.

Fri. March 7th 1-9 p.m.

Fri. April 4th 1-9 p.m

Fri. May 16th 1-9 p.m.

Fri. June 13th 1-9 p.m

Fee: $15  for 3 projects or class is free with a $30 order. Projects will vary from month to month, but the theme will always be "happiest day"!

Club option (local): Contact me direct for info if you would like to be part of the "Happiest Day" Club and receieve Hostess Benefits for participating! Join anytime!

"Vivid Vases" Class!

Stampin_up_vivid_vases

Saturday, February 22nd, 1-5 pm.

Fee: $25 to make 5 projects using the Vivid Vases stamp set and Sweet Sorbet Designer Paper, including the "card in a box"  and traditional card shown above! Take $10 off the class fee when you order $25 or more.

"Glitz & Glam" Class!

Stampin_up_glitz_and_glam

Saturday, March 15th, 1-5 p.m.

Fee: $25 to make 5 projects featuring our GOLD products in the Occasions Catalog! Take $10 off the class fee when you order $25 or more.

"Burlap & Blooms" Wreath Class!

Stampin_up_burlap_and_blooms_1

Fee: $25 to make this fun, springy wreath from the kit offered in the Occasions Catalog! All materials will be supplied, including hot glue guns and instruction.

I will be ordering the "Burlap & Blooms" Simply Created Kits for this class, therefore there is a FIRM DEADLINE RSVP date of Friday, March 14th!

"Girly Girls" Class!

Stampin_up_spiral_flower_die

Saturday, April 26th, 1-5 p.m.

Fee: $25 to make 5 "girly" projects, perfect for birthdays or Mother's Day! We will be making this kraft gift box embellished with Spiral Flower Die roses! Take $10 off the class fee when you order $25 or more.

Also coming:

Friday, May 30th and Saturday, May 31st, New Catalog Kick-off! Details TBA, but you won't want to miss this once-a-year event! All attendees will receive their own spiral-bound NEW 2014-2015 Stampin' Up! Annual Catalog from me! Catalogs are always free, but this is the only event you can get your catalog free AND spiral bound!

Saturday, June 7th, 1-5 p.m. "For the Boys" Class. Projects TBA.

Fee: $25 to make 5 projects "for the boys", perfect for birthdays or Father's Day! Take $10 off the class fee when you order $25 or more.

That's all for now. Until tomorrow, have a Stampingrox! day!

To order Stampin' Up! supplies from your wish list, click HERE.

All products used are ©Stampin'Up!™1990-2014

Stampin’ Up! Starburst Sayings!

Stampin’ Up! Starburst Sayings!

Hey there! I have another fun-fold card for you today using the same fold  and dimensions as yesterday, but this time I used the new Starburst Sayings from the Occasions Catalog to create a fun Birthday card:

Stampin_up_starburst_sayings_1

I love adding a real candle to a birthday card! Although it is not mailable, I made another custom envelope for it with my Envelope Punch Board. I cut out the "oh, HAPPY DAY" and the "celebrate", which are stamped with Bermuda Bay and Raspberry Ripple, with the coordinating Starburst Framelits Dies. I used Circles Framelits Dies that are just slightly larger than the starbursts to cut the layer behind each. I tied Raspberry Ripple 3/8" Stitched Satin Ribbon around the candle before adding it to the card with 3 Glue Dots. The card base is Bermuda Bay, the designer paper is Birthday Basics, and the images are stamped on Very Vanilla.

I added tiny mounds of Silver Sparkle Dazzling Details to the dots in the middle of the "HAPPY", and even added a bit of the same to the end of the candle! The Dazzling Details do take a bit of time to dry, so I added it to my card last thing so I could allow it to lay flat to dry.

Stampin_up_starburst_sayings_2

A view of the card front opened to reveal all of the Birthday Basics paper used.

Stampin_up_make_a_wish_1

I used another pattern from the Birthday Basic pack, then stamped images from the Make a Wish stamp set, inked with Bermuda Bay and Raspberry Ripple Stampin' Write Markers. I even inked the flames on the stamp with Summer Starfruit!

That's all for now. To order the supplies to create this card, click HERE to go to my Online Store!

Until tomorrow, have a Stampingrox! day!


All products used are ©Stampin'Up!™1990-2014

Stampin’ Up! Sunday Swap Day! Giftcards Galore!

Stampin’ Up! Sunday Swap Day! Giftcards Galore!

Hey there! Hope you are enjoying the time between Christmas and New Year's. We have our nephew, Nathan, and his sweet wife, Laura Beth, with us from Murfreesboro, TN, for a few days, so we are enjoying their visit!

After showing you all of the Christmas gift card holders, I still have a few non-Christmas ones left. Today's post is all about gift card holders!

This first one was created with the Monstermaniacs stamp set( #134972 $14.95):

Stampin_up_monstermainiacs_1

Monstermaniacs is not shown in any catalog, but you can download the flyer with all of the zany images here:

Download US_In_with_you_Flyer_Monstermaniacs_1013

134972L

The Pop 'n Cuts Bigz L Die was also used to create the gift card holder, along with Bermuda Bay cardstock and Birthday Basics Designer Paper. "Happy Birthday" is from the Remembering Your Birthday stamp set.

Stampin_up_monstermaniacs_2

This masculine gift card holder was made with the Remembering Christmas stamp set from the Holiday Catalog (and only available for a few more days! After January 2nd, it is gone, maybe forever.)

Stampin_up_remembering_christmas_1

The Woodgrain Textured Impressions folder was used on the Early Espresso cardstock, and the "thinking of you" is from the Wetlands stamp set. Susie Wood is the creator of this card. She used the Envelope Punch Board in a different way to create a card instead of an envelope!

Stampin_up_remembering_christmas_2

Speaking of Wetlands, this card is a beautiful example of the use of that set!

Marina Mist, Baked Brown Sugar, and Very Vanilla come together with  Midnight Muse and Baked Brown Sugar ink to create a masculine but very attractive card.

Stampin_up_wetlands_1

The Painter's Tape technique was used for the background behind the goose.

Stampin_up_wetlands_2

Inside the slot for the gift card was punched with the Word Window Punch.

Here's another gift card holder using the Remembering Your Birthday stamps and Birthday Basics Designer Paper again:

Stampin_up_remembering_your_birthday_1

The bow was created with the Gift Bow Bigz Die from the Holiday Catalog. If you were waiting to order this die later, DON'T WAIT! As far as I know, this die will no longer be available after January 2nd! It might come back in the new catalog in June, but there's no guarantee!

Stampin_up_remembering_your_birthday_2

The Word Window Punch was used again for the gift card slot.

Here's a couple more that are not gift card holders, but I just couldn't resist including them for you today:

Stampin_up_chalk_talk_1

Lots of punches used to create the clown, along with Chalk Talk stamps and framelits, Polka Dot Parade Designer Paper, and the Stripes Textured Impressions Folder!

Lastly, this cute card was created using the Zoo Review stamp set, Soft Sky, Whisper White, and Basic Black cardstock, Circle Collection Framelits, and Soft Sky 1/2" Seam Binding.

Stampin_up_zoo_review_1

The penguin stamp in Zoo Review is actually just one single penguin. The creator of this card stamped the center bird first, then covered it with a mask before stamping the same stamp on either side of it. "You Can Never Have Too Much Happy" is from the Yippee-Skippee! stamp set.

There you go! SIX cards for today! How do you like that?

To order any of the products used, including the soon-to-be-retired ones, click HERE

to go to my Online Store!

Until tomorrow, have a Stampingrox! day!


All products used are ©Stampin'Up!™1990-2013

Stampin’ Up! Sunday Swap Day! Giftcards Galore!

Stampin’ Up! Sunday Swap Day! Giftcards Galore!

Hey there! Hope you are enjoying the time between Christmas and New Year's. We have our nephew, Nathan, and his sweet wife, Laura Beth, with us from Murfreesboro, TN, for a few days, so we are enjoying their visit!

After showing you all of the Christmas gift card holders, I still have a few non-Christmas ones left. Today's post is all about gift card holders!

This first one was created with the Monstermaniacs stamp set( #134972 $14.95):

Stampin_up_monstermainiacs_1

Monstermaniacs is not shown in any catalog, but you can download the flyer with all of the zany images here:

Download US_In_with_you_Flyer_Monstermaniacs_1013

134972L

The Pop 'n Cuts Bigz L Die was also used to create the gift card holder, along with Bermuda Bay cardstock and Birthday Basics Designer Paper. "Happy Birthday" is from the Remembering Your Birthday stamp set.

Stampin_up_monstermaniacs_2

This masculine gift card holder was made with the Remembering Christmas stamp set from the Holiday Catalog (and only available for a few more days! After January 2nd, it is gone, maybe forever.)

Stampin_up_remembering_christmas_1

The Woodgrain Textured Impressions folder was used on the Early Espresso cardstock, and the "thinking of you" is from the Wetlands stamp set. Susie Wood is the creator of this card. She used the Envelope Punch Board in a different way to create a card instead of an envelope!

Stampin_up_remembering_christmas_2

Speaking of Wetlands, this card is a beautiful example of the use of that set!

Marina Mist, Baked Brown Sugar, and Very Vanilla come together with  Midnight Muse and Baked Brown Sugar ink to create a masculine but very attractive card.

Stampin_up_wetlands_1

The Painter's Tape technique was used for the background behind the goose.

Stampin_up_wetlands_2

Inside the slot for the gift card was punched with the Word Window Punch.

Here's another gift card holder using the Remembering Your Birthday stamps and Birthday Basics Designer Paper again:

Stampin_up_remembering_your_birthday_1

The bow was created with the Gift Bow Bigz Die from the Holiday Catalog. If you were waiting to order this die later, DON'T WAIT! As far as I know, this die will no longer be available after January 2nd! It might come back in the new catalog in June, but there's no guarantee!

Stampin_up_remembering_your_birthday_2

The Word Window Punch was used again for the gift card slot.

Here's a couple more that are not gift card holders, but I just couldn't resist including them for you today:

Stampin_up_chalk_talk_1

Lots of punches used to create the clown, along with Chalk Talk stamps and framelits, Polka Dot Parade Designer Paper, and the Stripes Textured Impressions Folder!

Lastly, this cute card was created using the Zoo Review stamp set, Soft Sky, Whisper White, and Basic Black cardstock, Circle Collection Framelits, and Soft Sky 1/2" Seam Binding.

Stampin_up_zoo_review_1

The penguin stamp in Zoo Review is actually just one single penguin. The creator of this card stamped the center bird first, then covered it with a mask before stamping the same stamp on either side of it. "You Can Never Have Too Much Happy" is from the Yippee-Skippee! stamp set.

There you go! SIX cards for today! How do you like that?

To order any of the products used, including the soon-to-be-retired ones, click HERE

to go to my Online Store!

Until tomorrow, have a Stampingrox! day!


All products used are ©Stampin'Up!™1990-2013

Stampin’ Up! Sunday Swap Day Chalk Talk!

Stampin’ Up! Sunday Swap Day Chalk Talk!

Good morning! It's Sunday again, which means it's Sunday Swap Day! Today I have some convention swaps using the fun new set, Chalk Talk!

Denise Sullivan combined this set with Crisp Cantaloupe Core'dinations cardstock and Birthday Basics Designer Paper. The Core'dinations paper already has a texture to it which Denise emphasized by sanding it lightly.

Denise Sullivan chalk talk

Brenda Meyers used Crushed Curry for her card base with lightly sanded Coastal Cabana Core'dinations paper which she had cranked through the Big Shot in the Beautifully Baroque Textured Impressions Folder. The Eastern Elegance Designer Paper strip at the bottom matches perfectly with the embossed design and the Chalk Talk stamps used. Brenda used Coastal Cabana 3/8" Ruffled Stretch Ribbon and Basic Jewel Pearls to finish off her design!

Brenda myers chalk talk

Jessica Lewis created this card with a decidedly Halloween feel, even though it says nothing scary! I think it is her color combo of Basic Black, Smoky Slate, and Tangerine Tango that gives me that impression. She embossed Vellum, stamped En Francais on the Basic Black oval with White Craft ink, and stamped the Chalk Talk flourish on Vellum with Black StazOn ink before cutting it out with the matching Chalk Talk Framelit. The "You Make Me Smile" from A Round Array has been heat embossed with Tangerine Tango and punched with the 7/8" Scallop Circle Punch.

Jessica lewis chalk talk

That's all for now. It's dark and rainy-looking here today. I've got to get ready to help in the nursery at church this morning. That is sure to brighten my day!

Until tomorrow, have a Stampingrox! day!

All products used are ©Stampin'Up!™1990-2013

Theme: Overlay by Kaira
Bonnie, Illinois, USA