Tag: cards

Stampin’ Up! Traveler!

Stampin’ Up! Traveler!

Hey there! Just a quick post before I fall into bed! This is Liam’s last night here with us. He goes home with his daddy tomorrow. I will be a little bit sad to see him go. Having him here makes me remember how much I enjoyed having my little ones underfoot. Even though they are a ton of work and you have to keep on your toes every second they are awake, they are TOTALLY WORTH IT!

Today’s cards are all created with the Traveler set. Three cards, all with the same set, all by different stampers, all very different:

Stampin_up_traveler_1

First, Loraine Duran used a stencil to sponge clouds for the background before stamping the steam engine from Traveler. When we made this card at my Birthday Card Buffet,  we used the top of a Scalloped Tag Topper Punched piece to sponge our clouds.

Inside we stamped a phrase from  Chalk Talk:

Stampin_up_traveler_2

Beverlee Morales stamped the train image with Lost Lagoon, then used Postage Due for the background, also stamping on half of a Tea Lace Doily. I love the Lost Lagoon 3/8″ Stitched Satin ribbon she accented with a few tiny pearls. The bottom section she scored every 1/8″ with the Simply Scored Scoring Tool.

Stampin_up_traveler_lost_lagoon_1

Finally, Dawn Klein stamped three of the 6 images from Traveler with Early Espresso ink. She easily added detail with Lullaby Designer Paper, the Arrows Textured Impressions Folder, and the Dictionary Background stamp. The greeting is from Really Good Greetings, which she accented with a hand-cut banner, a Basic Metal Button, and a bit of Linen Thread.

Stampin_up_traveler_life_1

That’s all for now. You can always shop by name for the products used in today’s cards. Just enter the name in the search box in my Online Store.

Until tomorrow, have a Stampingrox! day!


All images ©Stampin’Up!™1990-2014
Stampin’ Up! Traveler!

Stampin’ Up! Traveler!

Hey there! Just a quick post before I fall into bed! This is Liam’s last night here with us. He goes home with his daddy tomorrow. I will be a little bit sad to see him go. Having him here makes me remember how much I enjoyed having my little ones underfoot. Even though they are a ton of work and you have to keep on your toes every second they are awake, they are TOTALLY WORTH IT!

Today’s cards are all created with the Traveler set. Three cards, all with the same set, all by different stampers, all very different:

Stampin_up_traveler_1

First, Loraine Duran used a stencil to sponge clouds for the background before stamping the steam engine from Traveler. When we made this card at my Birthday Card Buffet,  we used the top of a Scalloped Tag Topper Punched piece to sponge our clouds.

Inside we stamped a phrase from  Chalk Talk:

Stampin_up_traveler_2

Beverlee Morales stamped the train image with Lost Lagoon, then used Postage Due for the background, also stamping on half of a Tea Lace Doily. I love the Lost Lagoon 3/8″ Stitched Satin ribbon she accented with a few tiny pearls. The bottom section she scored every 1/8″ with the Simply Scored Scoring Tool.

Stampin_up_traveler_lost_lagoon_1

Finally, Dawn Klein stamped three of the 6 images from Traveler with Early Espresso ink. She easily added detail with Lullaby Designer Paper, the Arrows Textured Impressions Folder, and the Dictionary Background stamp. The greeting is from Really Good Greetings, which she accented with a hand-cut banner, a Basic Metal Button, and a bit of Linen Thread.

Stampin_up_traveler_life_1

That’s all for now. You can always shop by name for the products used in today’s cards. Just enter the name in the search box in my Online Store.

Until tomorrow, have a Stampingrox! day!


All images ©Stampin’Up!™1990-2014

Stampin’ Up! Gorgeous Grunge!

Stampin’ Up! Gorgeous Grunge!

Hey there! I have another Birthday Card Buffet card to share with you today. The front of this one was originally created by one of my monthly swap group swappers, but I have somehow lost the name off the back:

Stampin_up_gorgeous_grunge_2

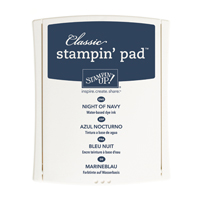
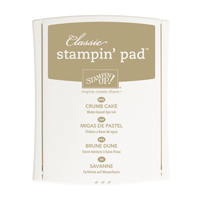
I love these colors of Night of Navy, Crumb Cake, Soft Suede, and Whisper White together! Stamps used are Gorgeous Grunge and From My Heart, and the Banner Punch was used to punch the Night of Navy cardstock and Soft Suede Backgrounds Designer Series Paper. Sponging with Crumb Cake and a little bit of Linen Thread add the finishing touches!

Stampin_up_gorgeous_grunge_1
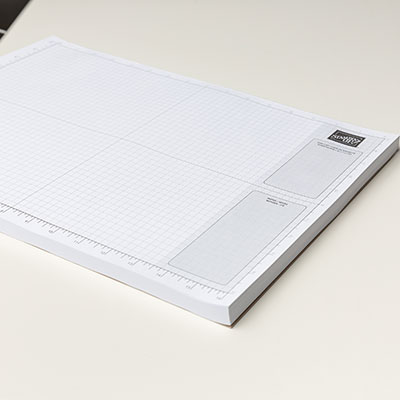
Here's a tip for stamping the lines stamp from Gorgeous Grunge straight on your paper: Line up the edges of the paper along the lines on your Stampin' Up! Grid Paper (if you don't have a this Grid Paper, you NEED to get a pack!), then line up the edges of your stamp block with the lines of the Grid paper before you stamp. With just a teeny little bit of practice your stamping of lines (or words, or whatever) will be just the way you want it!

Stampin_up_gorgeous_grunge_3

Inside we stamped more Gorgeous Grunge and another phrase from From My Heart.

That's it! This card was a favorite at my class. If you are attending any of my workshops or events this month you just might get a chance to make it!

Here's the supply list for shopping in my Online Store:

All images ©Stampin'Up!,™1990-2014

Stampin’ Up! Gorgeous Grunge!

Stampin’ Up! Gorgeous Grunge!

Hey there! I have another Birthday Card Buffet card to share with you today. The front of this one was originally created by one of my monthly swap group swappers, but I have somehow lost the name off the back:

Stampin_up_gorgeous_grunge_2

I love these colors of Night of Navy, Crumb Cake, Soft Suede, and Whisper White together! Stamps used are Gorgeous Grunge and From My Heart, and the Banner Punch was used to punch the Night of Navy cardstock and Soft Suede Backgrounds Designer Series Paper. Sponging with Crumb Cake and a little bit of Linen Thread add the finishing touches!

Stampin_up_gorgeous_grunge_1
Here's a tip for stamping the lines stamp from Gorgeous Grunge straight on your paper: Line up the edges of the paper along the lines on your Stampin' Up! Grid Paper (if you don't have a this Grid Paper, you NEED to get a pack!), then line up the edges of your stamp block with the lines of the Grid paper before you stamp. With just a teeny little bit of practice your stamping of lines (or words, or whatever) will be just the way you want it!

Stampin_up_gorgeous_grunge_3

Inside we stamped more Gorgeous Grunge and another phrase from From My Heart.

That's it! This card was a favorite at my class. If you are attending any of my workshops or events this month you just might get a chance to make it!

Here's the supply list for shopping in my Online Store:

All images ©Stampin'Up!,™1990-2014

Stampin’ Up! Endless Birthday Wishes!

Stampin’ Up! Endless Birthday Wishes!

Hey there! Today I'm sharing  another Birthday Card Buffet sample, Endless Birthday Wishes:

Stampin_up_endless_birthday_wishes_1 - Copy

I LOVE everything about this set- the fonts, the birthday cake, how EASY it is to stamp!

Cool thing about photopolymers: they are super-easy to stamp a bunch at the same time. They are super-sticky and you can see through them as you stamp! I know this isn't new news, but until Stampin' Up! offered high-quality photopolymers about a year ago, I was photopolymer-resistant. Now I am IN LOVE!

To stamp each of the words separately on the white panel would have taken FOREVER, so this is how I did it:
Stampin_up_endless_birthday_wishes_3 - Copy

Attaching them all to Block I, I laid my Whisper White panel on my Stampin' Pierce Mat, then stamped with Memento Tuxedo Black ink (available soon). The Stampin' Pierce Mat "gives" a little bit when you stamp, which helps with ink transfer.

After I stamped the cursive words, I stamped the typeset words separately. I found that stamping the two fonts on the same block did not work well.

I colored the cake with my Coastal Cabana and Daffodil Delight Blendabilites Markers. These alcohol-based markers will be available to order sometime later this summer.

We stamped the inside with just one phrase and the "confetti" stamp in Daffodil Delight Classic ink:

Stampin_up_endless_birthday_wishes_2 - Copy

The problem: the Endless Birthday Wishes stamp set is temporarily unavailable. Ugh! All non-catalog photopolymers are while-supplies-last, so when they are sold out they generally are gone forever.

The good news: Endless Birthday Wishes will be back, at least until the second shipment sells out, so when I let you know it's available again you need to order it quick! I will post the supply list for this card at that time.

While we are waiting for Endless Birthday Wishes to come back, here's a BRAND NEW set just out today, Calling All Heroes (item 138002)

2_calling-all-heroes_crbblog_dave_36

You can order this set TODAY! Go to My Online Store to shop and order!

Here's some cute samples, courtesy of Stampin' Up!:

3_calling-all-heroes_crbblog_dave_16

4_calling-all-heroes_crbblog_dave_32

5_calling-all-heroes_crbblog_dave_22

6_calling-all-heroes_crbblog_dave_10

7_calling-all-heroes_crbblog_dave_24

Until tomorrow, have a Stampingrox! day!

All images ©Stampin'Up!™1990-2014
Stampin’ Up! Endless Birthday Wishes!

Stampin’ Up! Endless Birthday Wishes!

Hey there! Today I'm sharing  another Birthday Card Buffet sample, Endless Birthday Wishes:

Stampin_up_endless_birthday_wishes_1 - Copy

I LOVE everything about this set- the fonts, the birthday cake, how EASY it is to stamp!

Cool thing about photopolymers: they are super-easy to stamp a bunch at the same time. They are super-sticky and you can see through them as you stamp! I know this isn't new news, but until Stampin' Up! offered high-quality photopolymers about a year ago, I was photopolymer-resistant. Now I am IN LOVE!

To stamp each of the words separately on the white panel would have taken FOREVER, so this is how I did it:
Stampin_up_endless_birthday_wishes_3 - Copy

Attaching them all to Block I, I laid my Whisper White panel on my Stampin' Pierce Mat, then stamped with Memento Tuxedo Black ink (available soon). The Stampin' Pierce Mat "gives" a little bit when you stamp, which helps with ink transfer.

After I stamped the cursive words, I stamped the typeset words separately. I found that stamping the two fonts on the same block did not work well.

I colored the cake with my Coastal Cabana and Daffodil Delight Blendabilites Markers. These alcohol-based markers will be available to order sometime later this summer.

We stamped the inside with just one phrase and the "confetti" stamp in Daffodil Delight Classic ink:

Stampin_up_endless_birthday_wishes_2 - Copy

The problem: the Endless Birthday Wishes stamp set is temporarily unavailable. Ugh! All non-catalog photopolymers are while-supplies-last, so when they are sold out they generally are gone forever.

The good news: Endless Birthday Wishes will be back, at least until the second shipment sells out, so when I let you know it's available again you need to order it quick! I will post the supply list for this card at that time.

While we are waiting for Endless Birthday Wishes to come back, here's a BRAND NEW set just out today, Calling All Heroes (item 138002)

2_calling-all-heroes_crbblog_dave_36

You can order this set TODAY! Go to My Online Store to shop and order!

Here's some cute samples, courtesy of Stampin' Up!:

3_calling-all-heroes_crbblog_dave_16

4_calling-all-heroes_crbblog_dave_32

5_calling-all-heroes_crbblog_dave_22

6_calling-all-heroes_crbblog_dave_10

7_calling-all-heroes_crbblog_dave_24

Until tomorrow, have a Stampingrox! day!

All images ©Stampin'Up!™1990-2014

Stampin’ Up! Sea Street!

Stampin’ Up! Sea Street!

Hey there. It's "Liam week" here at my house! His mommy is a counselor at church camp this week, so starting today he is my little buddy until sometime on Thursday afternoon. We've had time playing with the kittens, watching the trains go by, and had a bath because "we" ran off into the foliage and may have gotten into some poison ivy. And that's  all before lunch! He's taking a nap right now, so I have a minute to blog!

I posted these to Facebook and Instagram already, but I wanted to share these with you too. We have a "kitten cage" we put our motherless kittens in at night to protect them from coyotes and possums. Liam decided it would be fun to check it out:

10464016_10202105395217011_4645851010392631786_n

He decided to close himself in!

10398086_10202105385816776_1799729835604877098_n

It's so much fun to be a little kid, isn't it?

We made this Sea Street card at my Birthday Card Buffet this past Saturday. I combined the two Sea Street cards from yesterdays' post HERE to create this card.

Stampin_up_sea_street_1

We used Sea Street, Remembering Your Birthday, and Something to Say with the Circle Card Thinlet Die.

Stampin_up_sea_street_2
Night of Navy, Real Red, Whisper White cardstock, Maritime Designer Paper, with Night of Navy, Real Red, and Pool Party ink.

We extended the card to make an extra flap by inserting the cardstock both under and over the edges of the Circle Card Thinlet Die like this:

Stampin_up_sea_street_3

After cutting we used the Simply Scored Scoring Board to score the extra fold for the flap:

Stampin_up_sea_street_4

It's a fun card! We will be making this card again at some of my workshops and parties this month!

Here's the supply list. Click on any image and you will be taken to My Online Store where you can shop and order:

All images ©Stampin'Up!™1990-2014

Stampin’ Up! Sea Street!

Stampin’ Up! Sea Street!

Hey there. It's "Liam week" here at my house! His mommy is a counselor at church camp this week, so starting today he is my little buddy until sometime on Thursday afternoon. We've had time playing with the kittens, watching the trains go by, and had a bath because "we" ran off into the foliage and may have gotten into some poison ivy. And that's  all before lunch! He's taking a nap right now, so I have a minute to blog!

I posted these to Facebook and Instagram already, but I wanted to share these with you too. We have a "kitten cage" we put our motherless kittens in at night to protect them from coyotes and possums. Liam decided it would be fun to check it out:

10464016_10202105395217011_4645851010392631786_n

He decided to close himself in!

10398086_10202105385816776_1799729835604877098_n

It's so much fun to be a little kid, isn't it?

We made this Sea Street card at my Birthday Card Buffet this past Saturday. I combined the two Sea Street cards from yesterdays' post HERE to create this card.

Stampin_up_sea_street_1

We used Sea Street, Remembering Your Birthday, and Something to Say with the Circle Card Thinlet Die.

Stampin_up_sea_street_2
Night of Navy, Real Red, Whisper White cardstock, Maritime Designer Paper, with Night of Navy, Real Red, and Pool Party ink.

We extended the card to make an extra flap by inserting the cardstock both under and over the edges of the Circle Card Thinlet Die like this:

Stampin_up_sea_street_3

After cutting we used the Simply Scored Scoring Board to score the extra fold for the flap:

Stampin_up_sea_street_4

It's a fun card! We will be making this card again at some of my workshops and parties this month!

Here's the supply list. Click on any image and you will be taken to My Online Store where you can shop and order:

All images ©Stampin'Up!™1990-2014

Stampin’ Up! Cruise Swaps Part 5!

Stampin’ Up! Cruise Swaps Part 5!

Hey there. I'm back again with more cruise swaps!

This swap has some retired product, but I wanted to show it to you anyway because I love the layout:

Stampin_up_million_one

Flower Shop and Petite Petals blossoms were stamped on Vellum with black ink, then punched with the Pansy Punch and Petite Petals Punch. They were colored on the back side of the vellum with a Coastal Cabana Stampin' Write marker. Their attachment to the card with Glue Dots is hidden by the Pearls added to the centers. The greeting is from Million & One.

Next, Blushing Bride cardstock was stamped with the Hardwood Background, then punched with the Triangle punch to create the fencing.

Stampin_up_pleasant_poppies_1

Pleasant Poppies, a greeting from Six-Sided Sampler, and Gold Sequins combine for a harmonious look!

Lastly, the leafy stem from Summer Silhouettes was stamped with Pistachio Pudding before adding the fussy-cut owl and banner from So Very Happy.

Stampin_up_so_very_happy_1

The branches were punched with the bird builder punch, "happy birthday!" was highlighted with a White Gel Pen, and a sliver of glitz was added with Silver Foil  paper.

That's all for now. Until tomorrow, have a Stampingrox! day!

All images ©Stampin' Up!™1990-2014

Stampin’ Up! Cruise Swaps Part 5!

Stampin’ Up! Cruise Swaps Part 5!

Hey there. I'm back again with more cruise swaps!

This swap has some retired product, but I wanted to show it to you anyway because I love the layout:

Stampin_up_million_one

Flower Shop and Petite Petals blossoms were stamped on Vellum with black ink, then punched with the Pansy Punch and Petite Petals Punch. They were colored on the back side of the vellum with a Coastal Cabana Stampin' Write marker. Their attachment to the card with Glue Dots is hidden by the Pearls added to the centers. The greeting is from Million & One.

Next, Blushing Bride cardstock was stamped with the Hardwood Background, then punched with the Triangle punch to create the fencing.

Stampin_up_pleasant_poppies_1

Pleasant Poppies, a greeting from Six-Sided Sampler, and Gold Sequins combine for a harmonious look!

Lastly, the leafy stem from Summer Silhouettes was stamped with Pistachio Pudding before adding the fussy-cut owl and banner from So Very Happy.

Stampin_up_so_very_happy_1

The branches were punched with the bird builder punch, "happy birthday!" was highlighted with a White Gel Pen, and a sliver of glitz was added with Silver Foil  paper.

That's all for now. Until tomorrow, have a Stampingrox! day!

All images ©Stampin' Up!™1990-2014

Theme: Overlay by Kaira
Bonnie, Illinois, USA