Tag: cards

Stampin’ Up! Perfect Peacock by Linda!

Stampin’ Up! Perfect Peacock by Linda!

Hey there! Just a quick post this afternoon before I'm off to a stamp class in West Frankfort this evening!

I held my quarterly Yes Mam's downline meeting on Saturday. We had a shoebox swap, a yummy potluck lunch, and a class taught by Crystal Lopez on using the soon-coming Blendabiities alcohol markers from Stampin' Up! It was a blast!

I encourage my downline to bring projects they have been working on and sharing in their classes, and of course everyone is encouraged to bring their cameras to take pics of my displays and the projects their sister Mam's share.

Linda Reaney brought two cards she had created using the new Perfect Peacock stamp from the Annual Catalog. First, she stamped, colored with markers, then added a used dryer sheet with our Stampin' Glue Stick. Lastly she sprinkled with Dazzling Diamonds glitter:

Stampin_up_perfect_peacock_2


It's quite pretty, but it pales in comparison to her next creation:

Stampin_up_perfect_peacock_1

For this one Linda stamped, colored with markers, and then used the "Faux Diamond Dust" technique to give it the all-over sparkle! Gorgeous!

Here's a quick step-by-step for "Faux Diamond Dust":

1. Stamp image and color as needed.

2. Pat entire cardstock piece with an Embossing Buddy to completely dry the ink so it won't smear when you do Step #3.

3. Pat a Versamark inkpad all over image piece. Make sure you have the clear, sticky ink evenly all over the image and the surrounding cardstock.

4. Sprinkle all with Iridescent Ice Stampi' Emboss Powder. Tap excess back into container.

5. Heat with Heat Tool. Do not over-heat, as this will cause the Iridescent Ice to lose its' sparkle.

Linda did an excellent job coloring the peacock, and her choice of combining this image with the "Faux Diamond Dust" technique was pure genius!

That's all for now! You can purchase your Perfect Peacock stamp and all the supplies to do the Faux Diamond Dust technique from my Online Store:

All images ©Stampin'Up!™1990-2014

Stampin’ Up! Perfect Peacock by Linda!

Stampin’ Up! Perfect Peacock by Linda!

Hey there! Just a quick post this afternoon before I'm off to a stamp class in West Frankfort this evening!

I held my quarterly Yes Mam's downline meeting on Saturday. We had a shoebox swap, a yummy potluck lunch, and a class taught by Crystal Lopez on using the soon-coming Blendabiities alcohol markers from Stampin' Up! It was a blast!

I encourage my downline to bring projects they have been working on and sharing in their classes, and of course everyone is encouraged to bring their cameras to take pics of my displays and the projects their sister Mam's share.

Linda Reaney brought two cards she had created using the new Perfect Peacock stamp from the Annual Catalog. First, she stamped, colored with markers, then added a used dryer sheet with our Stampin' Glue Stick. Lastly she sprinkled with Dazzling Diamonds glitter:

Stampin_up_perfect_peacock_2


It's quite pretty, but it pales in comparison to her next creation:

Stampin_up_perfect_peacock_1

For this one Linda stamped, colored with markers, and then used the "Faux Diamond Dust" technique to give it the all-over sparkle! Gorgeous!

Here's a quick step-by-step for "Faux Diamond Dust":

1. Stamp image and color as needed.

2. Pat entire cardstock piece with an Embossing Buddy to completely dry the ink so it won't smear when you do Step #3.

3. Pat a Versamark inkpad all over image piece. Make sure you have the clear, sticky ink evenly all over the image and the surrounding cardstock.

4. Sprinkle all with Iridescent Ice Stampi' Emboss Powder. Tap excess back into container.

5. Heat with Heat Tool. Do not over-heat, as this will cause the Iridescent Ice to lose its' sparkle.

Linda did an excellent job coloring the peacock, and her choice of combining this image with the "Faux Diamond Dust" technique was pure genius!

That's all for now! You can purchase your Perfect Peacock stamp and all the supplies to do the Faux Diamond Dust technique from my Online Store:

All images ©Stampin'Up!™1990-2014

Stampin’ Up! It’s Sunday Swap Day with Something for Baby!

Stampin’ Up! It’s Sunday Swap Day with Something for Baby!

Hey there! It's Sunday, which means it's time to share some swaps! I know I've been absent from my blog quite a bit this week. Part of the reason is I broke my camera lens a few weeks ago and now when I take pics with my little point-and-shoot I'm just not happy with them at all. A new lens has finally been ordered, so hopefully it will come in soon and I can get my blogging mojo back.

Today I have three baby cards to share, all using the new set, Something for Baby!

First, Raedean Shibata created this simple congratulations card, including paper-piercing using a template from the Festive Paper Piercing pack and a greeting from Something to Say. She paired Crisp Cantaloupe cardstock with a selection from the Lullaby Designer Paper pack.

Stampin_up_something_for_baby_1

She used Crisp Cantaloupe and Hello Honey Stampin' Write Markers to ink the bib stamp. Sooooo cute!

Next, a much larger image from Something for Baby was used for this card, which unfortunately I have lost the creator's info. Some swappers attach their info on the back of the card on a post-it note, which helps me keep the name with the card, but some do not. If it's just loose with the card, it's much more likely to get lost as I take the swaps with me to workshops and classes.

Stampin_up_something_for_baby_2

This card features just Whisper White and Daffodil Delight. Just two colors, but it makes a very visually pleasing look! The rhinestones were colored with one of the Daffodil Delight Blendability markers, which should finally be available in a few weeks.

Lastly, I CASED this card from Deb Valder. Deb makes the most amazing cards. I stepped up just a few things, but I'd definitely going to be making more cards with this template, and I know you are going to want to know how!

Stampin_up_something_for_baby_block_2

This card stands up on it's own and is called a "block card". Doesn't it look just like a stack of baby blocks? Images from Something for Baby were cut with the coordinating Baby's First Framelits.

Stampin_up_something_for_baby_block_1

(Please pardon the sawdust. Apparently we have wood bees trying to make a home in our deck roof!) I cut the numbers with the "1, 2, and 3" from the File Tabs Edgelits Dies.

Stampin_up_something_for_baby_block_3

Pretty, pretty, pretty!

On the top blocks I stamped more phrases from Something to Say:

Stampin_up_something_for_baby_block_4

The tiny little hearts were punched with the Owl Builder Punch.

Stampin_up_something_for_baby_block_5


Stampin_up_something_for_baby_block_6

That's all for now. Here's the supply list for today's cards. Just click on any image and you will be taken to shop in my Online Store:


DID YOU NOTICE????? When you purchase the Something for Baby stamp set and the Baby Firsts Framelits in a BUNDLE you save 15%!
 
Until tomorrow, have a Stampingrox! day!

All images ©Stampin'Up!™1990-2014

Stampin’ Up! It’s Sunday Swap Day with Something for Baby!

Stampin’ Up! It’s Sunday Swap Day with Something for Baby!

Hey there! It's Sunday, which means it's time to share some swaps! I know I've been absent from my blog quite a bit this week. Part of the reason is I broke my camera lens a few weeks ago and now when I take pics with my little point-and-shoot I'm just not happy with them at all. A new lens has finally been ordered, so hopefully it will come in soon and I can get my blogging mojo back.

Today I have three baby cards to share, all using the new set, Something for Baby!

First, Raedean Shibata created this simple congratulations card, including paper-piercing using a template from the Festive Paper Piercing pack and a greeting from Something to Say. She paired Crisp Cantaloupe cardstock with a selection from the Lullaby Designer Paper pack.

Stampin_up_something_for_baby_1

She used Crisp Cantaloupe and Hello Honey Stampin' Write Markers to ink the bib stamp. Sooooo cute!

Next, a much larger image from Something for Baby was used for this card, which unfortunately I have lost the creator's info. Some swappers attach their info on the back of the card on a post-it note, which helps me keep the name with the card, but some do not. If it's just loose with the card, it's much more likely to get lost as I take the swaps with me to workshops and classes.

Stampin_up_something_for_baby_2

This card features just Whisper White and Daffodil Delight. Just two colors, but it makes a very visually pleasing look! The rhinestones were colored with one of the Daffodil Delight Blendability markers, which should finally be available in a few weeks.

Lastly, I CASED this card from Deb Valder. Deb makes the most amazing cards. I stepped up just a few things, but I'd definitely going to be making more cards with this template, and I know you are going to want to know how!

Stampin_up_something_for_baby_block_2

This card stands up on it's own and is called a "block card". Doesn't it look just like a stack of baby blocks? Images from Something for Baby were cut with the coordinating Baby's First Framelits.

Stampin_up_something_for_baby_block_1

(Please pardon the sawdust. Apparently we have wood bees trying to make a home in our deck roof!) I cut the numbers with the "1, 2, and 3" from the File Tabs Edgelits Dies.

Stampin_up_something_for_baby_block_3

Pretty, pretty, pretty!

On the top blocks I stamped more phrases from Something to Say:

Stampin_up_something_for_baby_block_4

The tiny little hearts were punched with the Owl Builder Punch.

Stampin_up_something_for_baby_block_5


Stampin_up_something_for_baby_block_6

That's all for now. Here's the supply list for today's cards. Just click on any image and you will be taken to shop in my Online Store:


DID YOU NOTICE????? When you purchase the Something for Baby stamp set and the Baby Firsts Framelits in a BUNDLE you save 15%!
 
Until tomorrow, have a Stampingrox! day!

All images ©Stampin'Up!™1990-2014

Stampin’ Up! Weekly Deals!

Stampin’ Up! Weekly Deals!

Hey there! Hope you enjoyed our blog hop this month, Home of the Brave! If you missed it, don't worry, we keep the posts and links up forever. Just click HERE to start at my post, then click the "next blog" link at the bottom of everyone's post to "hop" around the whole way!

New Weekly Deals from Stampin' Up! start today:

10426685_10203409156703749_7373454128595934472_n

Go to my Online Store to shop:www.carolpayne.stampinup.net

DID YOU KNOW? I place an order EVERY MONDAY EVENING! Avoid the minimum shipping of $6.95 by sending me your order to add to mine! (Local Southern Illinois pick up only)

Email me: carol@carolpaynestamps.com

That's all for now. Until tomorrow, have a Stampingrox! day!

All images ©Stampin'Up!™1990-2014

Stampin’ Up! Weekly Deals!

Stampin’ Up! Weekly Deals!

Hey there! Hope you enjoyed our blog hop this month, Home of the Brave! If you missed it, don't worry, we keep the posts and links up forever. Just click HERE to start at my post, then click the "next blog" link at the bottom of everyone's post to "hop" around the whole way!

New Weekly Deals from Stampin' Up! start today:

10426685_10203409156703749_7373454128595934472_n

Go to my Online Store to shop:www.carolpayne.stampinup.net

DID YOU KNOW? I place an order EVERY MONDAY EVENING! Avoid the minimum shipping of $6.95 by sending me your order to add to mine! (Local Southern Illinois pick up only)

Email me: carol@carolpaynestamps.com

That's all for now. Until tomorrow, have a Stampingrox! day!

All images ©Stampin'Up!™1990-2014

Stampin’ Up! Stampers Dozen Blog Hop June Edition Home of the Brave!

Stampin’ Up! Stampers Dozen Blog Hop June Edition Home of the Brave!

Hey there. Today is a good day! It's Father's Day, of course, which means all of our kids and grandkids will be here for lunch and the afternoon! Today is also the 15th, which means it's time for "Home of the Brave", the June edition of:

1797524_10152216933805070_1250170996_n

You may have arrived here from Stella's blog, StellarStamps.com I just love what Stella comes up with every month! Her style is simple but WOW! If you are just getting started, no worries! You can start here, hop through all 12 blogs, be inspired, then get busy creating something awesome of your own!

With the theme "Home of the Brave", I wanted to do something patriotic to commemorate our great Nation's birth. A card just didn't seem like enough, so I decided to use my new Star Framelits:

Stampin_up_star_framelits_1

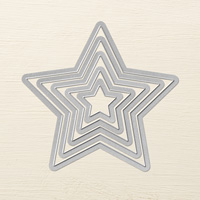
I hand-snipped the ends of Night of Navy banners, then used four of the five star framelits for the stars.

Stampin_up_star_framelits_2

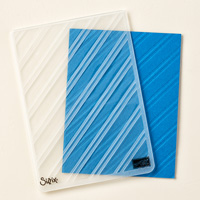
I embossed the Night of Navy banners with the Stylish Stripes folder, then cut Real Red Backgrounds Designer Paper with a Starburst Framelit.

Stampin_up_star_framelits_3

I cut Silver Glimmer paper for the largest stars, and punched the tiniest silver stars with the star punch from the Merry Minis Punch Pack, which is still available through August 27th on the Carryover List!

Stampin_up_star_framelits_4

I used the alphabet stencils from the Build a Banner Simply Created Kit to add the letters with Night of Navy ink. I'm so glad this kit is in the new catalog!

Each banner is assembled with either Stampin' Dimensionals or Glue Dots

Lastly, I covered regular clothespins with Real Red paper, cutting the strips 3/8" wide by 3 7/8" long and adhering with SNAIL.

I'm excited to decorate for the 4th with my new banner!

To see more patriotic creations, click the link below to Judy Garza's blog, Stamping With Judy G:

1551612_10152213036645070_18131182_n

Here's the project shopping list. Click on any image below to go to my Online Store

All images ©Stampin'Up!™1990-2014

Stampin’ Up! Stampers Dozen Blog Hop June Edition Home of the Brave!

Stampin’ Up! Stampers Dozen Blog Hop June Edition Home of the Brave!

Hey there. Today is a good day! It's Father's Day, of course, which means all of our kids and grandkids will be here for lunch and the afternoon! Today is also the 15th, which means it's time for "Home of the Brave", the June edition of:

1797524_10152216933805070_1250170996_n

You may have arrived here from Stella's blog, StellarStamps.com I just love what Stella comes up with every month! Her style is simple but WOW! If you are just getting started, no worries! You can start here, hop through all 12 blogs, be inspired, then get busy creating something awesome of your own!

With the theme "Home of the Brave", I wanted to do something patriotic to commemorate our great Nation's birth. A card just didn't seem like enough, so I decided to use my new Star Framelits:

Stampin_up_star_framelits_1

I hand-snipped the ends of Night of Navy banners, then used four of the five star framelits for the stars.

Stampin_up_star_framelits_2

I embossed the Night of Navy banners with the Stylish Stripes folder, then cut Real Red Backgrounds Designer Paper with a Starburst Framelit.

Stampin_up_star_framelits_3

I cut Silver Glimmer paper for the largest stars, and punched the tiniest silver stars with the star punch from the Merry Minis Punch Pack, which is still available through August 27th on the Carryover List!

Stampin_up_star_framelits_4

I used the alphabet stencils from the Build a Banner Simply Created Kit to add the letters with Night of Navy ink. I'm so glad this kit is in the new catalog!

Each banner is assembled with either Stampin' Dimensionals or Glue Dots

Lastly, I covered regular clothespins with Real Red paper, cutting the strips 3/8" wide by 3 7/8" long and adhering with SNAIL.

I'm excited to decorate for the 4th with my new banner!

To see more patriotic creations, click the link below to Judy Garza's blog, Stamping With Judy G:

1551612_10152213036645070_18131182_n

Here's the project shopping list. Click on any image below to go to my Online Store

All images ©Stampin'Up!™1990-2014

Stampin’ Up! Owl Graduate by Donna!

Stampin’ Up! Owl Graduate by Donna!

Hey there! I'm still up after midnight, so I'm going to do a quick post and then head off to bed!

One of my dear stamping friends, Donna, came to my Birthday Card Buffet this past Saturday. Donna has been stamping with me since probably 2005, over 9 years ago, and during that time has become a really good friend.

Donna stamps ALOT. She has a good portion of her basement outfitted for her stamping domain. We have a monthly stamp camp there and we love it!

Donna made this special graduation card for her niece who just graduated from college:

Stampin_up_owl_builder_graduation_1
Isn't this just adorable????!!!!

Donna used the Owl Builder Punch, the Scalloped Oval Punch, and a few other elements to create her graduating birdie!

Stampin_up_owl_builder_graduation_2

She hand-cut the pieces for the graduation cap, and custom-dyed the Baker's Twine to get the rich red color for the tassel.

Stampin_up_owl_builder_punch_graduation_3
Stamped-off Smoky Slate was used to stamp the "celebrate" background. I love this extra little touch that adds so much to the specialness of this card!

That's all for now! I've got to put myself to bed.

You can find many of the supplies to make this card in my Online Store.

Until tomorrow, have a Stampingrox! day!

All images ©Stampin' Up!™1990-2014

Guess what's coming on Sunday?

1797524_10152216933805070_1250170996_n

Our theme this month is "Home of the Brave". Be sure to come by anytime Sunday and take the hop!

Stampin’ Up! Owl Graduate by Donna!

Stampin’ Up! Owl Graduate by Donna!

Hey there! I'm still up after midnight, so I'm going to do a quick post and then head off to bed!

One of my dear stamping friends, Donna, came to my Birthday Card Buffet this past Saturday. Donna has been stamping with me since probably 2005, over 9 years ago, and during that time has become a really good friend.

Donna stamps ALOT. She has a good portion of her basement outfitted for her stamping domain. We have a monthly stamp camp there and we love it!

Donna made this special graduation card for her niece who just graduated from college:

Stampin_up_owl_builder_graduation_1
Isn't this just adorable????!!!!

Donna used the Owl Builder Punch, the Scalloped Oval Punch, and a few other elements to create her graduating birdie!

Stampin_up_owl_builder_graduation_2

She hand-cut the pieces for the graduation cap, and custom-dyed the Baker's Twine to get the rich red color for the tassel.

Stampin_up_owl_builder_punch_graduation_3
Stamped-off Smoky Slate was used to stamp the "celebrate" background. I love this extra little touch that adds so much to the specialness of this card!

That's all for now! I've got to put myself to bed.

You can find many of the supplies to make this card in my Online Store.

Until tomorrow, have a Stampingrox! day!

All images ©Stampin' Up!™1990-2014

Guess what's coming on Sunday?

1797524_10152216933805070_1250170996_n

Our theme this month is "Home of the Brave". Be sure to come by anytime Sunday and take the hop!

Theme: Overlay by Kaira
Bonnie, Illinois, USA