Tag: banner punch

Stamper’s Dozen Blog Hop August Edition Back to School!

Stamper’s Dozen Blog Hop August Edition Back to School!

Hey there! It's Stampers Dozen Blog Hop Day! YAY!

1797524_10152216933805070_1250170996_n

Augusts' theme is "Back to School"! One of my daughters is a teacher, so I consulted with her in Walmart a few days ago:

Stampin_up_flashback_school_1

The "mason jar mugs" have been at Walmart all summer and are on clearance right now, so I purchased  a small mug because all the big ones were gone!

Inside I put items to help a teacher get through those first days of back-to-school:

  • Tylenol Extra Strength
  • Band-aids
  • Tums
  • Chocolate!

The tag I am especially excited about!

Stampin_up_flashback_school_tag

I started with a Basic Black tag cut with the next-to-largest Banner Framelit, then layered on a next-to-next-to-largest banner cut from Flashback Designer Paper.

I added:

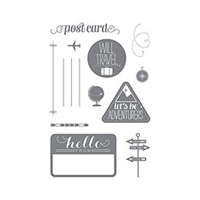
"SCHOOLS COOL!" – Alphabet Rotary Stamp, underscored with a Show & Tell 1 Photopolymer (cut with a new skinny banner framelit coming in the Holiday Catalog!)

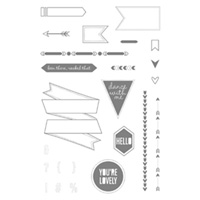
"STAY CALM AND BE AWESOME"- Show & Tell 2 Photopolymer, punched with Ticket Duo.

"SHOW & TELL" – Show & Tell 2 Photopolymer, punched with the Banner Punch.

"THIS WEEK" – Project Life Remember This, punched with the Word Window.

The globe – Wanderlust Photopolymer, punched with the 1 inch Circle.

"WOW!" – Honeycomb Hello, also punched with the Banner punch.

The hole for the Real Red 1/8" Taffeta Ribbon with the 1/4" Handheld Punch.

Here's the supply list for today's project. Everything can be ordered from my Online Store: www.carolpayne.stampinup.net

When you click on an image, it will be enlarged in my store, and you can throw it in your shopping cart if you like!

 
To see Judy Garza's Back to School creation, click on the "next" button. To go back to see what Stella MacKay created, click on "previous".
 
Either way you go, be sure to click through all 12 blogs!
 
Until tomorrow, have a Stampingrox! day!
 
1551612_10152213036645070_18131182_n
 
1013763_10152213037420070_1159313436_n
Stampin’ Up! Banner Punch Sunflower!

Stampin’ Up! Banner Punch Sunflower!

Hey there! Punch & Technique Class was yesterday! I will be posting the projects we made on the 15th for Stampers Dozen Blog Hop. Today I'm sharing the binder cover club members made to reference their class instructions:

Stampin_up_punch_binder_1 - Copy

We used the Banner, 2 3/8" Scallop Circle, and 1 3/4" Scallop Circle punches to create the sunflower.

Starting with a Baked Brown Sugar base, we layered 2 Lullaby Designer Series Paper designs. A Decorative Dots-embosed strip of Baked Brown Sugar covered the seam.

We matted the pre-printed title with Coastal Cabana.

Stampin_up_punch_binder_2 - Copy

We sponged Baked Brown Sugar on the embossed scallop circles and Hello Honey on the Hello Honey banners, adhering them to the circles with SNAIL. We anchored them with Stampin' Dimensionals. Stampin_up_punch_binder_3 - Copy
Starting with 8" of Burlap Ribbon, we separated the threads. We looped three together, tied a knot at the end, then adhered to the flower  back with Glue Dots. We added three groups of Mossy Meadow  "leaves" before adhering with all those lovely dimensionals!

Stampin_up_punch_binder_4 - Copy

Only club members made the binder. I AM still taking new club members, so if you would like to join, contact me for full details. You can join even if you live long distance. I will ship you the class packets, including the binder cover, which are free with the minimum $25 order each month.

Here's the supply list to find everything in my Online Store:

All images ©Stampin'Up!™1990-2014

Stampin’ Up! Banner Punch Sunflower!

Stampin’ Up! Banner Punch Sunflower!

Hey there! Punch & Technique Class was yesterday! I will be posting the projects we made on the 15th for Stampers Dozen Blog Hop. Today I'm sharing the binder cover club members made to reference their class instructions:

Stampin_up_punch_binder_1 - Copy

We used the Banner, 2 3/8" Scallop Circle, and 1 3/4" Scallop Circle punches to create the sunflower.

Starting with a Baked Brown Sugar base, we layered 2 Lullaby Designer Series Paper designs. A Decorative Dots-embosed strip of Baked Brown Sugar covered the seam.

We matted the pre-printed title with Coastal Cabana.

Stampin_up_punch_binder_2 - Copy

We sponged Baked Brown Sugar on the embossed scallop circles and Hello Honey on the Hello Honey banners, adhering them to the circles with SNAIL. We anchored them with Stampin' Dimensionals. Stampin_up_punch_binder_3 - Copy
Starting with 8" of Burlap Ribbon, we separated the threads. We looped three together, tied a knot at the end, then adhered to the flower  back with Glue Dots. We added three groups of Mossy Meadow  "leaves" before adhering with all those lovely dimensionals!

Stampin_up_punch_binder_4 - Copy

Only club members made the binder. I AM still taking new club members, so if you would like to join, contact me for full details. You can join even if you live long distance. I will ship you the class packets, including the binder cover, which are free with the minimum $25 order each month.

Here's the supply list to find everything in my Online Store:

All images ©Stampin'Up!™1990-2014

Stampin’ Up! Gorgeous Grunge!

Stampin’ Up! Gorgeous Grunge!

Hey there! I have another Birthday Card Buffet card to share with you today. The front of this one was originally created by one of my monthly swap group swappers, but I have somehow lost the name off the back:

Stampin_up_gorgeous_grunge_2

I love these colors of Night of Navy, Crumb Cake, Soft Suede, and Whisper White together! Stamps used are Gorgeous Grunge and From My Heart, and the Banner Punch was used to punch the Night of Navy cardstock and Soft Suede Backgrounds Designer Series Paper. Sponging with Crumb Cake and a little bit of Linen Thread add the finishing touches!

Stampin_up_gorgeous_grunge_1
Here's a tip for stamping the lines stamp from Gorgeous Grunge straight on your paper: Line up the edges of the paper along the lines on your Stampin' Up! Grid Paper (if you don't have a this Grid Paper, you NEED to get a pack!), then line up the edges of your stamp block with the lines of the Grid paper before you stamp. With just a teeny little bit of practice your stamping of lines (or words, or whatever) will be just the way you want it!

Stampin_up_gorgeous_grunge_3

Inside we stamped more Gorgeous Grunge and another phrase from From My Heart.

That's it! This card was a favorite at my class. If you are attending any of my workshops or events this month you just might get a chance to make it!

Here's the supply list for shopping in my Online Store:

All images ©Stampin'Up!,™1990-2014

Stampin’ Up! Gorgeous Grunge!

Stampin’ Up! Gorgeous Grunge!

Hey there! I have another Birthday Card Buffet card to share with you today. The front of this one was originally created by one of my monthly swap group swappers, but I have somehow lost the name off the back:

Stampin_up_gorgeous_grunge_2

I love these colors of Night of Navy, Crumb Cake, Soft Suede, and Whisper White together! Stamps used are Gorgeous Grunge and From My Heart, and the Banner Punch was used to punch the Night of Navy cardstock and Soft Suede Backgrounds Designer Series Paper. Sponging with Crumb Cake and a little bit of Linen Thread add the finishing touches!

Stampin_up_gorgeous_grunge_1
Here's a tip for stamping the lines stamp from Gorgeous Grunge straight on your paper: Line up the edges of the paper along the lines on your Stampin' Up! Grid Paper (if you don't have a this Grid Paper, you NEED to get a pack!), then line up the edges of your stamp block with the lines of the Grid paper before you stamp. With just a teeny little bit of practice your stamping of lines (or words, or whatever) will be just the way you want it!

Stampin_up_gorgeous_grunge_3

Inside we stamped more Gorgeous Grunge and another phrase from From My Heart.

That's it! This card was a favorite at my class. If you are attending any of my workshops or events this month you just might get a chance to make it!

Here's the supply list for shopping in my Online Store:

All images ©Stampin'Up!,™1990-2014

Stampin’ Up! Happenings Simply Created Card Kit!

Stampin’ Up! Happenings Simply Created Card Kit!

Hey there! I have some of my Leadership Presentation and Sale-a-bration Kick-off projects to show you today!

Stampin_up_happenings_simply_created_card_kit_4

I created the box using a card from the On Its Way Simply Sent Card Kit and a Bermuda Bay cardstock base stamped with the free Sale-a-bration Petal Parade stamps. I added a heart, buttons and a silver glimmer strip from the Happenings Simply Created Card Kit, then stamped the banners with the Banner Blast stamp set and punched them with the Banner Punch. Rhinestones give it the final touch!

Stampin_up_happenings_simply_created_card_kit_6

We stamped 5 cards with more of the supplies from the Happenings Simply Created Card Kit. The Smokey Slate hearts on the card on the lower right were sponged by laying the stencil left after punching out the spotted hearts in the kit!

Here's my class handout for these projects, including the dimensions and directions for the box:

Download Sale a bration Kick off Projects

Supplies used:

Stampin_up_happenings_simply_created_card_kit

Happenings Simply Created Card Kit  #133329  

Price: $14.95

Coordinating colors: Baked Brown Sugar, Bermuda Bay, Pear Pizzazz, Smoky Slate, Strawberry Slush, Whisper White.

Includes pieces for making 15 cards:
■ 15 card bases: finished card size: 4-1/4" x 5-1/2"
■ 15 sheets of single-sided, printed designer paper backgrounds, 5 ea. of 3 designs
■ 15 die-cut accents, 5 ea. of 3 designs
■ 15 Silver glitter banners
■ 15 White banners
■ 15 pieces of Baker’s Twine, 10" ea.
■ 15 buttons


Stampin_up_on_its_way_simply_sent


On Its Way Simply Sent  #131373 1313
Price: $11.95
 

Paper and accessories for 8 cards. Coordinates with Thanks & Hello Stamp. Kit includes

* 8 4-1/4" x 5-1/2" cards, with awesome glossy stripes on front
* 8 Kraft envelopes
* 8 sheets of cardstock stickers
* 8 arrow Cute Clips
* 20 Stampin' Dimensionals


  Stampin_up_simply_celebrate

Simply Celebrate  Wood-mount #133221 $16.95   Clear-mount #133224 $12.95  
 

To order these supplies and choose your free Sale-a-bration item when your order total reached $50 (before shipping and tax) click HERE to go to my Online Store!


Until tomorrow, have a Stampingrox! day!

All products used are ©Stampin'Up!™1990-2014

Stampin’ Up! Happenings Simply Created Card Kit!

Stampin’ Up! Happenings Simply Created Card Kit!

Hey there! I have some of my Leadership Presentation and Sale-a-bration Kick-off projects to show you today!

Stampin_up_happenings_simply_created_card_kit_4

I created the box using a card from the On Its Way Simply Sent Card Kit and a Bermuda Bay cardstock base stamped with the free Sale-a-bration Petal Parade stamps. I added a heart, buttons and a silver glimmer strip from the Happenings Simply Created Card Kit, then stamped the banners with the Banner Blast stamp set and punched them with the Banner Punch. Rhinestones give it the final touch!

Stampin_up_happenings_simply_created_card_kit_6

We stamped 5 cards with more of the supplies from the Happenings Simply Created Card Kit. The Smokey Slate hearts on the card on the lower right were sponged by laying the stencil left after punching out the spotted hearts in the kit!

Here's my class handout for these projects, including the dimensions and directions for the box:

Download Sale a bration Kick off Projects

Supplies used:

Stampin_up_happenings_simply_created_card_kit

Happenings Simply Created Card Kit  #133329  

Price: $14.95

Coordinating colors: Baked Brown Sugar, Bermuda Bay, Pear Pizzazz, Smoky Slate, Strawberry Slush, Whisper White.

Includes pieces for making 15 cards:
■ 15 card bases: finished card size: 4-1/4" x 5-1/2"
■ 15 sheets of single-sided, printed designer paper backgrounds, 5 ea. of 3 designs
■ 15 die-cut accents, 5 ea. of 3 designs
■ 15 Silver glitter banners
■ 15 White banners
■ 15 pieces of Baker’s Twine, 10" ea.
■ 15 buttons


Stampin_up_on_its_way_simply_sent


On Its Way Simply Sent  #131373 1313
Price: $11.95
 

Paper and accessories for 8 cards. Coordinates with Thanks & Hello Stamp. Kit includes

* 8 4-1/4" x 5-1/2" cards, with awesome glossy stripes on front
* 8 Kraft envelopes
* 8 sheets of cardstock stickers
* 8 arrow Cute Clips
* 20 Stampin' Dimensionals


  Stampin_up_simply_celebrate

Simply Celebrate  Wood-mount #133221 $16.95   Clear-mount #133224 $12.95  
 

To order these supplies and choose your free Sale-a-bration item when your order total reached $50 (before shipping and tax) click HERE to go to my Online Store!


Until tomorrow, have a Stampingrox! day!

All products used are ©Stampin'Up!™1990-2014

Stampin’Up! Retro Fresh Geometrics!

Stampin’Up! Retro Fresh Geometrics!

Hey there! I am working on getting caught up from being gone to Leadership. Caught up my laundry today. Unpacked and bagged orders that arrived while I was gone. And I took some time to play with new Occasions catalog stuff! lookie:

Stampin_up_retro_fresh_geometrics_1

I used the Geometrics stamp set we received from Stampin' Up! to do part of our Leadership Make & Takes with Tangerine Tango, Naturals Ivory, So Saffron, Baked Brown Sugar, and Coastal Cabana cardstock. I used Retro Fresh Designer Paper, cut into slightly less than 1/2" x 3" wide strips, then punched both ends with the new Banner Punch from the Sale-a-bration brochure, then embossed them with the Decorative Dots Textured Impressions Folder from the Sale-a-bration brochure.

I just LOVE how the new Arrows Textured Impressions Folder so easily coordiates with the Retro Fresh paper!

After stamping "hooray for today" with Baked Brown Sugar ink, I added punched Chevrons  with Coastal Cabana and Baked Brown Sugar cardstock to the right side of the greeting. I added a gold sequin, also from the Occasions Catalog (did I tell you gold is the NEW silver?) to the center of both "o's" in hooray with a glue dot.

Stampin_up_geometrics_make_a_wish_1

I stamped a phrase from Make a Wish with Baked Brown Sugar ink, then added just a bit of Tangerine Tango ink to the flames with a marker. A couple of more chevrons, a gold sequin, and a row of punched Retro Fresh banners finishes off the inside and coordinates it with the outside!

That's all for now. I need to head off to bed. Alisa and Oakley & I are heading out for a little shopping trip tomorrow morning, then I hope to get back decently early enough to squeeze in some more stamping! I'm having a downline meeting this Sunday and a Shoebox Swap, so I need to figure out what my swap will be!

You can order the Geometrics stamp set and the Retro Fresh Designer Paper when you click HERE.

Here's the graphic for the new Weekly Deals from Stampin' Up!

1520794_10202322658501973_1775240882_n

I love that there are new sale items each week!

Until tomorrow, have a Stampingrox! day!


All products used are ©Stampin'Up!™1990-2014

Theme: Overlay by Kaira
Bonnie, Illinois, USA