Category: Easter Cards & Projects

Stampin’ Up! Sunday Swap Day! Easter Cards!

Stampin’ Up! Sunday Swap Day! Easter Cards!

Hey there, I'm back and pretty quickly, with my promised post of new cards for you. My last post weighed heavy on my heart, but it was something I needed to do. For those of you that read my story, thank you.

Last month's installment of swaps was fantastic. I.mean.really.great.

Today I have the spring-iest and easter-y-iest of them to share with you:

First, Ann Betty's creation with Springtime Hello, Window Frames Framelits, Decorative Dots folder (returning in the new 2014-2015 Annual Catalog!) and now-retired Sweet Sorbet DSP:

Stampin_up_springtime_hello

Next, a cute bunny card. Unfortunately, the creator failed to put their name on this one, but used Ovals Colection Framelits, all three Oval punches, the Small Heart Punch, and Linen Thread to create this cute little fellow:

White bunny 1

Another bunny, "milk chocolate" this time, created by Cathy Stephenson of Boise, Idaho. This bunny is holding a designer paper "egg" punched with the Small Oval punch!

Ovals bunny_1

Lastly, Linda Pagel brought back and oldie-but-goodie, the pop-up-card. She used the Blessed Easter single stamp, combining Summer Starfruit and Gumball Green with the "bubbles" stamp from Happy Watercolor.

It starts out folded flat:

Stampin_up_blessed_easter_1

Then you push down on the green sides to reveal the pop-up center!

Stampin_up_blessed_easter_2

A side view of the way the cardstock folds out to create the base for the card stand:

Stampin_up_blessed_easter_3

That's all for now! Today Maddie Kate & Ava are coming over after church. I have a craft project planned I've been wanting to try for awhile, and hope to have pictures of it to share with you tomorrow!

Until tomorrow, have a Stampingrox! day!


©Stampin'Up!™1990-2014
Stampin’ Up! Hippity Hoppity Hip Notes!

Stampin’ Up! Hippity Hoppity Hip Notes!

Hey there! Hope you've had a good day. I had a short visit from Jessica and her little boys (Cohen & Jaxon) for a few hours this evening, so add in some stamping earlier today and it's been practically perfect!

My card for you tonight is an original Carol Payne from start to finish! No CASEing, just a new punch treatment for an cute little bunny, and the greeting from Hip Notes makes it perfect for a spring birthday!

Stampin_up_hip_notes_1 - Copy

I used lots of oval punches for this little fellow. I sponged the Baked Brown Sugar cardstock with Whisper White craft ink, and the lining of his ears and his nose are Blushing Bride Designer Paper and cardstock.

Inside the card I continued the oval theme to layer the greeting from Really Good Greetings.

Stampin_up_hip_notes_2 - Copy

Here's the supply list for today's project. You can purchase all of them from My Online Store:

That's all for now. Until tomorrow, have a Stampingrox! day!
 

©Stampin'Up!™1990-2014
Stampin’ Up! Hippity Hoppity Hip Notes!

Stampin’ Up! Hippity Hoppity Hip Notes!

Hey there! Hope you've had a good day. I had a short visit from Jessica and her little boys (Cohen & Jaxon) for a few hours this evening, so add in some stamping earlier today and it's been practically perfect!

My card for you tonight is an original Carol Payne from start to finish! No CASEing, just a new punch treatment for an cute little bunny, and the greeting from Hip Notes makes it perfect for a spring birthday!

Stampin_up_hip_notes_1 - Copy

I used lots of oval punches for this little fellow. I sponged the Baked Brown Sugar cardstock with Whisper White craft ink, and the lining of his ears and his nose are Blushing Bride Designer Paper and cardstock.

Inside the card I continued the oval theme to layer the greeting from Really Good Greetings.

Stampin_up_hip_notes_2 - Copy

Here's the supply list for today's project. You can purchase all of them from My Online Store:

That's all for now. Until tomorrow, have a Stampingrox! day!
 

©Stampin'Up!™1990-2014

Stampin’Up! Scalloped Tag Topper Bunny Box!

Stampin’Up! Scalloped Tag Topper Bunny Box!

Hey there! I've had a fun day today, creating and CASEing some new projects! The first one I want to show you is another project you can choose to make at my Happiest Day Class this Friday. I was inspired by Michelle Last of the UK to make these bunny boxes:

Stampin_up_scalloped_tag_topper_box_1

I made a few minor changes, but the basic construction is all Michelle's. You can view her video and instructions HERE. I hope after you view her instructions you will be inspired to come back and purchase your Stampin' Up! supplies from me in my online store. (USA residents cannot purchase from UK demos and vice-versa)

Stampin_up_scalloped_tag_topper_box_2 - Copy

I added little "bunny tails" to mine with hearts punched from Blushing Bride Patterns Designer Paper and the Small Heart Punch.

Stampin_up_scalloped_tag_topper_box_6 - Copy

The box opens and can hold several pieces of chocolate! (is there any other kind of candy?)

Stampin_up_scalloped_tag_topper_box_3 - Copy

I added an easter-egg basket to the Early Espresso bunny with the Large and Extra-Large Oval punches, the circle punch from the Itty Bitty Shapes Punch Pack for the "eggs", and the Square Lattice Textured Impressions Folder for the baskets' "weave".

Stampin_up_scalloped_tag_topper_box_4 - Copy

When you watch Michelle's video, she will give you some tips for cutting the flower stems with the Fringe Scissors! You tie the twine around the stems before you make the final cut from the cardstock, an ingenius way to keep the stems together as you tie the bow!

Stampin_up_scalloped_tag_topper_box_5 - Copy

I stamped and cut out this bunny's egg with the Backyard Basics Bundle of stamp set and Big Shot framelits.

That's all for now. I hope you are now inspired (and instructed) by Michelle's video to make your own bunny boxes! If you have any questions, you can just leave me a comment or email me: carol@carolpaynestamps.com

Until tomorrow, have a Stampingrox! day!

Here's the supply list to make the bunny boxes:


©Stampin'Up!™1990-2014

Stampin’Up! Scalloped Tag Topper Bunny Box!

Stampin’Up! Scalloped Tag Topper Bunny Box!

Hey there! I've had a fun day today, creating and CASEing some new projects! The first one I want to show you is another project you can choose to make at my Happiest Day Class this Friday. I was inspired by Michelle Last of the UK to make these bunny boxes:

Stampin_up_scalloped_tag_topper_box_1

I made a few minor changes, but the basic construction is all Michelle's. You can view her video and instructions HERE. I hope after you view her instructions you will be inspired to come back and purchase your Stampin' Up! supplies from me in my online store. (USA residents cannot purchase from UK demos and vice-versa)

Stampin_up_scalloped_tag_topper_box_2 - Copy

I added little "bunny tails" to mine with hearts punched from Blushing Bride Patterns Designer Paper and the Small Heart Punch.

Stampin_up_scalloped_tag_topper_box_6 - Copy

The box opens and can hold several pieces of chocolate! (is there any other kind of candy?)

Stampin_up_scalloped_tag_topper_box_3 - Copy

I added an easter-egg basket to the Early Espresso bunny with the Large and Extra-Large Oval punches, the circle punch from the Itty Bitty Shapes Punch Pack for the "eggs", and the Square Lattice Textured Impressions Folder for the baskets' "weave".

Stampin_up_scalloped_tag_topper_box_4 - Copy

When you watch Michelle's video, she will give you some tips for cutting the flower stems with the Fringe Scissors! You tie the twine around the stems before you make the final cut from the cardstock, an ingenius way to keep the stems together as you tie the bow!

Stampin_up_scalloped_tag_topper_box_5 - Copy

I stamped and cut out this bunny's egg with the Backyard Basics Bundle of stamp set and Big Shot framelits.

That's all for now. I hope you are now inspired (and instructed) by Michelle's video to make your own bunny boxes! If you have any questions, you can just leave me a comment or email me: carol@carolpaynestamps.com

Until tomorrow, have a Stampingrox! day!

Here's the supply list to make the bunny boxes:


©Stampin'Up!™1990-2014

Stampin’Up! Scalloped Tag Topper Easter Treats!

Stampin’Up! Scalloped Tag Topper Easter Treats!

Hey there! I'm back again! yay! I didn't get any time to stamp today, but that's o.k. All of my kids and grandkids were here off and on all day, so it was a fun day!

As promised, I have a trio of treat holders to show you, all created with the Scalloped Tag Topper Punch and various other punches:

Stampin_up_scalloped_tag_topper_easter_pals - Copy

I'm so happy with the way these little babies turned out! I found inspiration for each one from MANY different sources, so assigning an original creator would be pretty much impossible.

This little lamb has Calypso Coral twine to hold her together, and the Decorative Dots Textured Impressions Folder was used for al the texture. Her nose is a Blushing Bride Candy Dot, as is the center of the cork embellishment flower. The Calypso Coral twine and the Decorative Dots folder are only available as FREE Sale-a-bration items for ONE MORE DAY ONLY – March 31!

Stampin_up_scalloped_tag_topper_pal_1 - Copy

This little chickie has a tuft of a real feather added with a glue dot (purchased at a craft store), and her beak is from one of the Boho Blossoms, cut across the flower with Paper Snips to create the top and bottom of the beak. Her little feet are also punched with the same Boho Blossom.

Stampin_up_scalloped_tag_topper_pal_2 - Copy

Finally, little Miss Bunny is punched from Baked Brown Sugar cardstock. The center of her ears and her nose are cut from the slot punched out from the top of the Tag Topper Punch!

Stampin_up_scalloped_tag_topper_pal_3 - Copy

I needed a tiny Easter Basket for Miss Bunny, so I used the vest from the Owl Punch and punched a handle with my Small Oval Punch. The "eggs" in the basket are Coastal Cabana and Soft Sky-punched with the smaller eye of the Owl Punch. If you don't have the Owl Builder Punch yet, you NEED it!

That's all for now. Remember, Monday, March 31st is the LAST DAY of Sale-a-bration, so please go to my Online Store before Midnight tonight to place your order and choose your free items! If you have been thinking of joining the Stampin' Up! demonstrator family and would also like to be a part of my group, the Yes, Mam! Stampers, you can sign up while you are there!

Until tomorrow, have a Stampingrox! day!

©Stampin'Up!™1990-2014

Stampin’Up! Scalloped Tag Topper Easter Treats!

Stampin’Up! Scalloped Tag Topper Easter Treats!

Hey there! I'm back again! yay! I didn't get any time to stamp today, but that's o.k. All of my kids and grandkids were here off and on all day, so it was a fun day!

As promised, I have a trio of treat holders to show you, all created with the Scalloped Tag Topper Punch and various other punches:

Stampin_up_scalloped_tag_topper_easter_pals - Copy

I'm so happy with the way these little babies turned out! I found inspiration for each one from MANY different sources, so assigning an original creator would be pretty much impossible.

This little lamb has Calypso Coral twine to hold her together, and the Decorative Dots Textured Impressions Folder was used for al the texture. Her nose is a Blushing Bride Candy Dot, as is the center of the cork embellishment flower. The Calypso Coral twine and the Decorative Dots folder are only available as FREE Sale-a-bration items for ONE MORE DAY ONLY – March 31!

Stampin_up_scalloped_tag_topper_pal_1 - Copy

This little chickie has a tuft of a real feather added with a glue dot (purchased at a craft store), and her beak is from one of the Boho Blossoms, cut across the flower with Paper Snips to create the top and bottom of the beak. Her little feet are also punched with the same Boho Blossom.

Stampin_up_scalloped_tag_topper_pal_2 - Copy

Finally, little Miss Bunny is punched from Baked Brown Sugar cardstock. The center of her ears and her nose are cut from the slot punched out from the top of the Tag Topper Punch!

Stampin_up_scalloped_tag_topper_pal_3 - Copy

I needed a tiny Easter Basket for Miss Bunny, so I used the vest from the Owl Punch and punched a handle with my Small Oval Punch. The "eggs" in the basket are Coastal Cabana and Soft Sky-punched with the smaller eye of the Owl Punch. If you don't have the Owl Builder Punch yet, you NEED it!

That's all for now. Remember, Monday, March 31st is the LAST DAY of Sale-a-bration, so please go to my Online Store before Midnight tonight to place your order and choose your free items! If you have been thinking of joining the Stampin' Up! demonstrator family and would also like to be a part of my group, the Yes, Mam! Stampers, you can sign up while you are there!

Until tomorrow, have a Stampingrox! day!

©Stampin'Up!™1990-2014
Stampin’ Up! Pansy Punch Bunny!

Stampin’ Up! Pansy Punch Bunny!

Hey there! Just a quick post tonight. I spent the last 12 hours at Jessica's, plowing through all the paperwork, getting all her numbers ready for her tax lady, and I am pooped! We got it all done, so we can breathe a sigh of relief!

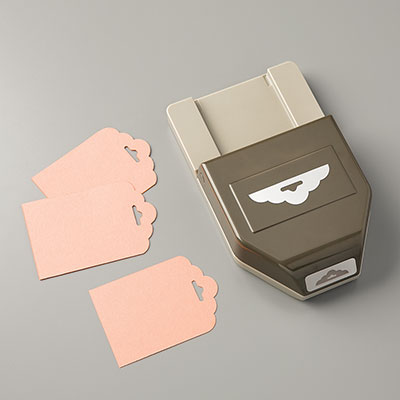
I do have a cute little treat holder to show you, using the Scalloped Tag Topper Punch for the holder and the Pansy Punch for the bunny ears:

Stampin_up_scalloped_tag_topper_bunny_watermarked

Isn't this the cutest little itty-bitty bunny? She was really quick and easy to make, too!

Stampin_up_scalloped_tag_topper_bunny_2watermarked

I hope to be able to share the directions for both the treat holder and the bunny soon, but now I must send my self to bed. My cold has been much better today. I think I may NOT have a sinus infection, but I've got to get some rest so that trend continues! Hopefully tomorrow I can share directions and pictures  to make this fun little treat!

ETA 3/26/14: Here's a punch page showing all the punches I used to make the bunny:

Bunny punch page - Copy

And here's a quick tutorial to make the Scalloped Tag Topper treat holder:

Punch both ends of a  8 1/2" x 2" strip of Coastal Cabana cardstock with the Scallop Tag Topper Punch. Score the center of the strip at 4 1/8" after you have punched. Score 3/4" on either side of the center scored line. Fold along the two outer score lines to create the base of the treat holder.

Stampin_up_scalloped_tag_topper_egg_holder_1

Cut about 1 or 1 1/2" from scalloped end with Paper Trimmer, cutting only half-way across to create a slit. Flip paper over and cut other end. You will be cutting a slit on the opposite side of the end.

Topper 1

This is what your slits will look like:

Topper 3

Bring the ends of the treat holder together, sliding the slits over each other to close the top:

Topper 4

When you are done the top of your holder will look like this:

Topper 5

That's all for now! Please visit my Online Store to shop and purchase your supplies to create this fun little cutie!

Until tomorrow, have a Stampingrox! day!

Click on any image below to go to my Online Store:

Stampin’ Up! Pansy Punch Bunny!

Stampin’ Up! Pansy Punch Bunny!

Hey there! Just a quick post tonight. I spent the last 12 hours at Jessica's, plowing through all the paperwork, getting all her numbers ready for her tax lady, and I am pooped! We got it all done, so we can breathe a sigh of relief!

I do have a cute little treat holder to show you, using the Scalloped Tag Topper Punch for the holder and the Pansy Punch for the bunny ears:

Stampin_up_scalloped_tag_topper_bunny_watermarked

Isn't this the cutest little itty-bitty bunny? She was really quick and easy to make, too!

Stampin_up_scalloped_tag_topper_bunny_2watermarked

I hope to be able to share the directions for both the treat holder and the bunny soon, but now I must send my self to bed. My cold has been much better today. I think I may NOT have a sinus infection, but I've got to get some rest so that trend continues! Hopefully tomorrow I can share directions and pictures  to make this fun little treat!

ETA 3/26/14: Here's a punch page showing all the punches I used to make the bunny:

Bunny punch page - Copy

And here's a quick tutorial to make the Scalloped Tag Topper treat holder:

Punch both ends of a  8 1/2" x 2" strip of Coastal Cabana cardstock with the Scallop Tag Topper Punch. Score the center of the strip at 4 1/8" after you have punched. Score 3/4" on either side of the center scored line. Fold along the two outer score lines to create the base of the treat holder.

Stampin_up_scalloped_tag_topper_egg_holder_1

Cut about 1 or 1 1/2" from scalloped end with Paper Trimmer, cutting only half-way across to create a slit. Flip paper over and cut other end. You will be cutting a slit on the opposite side of the end.

Topper 1

This is what your slits will look like:

Topper 3

Bring the ends of the treat holder together, sliding the slits over each other to close the top:

Topper 4

When you are done the top of your holder will look like this:

Topper 5

That's all for now! Please visit my Online Store to shop and purchase your supplies to create this fun little cutie!

Until tomorrow, have a Stampingrox! day!

Click on any image below to go to my Online Store:

Stampin’Up! Sunday Swap Day: You’re Lovely!

Stampin’Up! Sunday Swap Day: You’re Lovely!

Hey there! It's Sunday again, which means it's Sunday-swap-sharing day! yay!

Today I have a couple of fun cards using the Sale-a-bration set, You're Lovely:

Stampin_up_youre_lovely

This swap has Basic Gray, Crisp Cantaloupe, and Whisper White for its main colors, with a pop of Calypso Coral for the flower. A Tea Lace Doily, Whisper White Baker's Twine, the Scallop Tag Topper Punch, Scallop Trim Border Punch, and Pearls Basic Jewels make this card a winner!

Stampin_up_hardwood_susie_wood

My second swap to show you today was created by Susie Wood. Susie combined Crumb Cake, Basic Black, and a pop of Whisper White to create a very visually pleasing creation!

Stamps used are the You're Lovely stamp set, (free with a $50 order for just a couple more weeks, what are you waiting for? Get yours from my Online Store today!) Gorgeous Grunge, and Hardwood Background.

Big Shot products used are the Lattice Bigz Die and Deco Label Framelits.

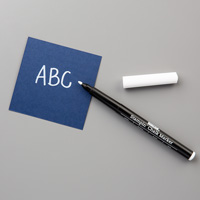
Accessories are Tea Lace Doilies, White Chalk Marker, Old Olive Stampin' Write Marker, and Rhinestone Basic Jewels.

That's all for now. If you haven't taken the Stamper's Dozen Blog Hop, go back to yesterday's post and start hoppin'!

Until tomorrow, have a Stampingrox! day!


All products used are ©Stampin'Up!™1990-2014

Theme: Overlay by Kaira
Bonnie, Illinois, USA