Hey there! Today is Sunday, which means it's Sunday Swap Day! yay!
These swaps are all from Leadership in Houston a few weeks ago. Some of them are swaps I brought home and some are swaps belonging to my downline, Linda!
All FIVE of these swaps have the same theme: they are all created using something from the Retro Fresh product suite on pages 18-19 of the Occasions Catalog:

Retro Fresh Designer Paper, Chevron Border Punch, Banner Punch (Sale-a-bration brochure), Love You More – download the flyer for this and more cute Valentine-themed products, only available until January 27th:
Download Flyer_wholelotoflove_demo_12.1-1.27.2014_US

Baked Brown Sugar cardbase, Costal Cabana and Very Vanill cardstock, Retro Fresh Designer Paper, Scalloped Tag Topper Punch, Baked Brown Sugar 3/8" Ruffle Stretch Trim, Love You to the Moon pg 25 of the Occasions Catalog.

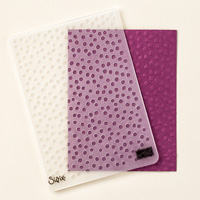
Soft Suede card base, Coastal Cabana Core'dinations (it has that pretty texture!) and Very Vanilla cardstock, Retro Fresh Designer Paper, Angled Tag Topper Punch, Ampersand Textured Impressions Folder, Banner Punch (Sale-a-bration brochure), and Perfect Pennants stamps on page 27 of the Occasions Catalog.

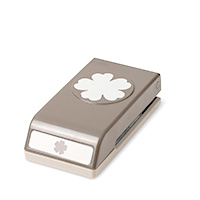
Very Vanilla card base, Coastal Cabana and So Saffron cardstock, Retro Fresh This and Taht Designer Washi Tape, Full Heart Punch, Early Espresso Baker's Twine, Itty Bitty Banners stamp set and Bitty Banners Framelits.

I think this one might be my favorite because of its super-simplicity and the saying from the Just Sayin' stamp set on page 36 of the Occasions catalog, cut out with the Word Bubbles Framelits Dies. This stamp set and dies are "bundled" together so that when you buy them at the same time you get a 15 % discount on what they would be if you bought them separately. The stamps are available in both wood-mount and clear-mount too!
That's all for now! After church this morning and Sunday dinner with the fam, I have a downline meeting this afternoon! We are having a Shoebox Swap, and I've got my card all ready and 12 packets cut so everyone can make it. I will come home with 12 different cards, each designed by one of my downline who also teaches and sells Stampin' Up! products. Fun!
You can shop for the products to make the cards shown today by clicking HERE to go to my Online Store!
Until tomorrow, have a Stampingrox! day!
All products used are ©Stampin'Up!™1990-2014