Tag: Bird Builder Punch

Stampin’ Up! Timeless Talk Birthday Wishes for Ava!

Stampin’ Up! Timeless Talk Birthday Wishes for Ava!

Hey there! Last night was Ava's birthday party. She had five girlfriends spend the night, so I'm sure the nail polishes, hair paint, and juggle bubbles she received from us were put to good use!

Inspiration for her card was from a convention board sample:

Stampin_up_timeless_talk_snail_1

I changed the colors, embellishments, and greeting. Six different circle punches created the snail shell. The body is the Bird Builder Punch.

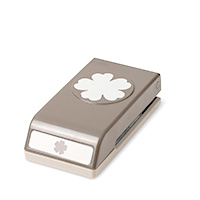
The Timeless Talk greeting, stamped inside a Just Sayin' shape, was cut with a Word Bubbles Framelit. The stems are from the Flower Frenzy Bigz L Die. The blooms are the Blossom, Pansy, Petite Petals, and Boho Blossom punches.

I finished off the bloom and snail shell centers with Regals and Subtles candy dots.

Stampin_up_timeless_talk_snail_2

The snail's eye is a Project Life Journaling Pen, with "light" from a White Chalk Marker. I colored the Rhinestones for the antennae, punched from the Cupcake Builder Punch, with a Rich Razzleberry Blendability.

Stampin_up_timeless_talk_snail_3

I think our wishes for Ava came true last night!

Here's the supply list for today's card, new Weekly Deals, and the Big Shot Bundle Flyer August Special:


August Big Shot Bundles flyer:
Download Flyer_BS_Demo_8.1-31.2014_US
 
New Weekly Deals:
10565157_10203757641255645_2381212398648798538_n
 
Shop for today's supplies, bundles, Weekly Deals, Clearance Rack, New Arrivals, and Annual Catalog supplies in My Online Stampin' Up! Store!
 
Until tomorrow, have a Stampingrox! day!

All images ©Stampin'Up!™1990-2014

Stampin’Up! More Easy Hoppity Baskets!

Stampin’Up! More Easy Hoppity Baskets!

Hey there! Hope you've had a good day. We had another reminder today that winter is not entirely gone with rounds of sleet, rain, and a threat of snow! Fortunately, the snow did not materialize, but it was pretty yucky here most of the day. A big change from Saturday when it was in the low 70's!

I hope you've enjoyed the Stamper's Dozen March Hoppity Hop Hop! If you missed it you can go back to THIS POST and hop through all 13 blogs to see what our group created for you!

Of course, you know I couldn't just make one itty-bitty basket and leave it at that! Here's a couple of sets of baskets I made for my hostess gifts for the rest of March.

The first set I inked the tulips from the Backyard Basics set with Melon Mambo and Wisteria Wonder Stampin' Write Markers and cut them out with the Backyard Basics Framelits before adding them to the baskets with Glue Dots. I also edged each basket with "grass" cut with the Fringe Scissors and butterflies from the Beautiful Wings Embosslit.

Stampin_up_backyard_basics_baskets_1 - Copy

I've already given a couple of these baskets away. I went a little overboard with my punches for these baskets. I used the Boho Blossoms Punch and the 1/2" Circle for the sunflowers, and the Real Red and Primrose Petals flowers. I used the Itty Bitty Shapes Punch Pack four-petal flower punch for the Rich Razzleberry flowers and scalloped-circle flower punch from the same pack for the centers of the Real Red flowers. All of the leafy stems are punched with the Bird Builder Punch.

Rhinestones and some Textured Impressions embossing finished it them all off nicely!

Stampin_up_punchy_baskets_2 - Copy

So what do you think of these little babies? Would you like one of your own? Every hostess from now on will receive a little hand-made project from me at their party!

In case you missed the tutorial, here's just the basket portion of my Hoppity Hop Hop handout:

Download Hoppity Hop Hop Projects just the basket tutorial

That's all for now! I have a couple of new cards in the works, both using a new fold I call "Reverse Easel". Be sure to come back tomorrow to see the first one!

Click HERE to go to my Online Store to shop for your Stampin' Up! supplies. You always earn "Bluesox" tokens with every $25 you spend, and until March 31st you can choose a free item from the Sale-a-bration brochure with every order of $50 (before tax & shipping)

Until tomorrow, have a Stampingrox! day!


All products used are ©Stampin'Up!™1990-2014

Stampin’Up! More Easy Hoppity Baskets!

Stampin’Up! More Easy Hoppity Baskets!

Hey there! Hope you've had a good day. We had another reminder today that winter is not entirely gone with rounds of sleet, rain, and a threat of snow! Fortunately, the snow did not materialize, but it was pretty yucky here most of the day. A big change from Saturday when it was in the low 70's!

I hope you've enjoyed the Stamper's Dozen March Hoppity Hop Hop! If you missed it you can go back to THIS POST and hop through all 13 blogs to see what our group created for you!

Of course, you know I couldn't just make one itty-bitty basket and leave it at that! Here's a couple of sets of baskets I made for my hostess gifts for the rest of March.

The first set I inked the tulips from the Backyard Basics set with Melon Mambo and Wisteria Wonder Stampin' Write Markers and cut them out with the Backyard Basics Framelits before adding them to the baskets with Glue Dots. I also edged each basket with "grass" cut with the Fringe Scissors and butterflies from the Beautiful Wings Embosslit.

Stampin_up_backyard_basics_baskets_1 - Copy

I've already given a couple of these baskets away. I went a little overboard with my punches for these baskets. I used the Boho Blossoms Punch and the 1/2" Circle for the sunflowers, and the Real Red and Primrose Petals flowers. I used the Itty Bitty Shapes Punch Pack four-petal flower punch for the Rich Razzleberry flowers and scalloped-circle flower punch from the same pack for the centers of the Real Red flowers. All of the leafy stems are punched with the Bird Builder Punch.

Rhinestones and some Textured Impressions embossing finished it them all off nicely!

Stampin_up_punchy_baskets_2 - Copy

So what do you think of these little babies? Would you like one of your own? Every hostess from now on will receive a little hand-made project from me at their party!

In case you missed the tutorial, here's just the basket portion of my Hoppity Hop Hop handout:

Download Hoppity Hop Hop Projects just the basket tutorial

That's all for now! I have a couple of new cards in the works, both using a new fold I call "Reverse Easel". Be sure to come back tomorrow to see the first one!

Click HERE to go to my Online Store to shop for your Stampin' Up! supplies. You always earn "Bluesox" tokens with every $25 you spend, and until March 31st you can choose a free item from the Sale-a-bration brochure with every order of $50 (before tax & shipping)

Until tomorrow, have a Stampingrox! day!


All products used are ©Stampin'Up!™1990-2014

Stampin’Up! Spiral Flower Die!

Stampin’Up! Spiral Flower Die!

Hey there! I'm almost ready for my Sale-a-bration Kick-off tomorrow! No sleeping on the couch for me tonight! (If you saw my Leadership presentation, you get the reference, lol!)

Yesterday I played with a lot of fun stuff from the Occasions Catalog! I used the Spiral Flower Originals Die (#129279 $17.95) to create this:

Stampin_up_spiral_flower_die

I used Watercolor Wonder Designer Paper, So Saffron, Calypso Coral, Pool Party, and Blushing Bride cardstock for all 7 of the roses. After cutting the paper with the Spiral Flower die, I curled all of the spirals with my bone folder, then starting with the outer end of the spiral, I wound each one around itself. When done, I let each one "relax" while I wound the rest of them, then use a hot glut gun to secure the spirals to the built-in base.

I created a belly-band for the Kraft Gift Box with Watercolor Wonder Designer Paper and Wild Wasabi cardstock. After attaching a Tea Lace Doily to the top, I added Wild Wasabi leaves cut with the Autumn Accents Bigz Die and embossed with the Square Lattice Textured Impressions Folder. I then added the flowers with the hot glue gun again, then tucked some Bird Builder punched-leaves to fill in between the blossoms.

I white heat-embossed the tag from Chalk Talk on Wild Wasabi cardstock, cut it out with the Chalk Talk framelit, then mounted it on a piece of Baked Brown Sugar cardstock. Baked Brown Sugar coordinated perfectly with the Kraft Gift Boxes!

After adding the tag under the doily, I then spritzed the entire thing with Vanilla Smooch Spritz. I actually added a bit of spritz to a Stampin' Spritzer, then filled it full of 91% Rubbing Alcohol. This stretches the smooch spritz, allowing more coverage, and also keeps it from clogging the nozzle of the spritzer.

That's all for now! You can order your own Spiral Flower Orignals Die, Watercolor Wonder Designer Paper, and Kraft Gift Boxes from my Online Store HERE.

Until tomorrow, have a Stampingrox! day!

All products used are ©Stampin'Up!™1990-2014

Stampin’ Up! Flower Shop Bundle!

Stampin’ Up! Flower Shop Bundle!

Good morning! Hope you are enjoying a long July 4th weekend! Today I want to share with you another card we will be making at my SWOW class next weekend using the Flower Shop Bundle, Dictionary Background stamp, the My Paper Pumpkin Try It Kit, and the Four You stamp set!

The Flower Shop Bundle listed on page 95 is one of several bundles Stampin' Up! is featuring in the New Catalog this year. Stamps are bundled with a coordinating punch or framelits to give the stamper a 15% discount when they buy the two products together! Look for the blue-framed bundles to get the item code and prices for a Wood-Mount Bundle or a Clear-Mount Bundle!

Flower shop 1

The colors are Sahara Sand, Blushing Bride, Whisper White, and Perfect Plum. I found my color combo by using the NEW Color Coach! I've never really been a Color Coach fan, but after fooling around with this one a bit, I think I'm going to be using it more and more all the time! I LOVE these colors together!

Sahara Sand
Blushing bride 
Perfect Plum

I made the flower centers with the Simply Pressed Clay and the "blossom" mold from the Buttons & Blossoms Simply Pressed Clay Molds. After pressing a little ball of the clay into the mold I popped it into the freezer for about 10-30 minutes (depending on how long it took me to remember to take it out, lol!), then popped the blossom out of the mold. After allowing it to air-dry for about 24 hours, I first spritzed them with a mixture of 91% rubbing alcohol and reinker, allowed that to dry for a few minutes, then used a Sponge Dauber to sponge on additional ink. They were then attached to the flower with a Glue Dot. The leaves are Pear Pizzazz and were punched with the Bird Builder Punch.

Flower shop 3

Inside I stamped a phrase from Really Good Greetings on page 38, then added another leaf branch and a couple of tiny flowers punched with the 4-petal flower punch in the Itty Bitty Shapes Punch Pack. I used my White Gel Pen for the flower centers.

Flower shop 2

Well, that's all for today!  If you want to make this card, you can either visit my Online Store by clicking on the "Shop Now" button on the upper left side of this blog or RSVP to come to the SWOW class next weekend on the 12th or the 13th!

Thanks so much for stopping by! Hope the rest of your day Stampingrox!

All products used are ©Stampin'Up!™1990-2013

Stampin’ Up! Flower Shop Bundle!

Stampin’ Up! Flower Shop Bundle!

Good morning! Hope you are enjoying a long July 4th weekend! Today I want to share with you another card we will be making at my SWOW class next weekend using the Flower Shop Bundle, Dictionary Background stamp, the My Paper Pumpkin Try It Kit, and the Four You stamp set!

The Flower Shop Bundle listed on page 95 is one of several bundles Stampin' Up! is featuring in the New Catalog this year. Stamps are bundled with a coordinating punch or framelits to give the stamper a 15% discount when they buy the two products together! Look for the blue-framed bundles to get the item code and prices for a Wood-Mount Bundle or a Clear-Mount Bundle!

Flower shop 1

The colors are Sahara Sand, Blushing Bride, Whisper White, and Perfect Plum. I found my color combo by using the NEW Color Coach! I've never really been a Color Coach fan, but after fooling around with this one a bit, I think I'm going to be using it more and more all the time! I LOVE these colors together!

Sahara Sand
Blushing bride 
Perfect Plum

I made the flower centers with the Simply Pressed Clay and the "blossom" mold from the Buttons & Blossoms Simply Pressed Clay Molds. After pressing a little ball of the clay into the mold I popped it into the freezer for about 10-30 minutes (depending on how long it took me to remember to take it out, lol!), then popped the blossom out of the mold. After allowing it to air-dry for about 24 hours, I first spritzed them with a mixture of 91% rubbing alcohol and reinker, allowed that to dry for a few minutes, then used a Sponge Dauber to sponge on additional ink. They were then attached to the flower with a Glue Dot. The leaves are Pear Pizzazz and were punched with the Bird Builder Punch.

Flower shop 3

Inside I stamped a phrase from Really Good Greetings on page 38, then added another leaf branch and a couple of tiny flowers punched with the 4-petal flower punch in the Itty Bitty Shapes Punch Pack. I used my White Gel Pen for the flower centers.

Flower shop 2

Well, that's all for today!  If you want to make this card, you can either visit my Online Store by clicking on the "Shop Now" button on the upper left side of this blog or RSVP to come to the SWOW class next weekend on the 12th or the 13th!

Thanks so much for stopping by! Hope the rest of your day Stampingrox!

All products used are ©Stampin'Up!™1990-2013

Stampin’Up! Guest Stamper, Joyce Fisher!

Stampin’Up! Guest Stamper, Joyce Fisher!

One of the many things I enjoy about being a Stampin' Up! Demonstrator is building friendships with my customers and my downline. Today's post is all about one of my downline, Joyce! I met Joyce at least 6 years ago and she has been stamping with me ever since. About a year ago, last July in fact, she decided to join my group of "Yes Ma'am!" downline. Since then we have grown even closer as she is a faithful attendee of my meetings and many of my classes. At the "Brides & Babies" class this past weekend, she brought a small stack of cards she had been working on and they were so delightful I had to take pictures and asked her if she would like to be a guest stamper here on "Stampingrox My Fuzzy Blue Sox!" With Joyce's permission, here are her creations:

Strawberry lemonade
©Stampin'Up!™1990-2012

Inspired by many others out here in blogland, Joyce created an over-sized card for her "Strawberry Lemonade" or "Margarita" card. In lieu of microbeads for the edge of the cup, Joyce added actual salt to the Sticky Strip! So ingenious!

Another ingenious card, Joyce's "Mother's Day Word Search" card she created to give to her daughters on Mother's Day!

Joyce's word search
©Stampin'Up!™1990-2012

 Here are all the words for her daughters to find that Joyce used to describe them!

Joyce's word search 4
©Stampin'Up!™1990-2012

Apparently there is a website where you can put in all the words you want in your wordsearch and it will create it for you, but Joyce painstakingly created this all on her own! Yay Joyce!

Next Joyce created this beautifully sponged card with the Bird Builder Punched silhouette. This card has an elegant, masculine feel to it. Very well done!

Sunset bird 1
©Stampin'Up!™1990-2012

I loved Joyce's Owl Builder Punch nurse! So cute, and using the vest of the owl to create the nurse's cap is just so simple! The color combo of Riding Hood Red, Marina Mist, Soft Suede and Whisper White really give this card a "first aid kit" feel!

Nurse owl 1
©Stampin'Up!™1990-2012

Last-but-not-least, Joyce found directions on SCS for this adorable pleated dress made with "Twitterpated" Designer Paper, which is NOT retiring!

Dress
©Stampin'Up!™1990-2012

I hope you've enjoyed Joyce's creations as much as I have! Until tomorrow, have a "Stampingrox!" Day!

Stampin’Up! Guest Stamper, Joyce Fisher!

Stampin’Up! Guest Stamper, Joyce Fisher!

One of the many things I enjoy about being a Stampin' Up! Demonstrator is building friendships with my customers and my downline. Today's post is all about one of my downline, Joyce! I met Joyce at least 6 years ago and she has been stamping with me ever since. About a year ago, last July in fact, she decided to join my group of "Yes Ma'am!" downline. Since then we have grown even closer as she is a faithful attendee of my meetings and many of my classes. At the "Brides & Babies" class this past weekend, she brought a small stack of cards she had been working on and they were so delightful I had to take pictures and asked her if she would like to be a guest stamper here on "Stampingrox My Fuzzy Blue Sox!" With Joyce's permission, here are her creations:

Strawberry lemonade
©Stampin'Up!™1990-2012

Inspired by many others out here in blogland, Joyce created an over-sized card for her "Strawberry Lemonade" or "Margarita" card. In lieu of microbeads for the edge of the cup, Joyce added actual salt to the Sticky Strip! So ingenious!

Another ingenious card, Joyce's "Mother's Day Word Search" card she created to give to her daughters on Mother's Day!

Joyce's word search
©Stampin'Up!™1990-2012

 Here are all the words for her daughters to find that Joyce used to describe them!

Joyce's word search 4
©Stampin'Up!™1990-2012

Apparently there is a website where you can put in all the words you want in your wordsearch and it will create it for you, but Joyce painstakingly created this all on her own! Yay Joyce!

Next Joyce created this beautifully sponged card with the Bird Builder Punched silhouette. This card has an elegant, masculine feel to it. Very well done!

Sunset bird 1
©Stampin'Up!™1990-2012

I loved Joyce's Owl Builder Punch nurse! So cute, and using the vest of the owl to create the nurse's cap is just so simple! The color combo of Riding Hood Red, Marina Mist, Soft Suede and Whisper White really give this card a "first aid kit" feel!

Nurse owl 1
©Stampin'Up!™1990-2012

Last-but-not-least, Joyce found directions on SCS for this adorable pleated dress made with "Twitterpated" Designer Paper, which is NOT retiring!

Dress
©Stampin'Up!™1990-2012

I hope you've enjoyed Joyce's creations as much as I have! Until tomorrow, have a "Stampingrox!" Day!

Stampin’ Up! Bird Builder Punch Treat Holder!

Stampin’ Up! Bird Builder Punch Treat Holder!

I try to not blog surf too much (however, I'm sure we each have our own definition of "too much" lol!) However, there are a handful of blogs that I visit regularly because they either are constantly inspiring & teaching me, or they are a resource "jumping off place" that can't be beat!

Today, I did a bit of "jumping off" and found this treat holder by UK Stampin' Up! Demo Michelle Last. She is an uber-successful demo, having achieved #1 Demonstrator in the UK two years running! Here is my version of her treat holder:

Chicks 2
©Stampin'Up!™1990-2012

Isn't this cute little chick adorable? He is made with the Bird Builder Punch and with just a little bit of punching modification he is transformed into a chickie!

I used the soon-to-be-retired-forever Hostess Set, Precious Butterflies, and used Lucky Limeade cardstock and Wisteria Wonder 3/8" Ruffled Ribbon.

I will be offering this treatholder at my next few workshops this month, but if you are either impatient or have no hope of attending one of my events you can go to Michelle's blog and watch her video of how she made the holder and the chickie:

Michelle Last Blog

I plan to have a downloadable tutorial for printing available in a few days, so check back!

Until tomorrow, have a "Stampingrox! Day!"


Theme: Overlay by Kaira
Bonnie, Illinois, USA