Hey there! I had such a very positive response to yesterday's card using Serene Silhouettes I decided to create another card using this set using an idea that has been rolling around in my head for quite awhile:

I combined Serene Silhouettes with Lovely as a Tree and a phrase from More Merry Messages. I stamped the birds on the branch with Jet Black StazOn ink on a strip of Crumb Cake 2" x 4", then used my Paper Snips to hand-cut the tag corners. I layered this on a piece of 2 1/8" x 4 1/8" Always Artichoke that I also sponged with Always Artichoke ink. I used the Crumb Cake tag corners as my guide to cut the Always Artichoke tag corners.

To achieve the "snowstorm" look: after stamping the Lovely as a Tree images with Always Artichoke ink (the bare trees in the background were stamped-off once before stamping on the card base), I used the finest splatter stamp from Gorgeous Grunge to stamp both the card base and the birdie tag first with Smoky Slate ink, cleaned my stamp, then stamped the same image over all with Whisper White Craft ink. I think the two colors layered over each other does give depth to the "storm", yes?
All edges were sponged with first Always Artichoke ink and then Whisper White Craft.
The Always Artichoke bow is actually Pear Pizzazz 3/8" Taffeta ribbon that I custom-dyed by laying the ribbon directly on the Always Artichoke inkpad and sponging. I rubbed the ribbon with a paper towel to remove as much excess ink as I could before tying the bow. It is adhered to the top of the birdie tag with Glue Dots.
I stamped the "merry christmas" phrase from More Merry Messages with Jet Black Staz On on Crumb Cake, then punched with the Modern Label punch. I then sponged it with both Always Artichoke and Whisper White, then rubbed the edges of the piece directly on the Always Artichoke pad for more definition. It is adhered to the card with Stampin' Dimensionals.
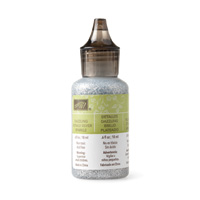
For my finishing touch I added Cherry Cobbler Dazzling Details to the birdies, leaving the card flat to allow time for the "glitter glue" to dry.

Inside is stamped with the same Lovely as a Tree images and sponged with the same inks as the outside.
The inner phrase is from Christmas Messages, stamped with Jet Black StazOn ink.
All of these items can be ordered in my Online Store:
www.carolpayne.stampinup.net
Here's your shopping list:
Serene Silhouettes: #132073 Wood-mount $24.95, #127324 Clear-mount $17.95
Lovely as a Tree: #128655 Wood-mount $27.95, #127793 Clear-mount $19.95
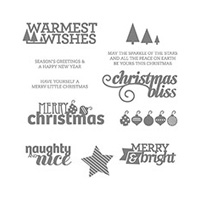
More Merry Messages: #126400 Wood-mount $32.95, #126402 Clear-mount $24.95
Christmas Messages: #131790 Wood-mount $28.95, #131793 Clear-mount $20.95
Crumb Cake 8 1/2" x 11 cardstock: #120953 $6.95 (I cut the card base 11" x 4 1/4", scored and folded at 5 1/2") (24 sheets)
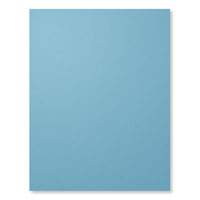
Always Artichoke 8 1/2" x 11 cardstock: #105119 $6.95 (24 sheets)
Always Artichoke Classic Inkpad: #126972 $5.95
Smoky Slate Classic Inkpad: #131179 $5.95
Whisper White Craft Inkpad: #101731 $7.50
Jet Black StazOn inkpad: #101406 $7.95
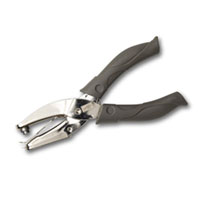
Paper Snips: #103579 $9.95
Pear Pizzazz 3/8" Taffeta Ribbon: #131208 $6.95 (10 yds)
Stampin' Sponges: #101610 $3.50 (pkg of 3)
Stampin' Dimensionals: #104430 $3.95
SNAIL Adhesive: #104332 $6.95 (refill #104431 $4.50)
Glue Dots: #103683 $4.95
That's all for now. Until tomorrow, have a Stampingrox! day!
All products used are ©Stampin'Up!™1990-2013