Tag: cards

Stampin’ Up! Five-Way Flower Pop n’ Cuts Card!

Stampin’ Up! Five-Way Flower Pop n’ Cuts Card!

Hey there! I'm back to day with the OPPOSITE of yesterday's post; instead of Clean-and-Simple, this one you could say is "high maintenance". lol!

Stampin_up_five_way_flower_1 - Copy

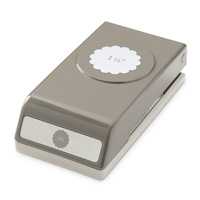
I used the Pop 'n Cuts Card Base Die for the card base. It makes fancy little curves on the front end of the base – I love it! I also clear heat-embossed the Five-Way Flower on both Melon Mambo and Pink Pirouette cardstock two times on each color before punching with all of the scallop circle punches in the catalog!

Stampin_up_five_way_flower_2 - Copy

Pretty much every layer is popped up with Stampin' Dimensionals. This would definitely be a special card for a special someone!

Stampin_up_five_way_flower_3 - Copy

I finished the inside with one of the phrases from Million & One, cut and layered with Deco Label Framelits.

Stampin_up_five _way_flower_closeCopy (2) - Copy

Up close you can see all the details of the heat-embossed, punched layers, as well as the fun trim details I added. I never seem to use the strips of connected pearls very much from the Pearls Basic Jewels very often, but they were the perfect choice to layer over the Victoria Crochet Trim and the Strawberry Slush 3/8" Ruffled Stretch Trim!

That's all for now! Check out my supply list for this card, then go to my Online Store to shop! Don't forget there's a new set of Weekly Deals, as well as the Clearance Rack to browse. You never know what you will find in there!

Please note: the "congratulations" greeting is from the Hostess Set, Express Yourself. I did not include it in the supply list because you can only choose it as part of your Hostess freebies when you submit an order of at least $150, whether it is just your own order, or a combined order of yours and those of your friends. If you have any questions about that, please contact me!

Until tomorrow, have a Stampingrox! day!


All images ©Stampin'Up!™1990-2014

Stampin’ Up! Five-Way Flower Pop n’ Cuts Card!

Stampin’ Up! Five-Way Flower Pop n’ Cuts Card!

Hey there! I'm back to day with the OPPOSITE of yesterday's post; instead of Clean-and-Simple, this one you could say is "high maintenance". lol!

Stampin_up_five_way_flower_1 - Copy

I used the Pop 'n Cuts Card Base Die for the card base. It makes fancy little curves on the front end of the base – I love it! I also clear heat-embossed the Five-Way Flower on both Melon Mambo and Pink Pirouette cardstock two times on each color before punching with all of the scallop circle punches in the catalog!

Stampin_up_five_way_flower_2 - Copy

Pretty much every layer is popped up with Stampin' Dimensionals. This would definitely be a special card for a special someone!

Stampin_up_five_way_flower_3 - Copy

I finished the inside with one of the phrases from Million & One, cut and layered with Deco Label Framelits.

Stampin_up_five _way_flower_closeCopy (2) - Copy

Up close you can see all the details of the heat-embossed, punched layers, as well as the fun trim details I added. I never seem to use the strips of connected pearls very much from the Pearls Basic Jewels very often, but they were the perfect choice to layer over the Victoria Crochet Trim and the Strawberry Slush 3/8" Ruffled Stretch Trim!

That's all for now! Check out my supply list for this card, then go to my Online Store to shop! Don't forget there's a new set of Weekly Deals, as well as the Clearance Rack to browse. You never know what you will find in there!

Please note: the "congratulations" greeting is from the Hostess Set, Express Yourself. I did not include it in the supply list because you can only choose it as part of your Hostess freebies when you submit an order of at least $150, whether it is just your own order, or a combined order of yours and those of your friends. If you have any questions about that, please contact me!

Until tomorrow, have a Stampingrox! day!


All images ©Stampin'Up!™1990-2014

Stampin’ Up! Secret Garden Single Layer Card!

Stampin’ Up! Secret Garden Single Layer Card!

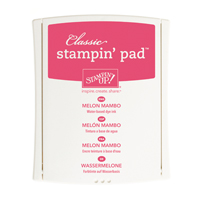
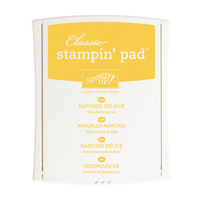
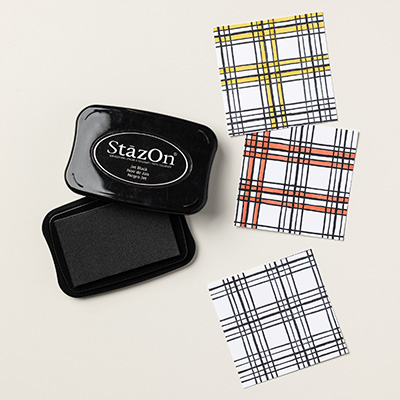
Hey there! Here's one of the cards I worked on last week. I used the Secret Garden stamp set with Melon Mambo, Gumball Green, Daffodil Delight, and Jet Black StazOn:

Stampin_up_mambo_secret_garden_1 - Copy

"hey there friend" is from the Starter Kit you get when you subscribe to  My Paper Pumpkin . I custom-dyed White Organza Ribbon with my Melon Mambo inkpad and a Stampin' Sponge.

Stampin_up_mambo_secret_garden_2 - Copy

Inside is a sentiment from Really Good Greetings. I love that set, and that phrase!

The envelope is stamped with the same stamps and colors, and I found a design in the Gingham Garden Designer Paper pack that had perfect color coordination in it's blooms!

That's all for now. You can always order your supplies from my Online Store HERE.

Stampin' Up! published their new set of Weekly Deals! Here they are, all 25% off:

1964965_10202905886362305_2615639044275351843_n

Here's the supply list for today's card:


Stampin’ Up! Secret Garden Single Layer Card!

Stampin’ Up! Secret Garden Single Layer Card!

Hey there! Here's one of the cards I worked on last week. I used the Secret Garden stamp set with Melon Mambo, Gumball Green, Daffodil Delight, and Jet Black StazOn:

Stampin_up_mambo_secret_garden_1 - Copy

"hey there friend" is from the Starter Kit you get when you subscribe to  My Paper Pumpkin . I custom-dyed White Organza Ribbon with my Melon Mambo inkpad and a Stampin' Sponge.

Stampin_up_mambo_secret_garden_2 - Copy

Inside is a sentiment from Really Good Greetings. I love that set, and that phrase!

The envelope is stamped with the same stamps and colors, and I found a design in the Gingham Garden Designer Paper pack that had perfect color coordination in it's blooms!

That's all for now. You can always order your supplies from my Online Store HERE.

Stampin' Up! published their new set of Weekly Deals! Here they are, all 25% off:

1964965_10202905886362305_2615639044275351843_n

Here's the supply list for today's card:


Stampin’ Up! Fresh Prints Balloons!

Stampin’ Up! Fresh Prints Balloons!

Hey there! Hope your Monday is going well. I got up really early this morning to go to Jessica's house to help the girls (chiefly Ava) get ready for school, then I've been watching Jaxon until Jessica gets home. She went to a photography seminar in Champaign, IL over the weekend.

I spent a few days last week stamping, stamping, stamping, so I  have quite a pile of projects waiting to show you. Today's project incorporates the balloon tutorial that went out with my last newsletter, only this time I used the Extra Large Oval Punch for the body of the balloons:
Stampin_up_regarding_dahlias_1

I liked using the Extra Large Oval Punch, because I could stamp the greeting from Regarding Dahlias first, and then punch it out. I used one of the patterns from the Fresh Prints Designer Paper Stack and Island Indigo cardstock for the other two balloms, all anchored with Island Indigo Bakers Twine and highlighted with my White Chalk Marker.

Stampin_up_regarding_dahlias_2

 I've tried to capture for you the custom-made clouds embossing I did on the Soft Sky layer, but it's hard to see:

Stampin_up_regarding_dahlias_4

Inside I stamped a sentiment from Bring on the Cake:

Stampin_up_balloons

Here's how I made the embossed clouds:

I started by cutting 24 clouds with the cloud-shaped word bubble framelit and some medium-weight cardboard I had saved in my stash from discarded packaging. I stacked the clouds three high, adhering them to each other and the 4 1/4" x 5 1/2" cardboard base with SNAIL. I trimmed off the ends of the clouds flush with the edges of the base with scissors.

Stampin_up_word_bubbles_clouds_1

Starting with Tab 1 and a cutting plate, I put the cardstock I wanted to emboss face-down on the clouds shapes on the Big Shot platform.

Stampin_up_word_bubbles_clouds_3

I added three layers of craft felt over the cardstock/clouds layers before finishing with the top cutting pad. I cranked this through the Big Shot. It was tight, but not too tight to go through. You need the layers of felt so they will squish down over the cloud shapes and emboss the paper. (If you have one of the soft, floppy silicone pads from Stampin' Up!'s retired Letterpress plates that would work too, but I wanted to use something that was readily available and not frustrate you by using something I can't sell to you anymore.)

Stampin_up_word_bubbles_clouds_4

After embossing the clouds I sponge them with whatever color I want them to be. On today's card I sponged them with White Craft ink. In the picture below I sponged the white clouds with Soft Sky ink.

Stampin_up_word_bubbles_clouds_6

I attached this layer to my card with LOTS of Stampin' Dimensionals. I even put a dimensional in the center of each cloud to keep them from flattening as the card went through the mail.

Stampin_up_word_bubbles_clouds_7
Finished card again:

Stampin_up_regarding_dahlias_1

That's it! To purchase the supplies to create this card, go to my online store HERE.

Until tomorrow, have a Stampingrox! day!

Here's the supplies I used:


©Stampin'Up!™1990-2014

Stampin’ Up! Fresh Prints Balloons!

Stampin’ Up! Fresh Prints Balloons!

Hey there! Hope your Monday is going well. I got up really early this morning to go to Jessica's house to help the girls (chiefly Ava) get ready for school, then I've been watching Jaxon until Jessica gets home. She went to a photography seminar in Champaign, IL over the weekend.

I spent a few days last week stamping, stamping, stamping, so I  have quite a pile of projects waiting to show you. Today's project incorporates the balloon tutorial that went out with my last newsletter, only this time I used the Extra Large Oval Punch for the body of the balloons:
Stampin_up_regarding_dahlias_1

I liked using the Extra Large Oval Punch, because I could stamp the greeting from Regarding Dahlias first, and then punch it out. I used one of the patterns from the Fresh Prints Designer Paper Stack and Island Indigo cardstock for the other two balloms, all anchored with Island Indigo Bakers Twine and highlighted with my White Chalk Marker.

Stampin_up_regarding_dahlias_2

 I've tried to capture for you the custom-made clouds embossing I did on the Soft Sky layer, but it's hard to see:

Stampin_up_regarding_dahlias_4

Inside I stamped a sentiment from Bring on the Cake:

Stampin_up_balloons

Here's how I made the embossed clouds:

I started by cutting 24 clouds with the cloud-shaped word bubble framelit and some medium-weight cardboard I had saved in my stash from discarded packaging. I stacked the clouds three high, adhering them to each other and the 4 1/4" x 5 1/2" cardboard base with SNAIL. I trimmed off the ends of the clouds flush with the edges of the base with scissors.

Stampin_up_word_bubbles_clouds_1

Starting with Tab 1 and a cutting plate, I put the cardstock I wanted to emboss face-down on the clouds shapes on the Big Shot platform.

Stampin_up_word_bubbles_clouds_3

I added three layers of craft felt over the cardstock/clouds layers before finishing with the top cutting pad. I cranked this through the Big Shot. It was tight, but not too tight to go through. You need the layers of felt so they will squish down over the cloud shapes and emboss the paper. (If you have one of the soft, floppy silicone pads from Stampin' Up!'s retired Letterpress plates that would work too, but I wanted to use something that was readily available and not frustrate you by using something I can't sell to you anymore.)

Stampin_up_word_bubbles_clouds_4

After embossing the clouds I sponge them with whatever color I want them to be. On today's card I sponged them with White Craft ink. In the picture below I sponged the white clouds with Soft Sky ink.

Stampin_up_word_bubbles_clouds_6

I attached this layer to my card with LOTS of Stampin' Dimensionals. I even put a dimensional in the center of each cloud to keep them from flattening as the card went through the mail.

Stampin_up_word_bubbles_clouds_7
Finished card again:

Stampin_up_regarding_dahlias_1

That's it! To purchase the supplies to create this card, go to my online store HERE.

Until tomorrow, have a Stampingrox! day!

Here's the supplies I used:


©Stampin'Up!™1990-2014

Stampin’ Up! Grunge Butterflies!

Stampin’ Up! Grunge Butterflies!

Hey there! Rain, rain, rain! All it has done at my house today is rain! It has alternately thundered and rained, lightened up, then thundered and rained again ALL DAY, and it is raining now as I write this! At least it's not snow!

While it's been raining, I've been stamping! Bet you could have guessed that anyway, huh? Today I have a fun little butterfly card made with the Gorgeous Grunge stamp set and both the Elegant and Bitty Butterfly punches:

Stampin_up_gorgeous_grunge_butterflies_1 - Copy

I CASED this card from Michelle Last of the U.K., and you can view her card HERE. Michelle is a very talented stamper, but even she CASES cards now and then! Michelle CASED her card from one her downline, Tracey May! You can view Tracey's card HERE.

As you can see, even a CASED card morphs into something a little bit different every time as the CASE-er changes the card just a little bit to suit their fancy!

In case you are wondering what CASE means, it stands for Copy And Share Everything, which is a friendly standard Stampin' Up! Demonstrators live by world-wide!

Stampin_up_gorgeous_grunge_butterflies_1 - Copy (2)

I punched the butterflies with both the Elegant and Bitty Butterfly punches from Soft Sky cadstock, Fresh Prints Designer Paper, and Vellum cardstock. They are layered on each other with Glue Dots, as well as adhered over the Pool Party-stamped Gorgeous Grunge splatters with the same.

Inside I stamped a sentiment from Happy Watercolor. I really liked adding the "scratch" stamp to the sides of the layers. It gives a nice contrast of images with the splatters.


Stampin_up_gorgeous_grunge_butterflies_2 - Copy

That's all for now. I'm going to head to bed and hope the rain stops before morning, athough it IS soothing to sleep with a gentle rain falling!

Here's the supply list for everthing you need to CASE your own version of this card. You can purchase your supplies from my online store HERE.

Until tomorrow, have a Stampingrox! day!


©Stampin'Up!51990-2014

Stampin’ Up! Grunge Butterflies!

Stampin’ Up! Grunge Butterflies!

Hey there! Rain, rain, rain! All it has done at my house today is rain! It has alternately thundered and rained, lightened up, then thundered and rained again ALL DAY, and it is raining now as I write this! At least it's not snow!

While it's been raining, I've been stamping! Bet you could have guessed that anyway, huh? Today I have a fun little butterfly card made with the Gorgeous Grunge stamp set and both the Elegant and Bitty Butterfly punches:

Stampin_up_gorgeous_grunge_butterflies_1 - Copy

I CASED this card from Michelle Last of the U.K., and you can view her card HERE. Michelle is a very talented stamper, but even she CASES cards now and then! Michelle CASED her card from one her downline, Tracey May! You can view Tracey's card HERE.

As you can see, even a CASED card morphs into something a little bit different every time as the CASE-er changes the card just a little bit to suit their fancy!

In case you are wondering what CASE means, it stands for Copy And Share Everything, which is a friendly standard Stampin' Up! Demonstrators live by world-wide!

Stampin_up_gorgeous_grunge_butterflies_1 - Copy (2)

I punched the butterflies with both the Elegant and Bitty Butterfly punches from Soft Sky cadstock, Fresh Prints Designer Paper, and Vellum cardstock. They are layered on each other with Glue Dots, as well as adhered over the Pool Party-stamped Gorgeous Grunge splatters with the same.

Inside I stamped a sentiment from Happy Watercolor. I really liked adding the "scratch" stamp to the sides of the layers. It gives a nice contrast of images with the splatters.


Stampin_up_gorgeous_grunge_butterflies_2 - Copy

That's all for now. I'm going to head to bed and hope the rain stops before morning, athough it IS soothing to sleep with a gentle rain falling!

Here's the supply list for everthing you need to CASE your own version of this card. You can purchase your supplies from my online store HERE.

Until tomorrow, have a Stampingrox! day!


©Stampin'Up!51990-2014

Stampin’ Up! Hippity Hoppity Hip Notes!

Stampin’ Up! Hippity Hoppity Hip Notes!

Hey there! Hope you've had a good day. I had a short visit from Jessica and her little boys (Cohen & Jaxon) for a few hours this evening, so add in some stamping earlier today and it's been practically perfect!

My card for you tonight is an original Carol Payne from start to finish! No CASEing, just a new punch treatment for an cute little bunny, and the greeting from Hip Notes makes it perfect for a spring birthday!

Stampin_up_hip_notes_1 - Copy

I used lots of oval punches for this little fellow. I sponged the Baked Brown Sugar cardstock with Whisper White craft ink, and the lining of his ears and his nose are Blushing Bride Designer Paper and cardstock.

Inside the card I continued the oval theme to layer the greeting from Really Good Greetings.

Stampin_up_hip_notes_2 - Copy

Here's the supply list for today's project. You can purchase all of them from My Online Store:

That's all for now. Until tomorrow, have a Stampingrox! day!
 

©Stampin'Up!™1990-2014

Stampin’ Up! Hippity Hoppity Hip Notes!

Stampin’ Up! Hippity Hoppity Hip Notes!

Hey there! Hope you've had a good day. I had a short visit from Jessica and her little boys (Cohen & Jaxon) for a few hours this evening, so add in some stamping earlier today and it's been practically perfect!

My card for you tonight is an original Carol Payne from start to finish! No CASEing, just a new punch treatment for an cute little bunny, and the greeting from Hip Notes makes it perfect for a spring birthday!

Stampin_up_hip_notes_1 - Copy

I used lots of oval punches for this little fellow. I sponged the Baked Brown Sugar cardstock with Whisper White craft ink, and the lining of his ears and his nose are Blushing Bride Designer Paper and cardstock.

Inside the card I continued the oval theme to layer the greeting from Really Good Greetings.

Stampin_up_hip_notes_2 - Copy

Here's the supply list for today's project. You can purchase all of them from My Online Store:

That's all for now. Until tomorrow, have a Stampingrox! day!
 

©Stampin'Up!™1990-2014
Theme: Overlay by Kaira
Bonnie, Illinois, USA