Category: Christmas Cards & Projects

Stampin’ Up! Sunday Swap Day on Monday, Jolly Friends!

Stampin’ Up! Sunday Swap Day on Monday, Jolly Friends!

Hey there! I continued to have computer issues over the weekend, which is why my pictures were so small in my Saturday post and no post yesterday. Last night I consulted with my IT guy, my son Ben, and now I am "back in business"!

Today I have a few cute Christmas swaps to share, using Jolly Friends and Wrapped in Warmth!

First, Lauren Hayes created her swap with Jolly Friends, Snow Place, and a wreath cut with the Swirly Scribbles Thinlets!

Stampin_up_jolly_friends_carolpaynestamps1

She embossed the hat from Jolly Friends with Real Red Glitter Stampin' Emboss Powder before punching with the Jolly Hat Builder Punch. Cherry Cobbler twine from the Baker's Twine Trio Pack and a Mini Jingle Bell are the perfect embellishments.

Stampin_up_jolly_friends_carolpaynestamps2

Inside she stamped the swirls from the Swirly Bird set and a sentiment from the Tin of Tags set.

Stampin_up_jolly_friends_carolpaynestamps3

Next, Sandy Carlson used Jolly Friends, Jolly Hat Builder Punch, a Mini Jingle Bell, Candy Cane Lane Designer Paper, and Real Red 3/4" Stitched Edge Ribbon.

Stampin_up_jolly_friends_carolpaynestamps4

Lastly, Kay Kalthoff used Wrapped in Warmth, Delicate Ornaments Framelits,  Cable Knit folder, Warmth & Cheer Designer Paper Stack, and Warmth & Cheer Designer Washi Tape:

Stampin_up_wrapped_in_warmth_carolpaynestamps1

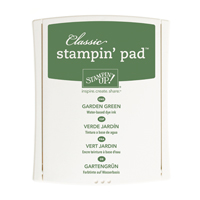
She cut the top of the ornament from Gold Foil Sheets, and tied it with Garden Green from the  Baker's Twine Trio Pack.

Stampin_up_wrapped_in_warmth_carolpaynestamps2

A completely adorable card inside and out!

Stampin_up_wrapped_in_warmth_carolpaynestamps3

Any of these would be easy to make a stack of for your Christmas cards! To order your supplies, go to my online store: www.carolpayne.stampinup.net

Remember while shopping:

All orders receive a Thank You Project Packet in the mail.

When your order is at least $35 (before tax & shipping) and you use the October Host Code:  Q7JJPNYN, you’ll receive the October Online Class; six COMPLETED cards, two each of three designs, with envelopes and instructions, FREE!

October Online Class carol paynestamps

When your order (before tax & shipping) reaches $150, DON’T USE THE HOSTESS CODE, you will choose Stampin' Rewards starting at 10% of the merchandise total. And you’ll still receive the monthly online class cards!           

October is B3G1F Designer Paper Month!

October 2016 B3G1F

That’s all for now, until tomorrow,  have a Stampingrox! Day!

All images ©Stampin' Up! ™1990-2016


Stampin’ Up! Sunday Swap Day on Monday, Jolly Friends!

Stampin’ Up! Sunday Swap Day on Monday, Jolly Friends!

Hey there! I continued to have computer issues over the weekend, which is why my pictures were so small in my Saturday post and no post yesterday. Last night I consulted with my IT guy, my son Ben, and now I am "back in business"!

Today I have a few cute Christmas swaps to share, using Jolly Friends and Wrapped in Warmth!

First, Lauren Hayes created her swap with Jolly Friends, Snow Place, and a wreath cut with the Swirly Scribbles Thinlets!

Stampin_up_jolly_friends_carolpaynestamps1

She embossed the hat from Jolly Friends with Real Red Glitter Stampin' Emboss Powder before punching with the Jolly Hat Builder Punch. Cherry Cobbler twine from the Baker's Twine Trio Pack and a Mini Jingle Bell are the perfect embellishments.

Stampin_up_jolly_friends_carolpaynestamps2

Inside she stamped the swirls from the Swirly Bird set and a sentiment from the Tin of Tags set.

Stampin_up_jolly_friends_carolpaynestamps3

Next, Sandy Carlson used Jolly Friends, Jolly Hat Builder Punch, a Mini Jingle Bell, Candy Cane Lane Designer Paper, and Real Red 3/4" Stitched Edge Ribbon.

Stampin_up_jolly_friends_carolpaynestamps4

Lastly, Kay Kalthoff used Wrapped in Warmth, Delicate Ornaments Framelits,  Cable Knit folder, Warmth & Cheer Designer Paper Stack, and Warmth & Cheer Designer Washi Tape:

Stampin_up_wrapped_in_warmth_carolpaynestamps1

She cut the top of the ornament from Gold Foil Sheets, and tied it with Garden Green from the  Baker's Twine Trio Pack.

Stampin_up_wrapped_in_warmth_carolpaynestamps2

A completely adorable card inside and out!

Stampin_up_wrapped_in_warmth_carolpaynestamps3

Any of these would be easy to make a stack of for your Christmas cards! To order your supplies, go to my online store: www.carolpayne.stampinup.net

Remember while shopping:

All orders receive a Thank You Project Packet in the mail.

When your order is at least $35 (before tax & shipping) and you use the October Host Code:  Q7JJPNYN, you’ll receive the October Online Class; six COMPLETED cards, two each of three designs, with envelopes and instructions, FREE!

October Online Class carol paynestamps

When your order (before tax & shipping) reaches $150, DON’T USE THE HOSTESS CODE, you will choose Stampin' Rewards starting at 10% of the merchandise total. And you’ll still receive the monthly online class cards!           

October is B3G1F Designer Paper Month!

October 2016 B3G1F

That’s all for now, until tomorrow,  have a Stampingrox! Day!

All images ©Stampin' Up! ™1990-2016


Stampin’ Up! Seasonal Bells!

Stampin’ Up! Seasonal Bells!

Hey there! I was so excited to find the Seasonal Bells bundle in the Holiday Catalog!

Note: Please excuse the tiny pictures. My regular photo editing program is on the fritz, using an alternative to add my watermark resulted in teeny-tiny ones!

Today I used the Hardwood Background with White Craft ink on Cherry Cobbler for a rustic barn-siding look:

Stampin_up_seasonal_bells_carolpaynestamps1

I stamped Real Red on the Crumb Cake to get a closer match to Cherry Cobbler. Cherry Cobbler ink on Crumb Cake looks too brown. I stamped the other bell with Garden Green and used the "fork bow" technique to add the Garden Green Baker's Twine from the Baker's Twine Trio Pack.

Stampin_up_seasonal_bells_carolpaynestamps2 watermarked

I cut the window for the "barn" with a Layering Squares Framelit, then used the next-size larger to create the frame around it.

Stampin_up_seasonal_bells_carolpaynestamps3

"HAPPY CHRISTMAS" was stamped first with Garden Green then again with Real Red. I cut out just the Real Red section to add over the Garden Green one with dimensionals.

Stampin_up_seasonal_bells_carolpaynestamps4

Inside I used a 1" strip of Warmth & Cheer Designer Paper and a sentiment from Wrapped in Warmth.

Stampin_up_seasonal_bells_carolpaynestamps5

To shop for the Seasonal Bells Bundle, go to my online store: www.carolpayne.stampinup.net

Product List

Glue Dots

$5.25


Remember while shopping:

All orders receive a Thank You Project Packet in the mail.

When your order is at least $35 (before tax & shipping) and you use the October Host Code:  Q7JJPNYN, you’ll receive the October Online Class; six COMPLETED cards, two each of three designs, with envelopes and instructions, FREE!

October Online Class carol paynestamps

When your order (before tax & shipping) reaches $150, DON’T USE THE HOSTESS CODE, you will choose Stampin' Rewards starting at 10% of the merchandise total. And you’ll still receive the monthly online class cards!         

October is B3G1F Designer Paper Month!

October 2016 B3G1F

That’s all for now, until tomorrow,  have a Stampingrox! Day!

All images ©Stampin' Up! ™1990-2016

Stampin’ Up! Seasonal Bells!

Stampin’ Up! Seasonal Bells!

Hey there! I was so excited to find the Seasonal Bells bundle in the Holiday Catalog!

Note: Please excuse the tiny pictures. My regular photo editing program is on the fritz, using an alternative to add my watermark resulted in teeny-tiny ones!

Today I used the Hardwood Background with White Craft ink on Cherry Cobbler for a rustic barn-siding look:

Stampin_up_seasonal_bells_carolpaynestamps1

I stamped Real Red on the Crumb Cake to get a closer match to Cherry Cobbler. Cherry Cobbler ink on Crumb Cake looks too brown. I stamped the other bell with Garden Green and used the "fork bow" technique to add the Garden Green Baker's Twine from the Baker's Twine Trio Pack.

Stampin_up_seasonal_bells_carolpaynestamps2 watermarked

I cut the window for the "barn" with a Layering Squares Framelit, then used the next-size larger to create the frame around it.

Stampin_up_seasonal_bells_carolpaynestamps3

"HAPPY CHRISTMAS" was stamped first with Garden Green then again with Real Red. I cut out just the Real Red section to add over the Garden Green one with dimensionals.

Stampin_up_seasonal_bells_carolpaynestamps4

Inside I used a 1" strip of Warmth & Cheer Designer Paper and a sentiment from Wrapped in Warmth.

Stampin_up_seasonal_bells_carolpaynestamps5

To shop for the Seasonal Bells Bundle, go to my online store: www.carolpayne.stampinup.net

Product List

Glue Dots

$5.25


Remember while shopping:

All orders receive a Thank You Project Packet in the mail.

When your order is at least $35 (before tax & shipping) and you use the October Host Code:  Q7JJPNYN, you’ll receive the October Online Class; six COMPLETED cards, two each of three designs, with envelopes and instructions, FREE!

October Online Class carol paynestamps

When your order (before tax & shipping) reaches $150, DON’T USE THE HOSTESS CODE, you will choose Stampin' Rewards starting at 10% of the merchandise total. And you’ll still receive the monthly online class cards!         

October is B3G1F Designer Paper Month!

October 2016 B3G1F

That’s all for now, until tomorrow,  have a Stampingrox! Day!

All images ©Stampin' Up! ™1990-2016

Stampin’ Up! Merriest Wishes for Hello December!

Stampin’ Up! Merriest Wishes for Hello December!

Hey there and good morning! Today I have an adorable card I CASED and changed from my friend, Kelly Acheson.  First, Kelly's creation:

Stampin_up_merriest_wishes_carolpaynestamps6

She used the Pine Bough Textured Impressions Folder and the Merriest Wishes stamp set with the bundled (to save 10%) Merry Tags Framelits. Emerald Envy, Whisper White, and Gold Glimmer are her colors.

My version using Real Red, Emerald Envy, Whisper White, and Silver Glimmer:

Stampin_up_merriest_wishes_carolpaynestamps1

I think silver is just a pretty as gold!

Stampin_up_merriest_wishes_carolpaynestamps2

I punched the Silver Glimmer with the 1 3/4" Circle punch. Emerald Envy Metallic Thread from the Metallic Thread Combo Pack creates the ornament 'hanger".

Tips & Tricks:

  • Cut ornament from Real Red card stock using the Precision Base Plate and new Big Shot Platform. Roll the Die Brush over the back side to remove the tiny pieces.
  • Use the Stamp-a-ma-jig to stamp the "deck the halls and trim the tree" around the outer edge of the ornament. Emboss with white powder.
  • Adhere ornament to card front with Stampin' Dimensionals.
  • Tie a double length of metallic thread for the hanger.

Stampin_up_merriest_wishes_carolpaynestamps3

Inside I stamped more Merriest Wishes images with Real Red and Emerald Envy.

To order your Merriest Wishes/Merry Tags Bundle, go to my online store: www.carolpayne.stampinup.net

Heat Tool

$30.00

Remember while shopping:

All orders receive a Thank You Project Packet in the mail.

When your order is at least $35 (before tax & shipping) and you use the October Host Code:  Q7JJPNYN, you’ll receive the October Online Class; six COMPLETED cards, two each of three designs, with envelopes and instructions, FREE!

October Online Class carol paynestamps

When your order (before tax & shipping) reaches $150, DON’T USE THE HOSTESS CODE, you will choose Stampin' Rewards starting at 10% of the merchandise total. And you’ll still receive the monthly online class cards!         

October is B3G1Free Designer Paper Month!

October 2016 B3G1F

That’s all for now, until tomorrow,  have a Stampingrox! Day!

All images ©Stampin' Up! ™1990-2016


Stampin’ Up! Merriest Wishes for Hello December!

Stampin’ Up! Merriest Wishes for Hello December!

Hey there and good morning! Today I have an adorable card I CASED and changed from my friend, Kelly Acheson.  First, Kelly's creation:

Stampin_up_merriest_wishes_carolpaynestamps6

She used the Pine Bough Textured Impressions Folder and the Merriest Wishes stamp set with the bundled (to save 10%) Merry Tags Framelits. Emerald Envy, Whisper White, and Gold Glimmer are her colors.

My version using Real Red, Emerald Envy, Whisper White, and Silver Glimmer:

Stampin_up_merriest_wishes_carolpaynestamps1

I think silver is just a pretty as gold!

Stampin_up_merriest_wishes_carolpaynestamps2

I punched the Silver Glimmer with the 1 3/4" Circle punch. Emerald Envy Metallic Thread from the Metallic Thread Combo Pack creates the ornament 'hanger".

Tips & Tricks:

  • Cut ornament from Real Red card stock using the Precision Base Plate and new Big Shot Platform. Roll the Die Brush over the back side to remove the tiny pieces.
  • Use the Stamp-a-ma-jig to stamp the "deck the halls and trim the tree" around the outer edge of the ornament. Emboss with white powder.
  • Adhere ornament to card front with Stampin' Dimensionals.
  • Tie a double length of metallic thread for the hanger.

Stampin_up_merriest_wishes_carolpaynestamps3

Inside I stamped more Merriest Wishes images with Real Red and Emerald Envy.

To order your Merriest Wishes/Merry Tags Bundle, go to my online store: www.carolpayne.stampinup.net

Heat Tool

$30.00

Remember while shopping:

All orders receive a Thank You Project Packet in the mail.

When your order is at least $35 (before tax & shipping) and you use the October Host Code:  Q7JJPNYN, you’ll receive the October Online Class; six COMPLETED cards, two each of three designs, with envelopes and instructions, FREE!

October Online Class carol paynestamps

When your order (before tax & shipping) reaches $150, DON’T USE THE HOSTESS CODE, you will choose Stampin' Rewards starting at 10% of the merchandise total. And you’ll still receive the monthly online class cards!         

October is B3G1Free Designer Paper Month!

October 2016 B3G1F

That’s all for now, until tomorrow,  have a Stampingrox! Day!

All images ©Stampin' Up! ™1990-2016


Stampin’ Up! Sunday Swap Day on Thursday!

Stampin’ Up! Sunday Swap Day on Thursday!

Hey there! It's Sunday Swap Day on Thursday!  yay! These swaps also feature designer paper that's on sale this month B3G1F, so you NEED to see these!

First, Tamie Ackerson used Candy Cane Lane Designer Series Paper and Christmas Magic to create a super cute card!

Stampin_up_christmas_magic_carolpaynestamps1

The gingerbread houses are pre-printed on one design of Candy Cane Lane, making it simple to hand-cut and pop on your card! A little dash of glue and a sprinkle of Dazzling Diamonds Glitter give a snowy look!

Stampin_up_christmas_magic_carolpaynestamps2

 Next, Teri Gaines used Candy Cane Lane paper, Cable Knit Dynamic folder, and Cookie Cutter Christmas to create a card with a surprising fold!

Stampin_up_cookie_cutter_christmas_carolpaynestamps2

 A fun fold but not a lot of extra paper used!

Stampin_up_cookie_cutter_christmas_carolpaynestamps1

 Crystal Brown punched a pair of gingerbread boys with the Cookie Cutter Christmas bundle (stamps & punch), and used Candy Cane Lane paper and Kraft Rope Trim.

Stampin_up_cookie_cutter_christmas_carolpaynestamps3

Frances Wagner used the Cable Knit Dynamic Textured Impressions folder for the background of her Cookie Cutter Christmas card. She punched the sentiment from Oh, What Fun (Annual Catalog) with the Duet Banner Punch.

Stampin_up_cookie_cutter_christmas_carolpaynestamps4

Amy Combs also cut out the gingerbread house from Candy Cane Lane Designer Paper, mounting it on an In Color Doily, and using strips of Candy Cane Lane Washi Tape for the background.

Stampin_up_cookie_cutter_christmas_carolpaynestamps5

Dianna Richards cut Candy Cane Lane Designer Paper into banner strips and punched a window with the Best Badge punch.

Stampin_up_suite_seasons_carolpaynestamps1

She embossed the Suite Seasons sentiment with Read Red Stampin' Glitter.

Stampin_up_suite_seasons_carolpaynestamps3

This Real Red 3/4" Stitched Edge Ribbon is just gorgeous!

Stampin_up_suite_seasons_carolpaynestamps2

To shop for Stampin' Up! stamping supplies and to get some of the Candy Cane Lane Designer Paper B3G1F, go to my online store: www.carolpayne.stampinup.net

Remember while shopping:

All orders receive a Thank You Project Packet in the mail.

When your order is at least $35 (before tax & shipping) and you use the October Host Code:  Q7JJPNYN, you’ll receive the October Online Class; six COMPLETED cards, two each of three designs, with envelopes and instructions, FREE!

October Online Class carol paynestamps

When your order (before tax & shipping) reaches $150, DON’T USE THE HOSTESS CODE, you will choose Stampin' Rewards starting at 10% of the merchandise total. And you’ll still receive the monthly online class cards! 

October is B3G1F Designer Paper Month!

October 2016 B3G1F

That’s all for now, until tomorrow,  have a Stampingrox! Day!

All images ©Stampin' Up! ™1990-2016

Stampin’ Up! Sunday Swap Day on Thursday!

Stampin’ Up! Sunday Swap Day on Thursday!

Hey there! It's Sunday Swap Day on Thursday!  yay! These swaps also feature designer paper that's on sale this month B3G1F, so you NEED to see these!

First, Tamie Ackerson used Candy Cane Lane Designer Series Paper and Christmas Magic to create a super cute card!

Stampin_up_christmas_magic_carolpaynestamps1

The gingerbread houses are pre-printed on one design of Candy Cane Lane, making it simple to hand-cut and pop on your card! A little dash of glue and a sprinkle of Dazzling Diamonds Glitter give a snowy look!

Stampin_up_christmas_magic_carolpaynestamps2

 Next, Teri Gaines used Candy Cane Lane paper, Cable Knit Dynamic folder, and Cookie Cutter Christmas to create a card with a surprising fold!

Stampin_up_cookie_cutter_christmas_carolpaynestamps2

 A fun fold but not a lot of extra paper used!

Stampin_up_cookie_cutter_christmas_carolpaynestamps1

 Crystal Brown punched a pair of gingerbread boys with the Cookie Cutter Christmas bundle (stamps & punch), and used Candy Cane Lane paper and Kraft Rope Trim.

Stampin_up_cookie_cutter_christmas_carolpaynestamps3

Frances Wagner used the Cable Knit Dynamic Textured Impressions folder for the background of her Cookie Cutter Christmas card. She punched the sentiment from Oh, What Fun (Annual Catalog) with the Duet Banner Punch.

Stampin_up_cookie_cutter_christmas_carolpaynestamps4

Amy Combs also cut out the gingerbread house from Candy Cane Lane Designer Paper, mounting it on an In Color Doily, and using strips of Candy Cane Lane Washi Tape for the background.

Stampin_up_cookie_cutter_christmas_carolpaynestamps5

Dianna Richards cut Candy Cane Lane Designer Paper into banner strips and punched a window with the Best Badge punch.

Stampin_up_suite_seasons_carolpaynestamps1

She embossed the Suite Seasons sentiment with Read Red Stampin' Glitter.

Stampin_up_suite_seasons_carolpaynestamps3

This Real Red 3/4" Stitched Edge Ribbon is just gorgeous!

Stampin_up_suite_seasons_carolpaynestamps2

To shop for Stampin' Up! stamping supplies and to get some of the Candy Cane Lane Designer Paper B3G1F, go to my online store: www.carolpayne.stampinup.net

Remember while shopping:

All orders receive a Thank You Project Packet in the mail.

When your order is at least $35 (before tax & shipping) and you use the October Host Code:  Q7JJPNYN, you’ll receive the October Online Class; six COMPLETED cards, two each of three designs, with envelopes and instructions, FREE!

October Online Class carol paynestamps

When your order (before tax & shipping) reaches $150, DON’T USE THE HOSTESS CODE, you will choose Stampin' Rewards starting at 10% of the merchandise total. And you’ll still receive the monthly online class cards! 

October is B3G1F Designer Paper Month!

October 2016 B3G1F

That’s all for now, until tomorrow,  have a Stampingrox! Day!

All images ©Stampin' Up! ™1990-2016

Stampin’ Up! Serene Indigo Scenery Star of Light!

Stampin’ Up! Serene Indigo Scenery Star of Light!

Hey there! I'm back today with the third card I created while I was playing with the Star of Light Thinlets! Soooo pretty!

Stampin_up_star_of_light_carolpaynestamps7

For this one I used Island Indigo for the card base, and used the same Serene Scenery Designer Paper Stack to layer before embossing again with the Sparkle folder.

Stampin_up_star_of_light_carolpaynestamps9

I think I like the Island Indigo card base better than yesterday's card with Sahara Sand. It just give a more intense, night sky look.

The Precision Base Plate is a MUST when cutting these detailed Thinlet dies.

Stampin_up_star_of_light_carolpaynestamps10

I stamped the "Shine" sentiment with Island Indigo ink and cut out with a Tags & Labels Framelit. I adhered a strip of Silver Sequin trim with Multipurpose Liquid Glue.

I think I like the inside stamped with Island Indigo ink better too.

Stampin_up_star_of_light_carolpaynestamps11

Have I convinced you that you need the Star of Light Bundle yet? Hop over to my online store to order using this link: www.carolpayne.stampinup.net

Glue Dots

$5.25

Remember while shopping:

All orders receive a Thank You Project Packet in the mail.

When your order is at least $35 (before tax & shipping) and you use the October Host Code:  Q7JJPNYN, you’ll receive the October Online Class; six COMPLETED cards, two each of three designs, with envelopes and instructions, FREE!

October Online Class carol paynestamps

When your order (before tax & shipping) reaches $150, DON’T USE THE HOSTESS CODE, you will choose Stampin' Rewards starting at 10% of the merchandise total. And you’ll still receive the monthly online class cards!            

October is B3G1F Designer Paper Month!

October 2016 B3G1F

That’s all for now, until tomorrow,  have a Stampingrox! Day!

All images ©Stampin' Up! ™1990-2016

Stampin’ Up! Serene Indigo Scenery Star of Light!

Stampin’ Up! Serene Indigo Scenery Star of Light!

Hey there! I'm back today with the third card I created while I was playing with the Star of Light Thinlets! Soooo pretty!

Stampin_up_star_of_light_carolpaynestamps7

For this one I used Island Indigo for the card base, and used the same Serene Scenery Designer Paper Stack to layer before embossing again with the Sparkle folder.

Stampin_up_star_of_light_carolpaynestamps9

I think I like the Island Indigo card base better than yesterday's card with Sahara Sand. It just give a more intense, night sky look.

The Precision Base Plate is a MUST when cutting these detailed Thinlet dies.

Stampin_up_star_of_light_carolpaynestamps10

I stamped the "Shine" sentiment with Island Indigo ink and cut out with a Tags & Labels Framelit. I adhered a strip of Silver Sequin trim with Multipurpose Liquid Glue.

I think I like the inside stamped with Island Indigo ink better too.

Stampin_up_star_of_light_carolpaynestamps11

Have I convinced you that you need the Star of Light Bundle yet? Hop over to my online store to order using this link: www.carolpayne.stampinup.net

Glue Dots

$5.25

Remember while shopping:

All orders receive a Thank You Project Packet in the mail.

When your order is at least $35 (before tax & shipping) and you use the October Host Code:  Q7JJPNYN, you’ll receive the October Online Class; six COMPLETED cards, two each of three designs, with envelopes and instructions, FREE!

October Online Class carol paynestamps

When your order (before tax & shipping) reaches $150, DON’T USE THE HOSTESS CODE, you will choose Stampin' Rewards starting at 10% of the merchandise total. And you’ll still receive the monthly online class cards!            

October is B3G1F Designer Paper Month!

October 2016 B3G1F

That’s all for now, until tomorrow,  have a Stampingrox! Day!

All images ©Stampin' Up! ™1990-2016

Theme: Overlay by Kaira
Bonnie, Illinois, USA